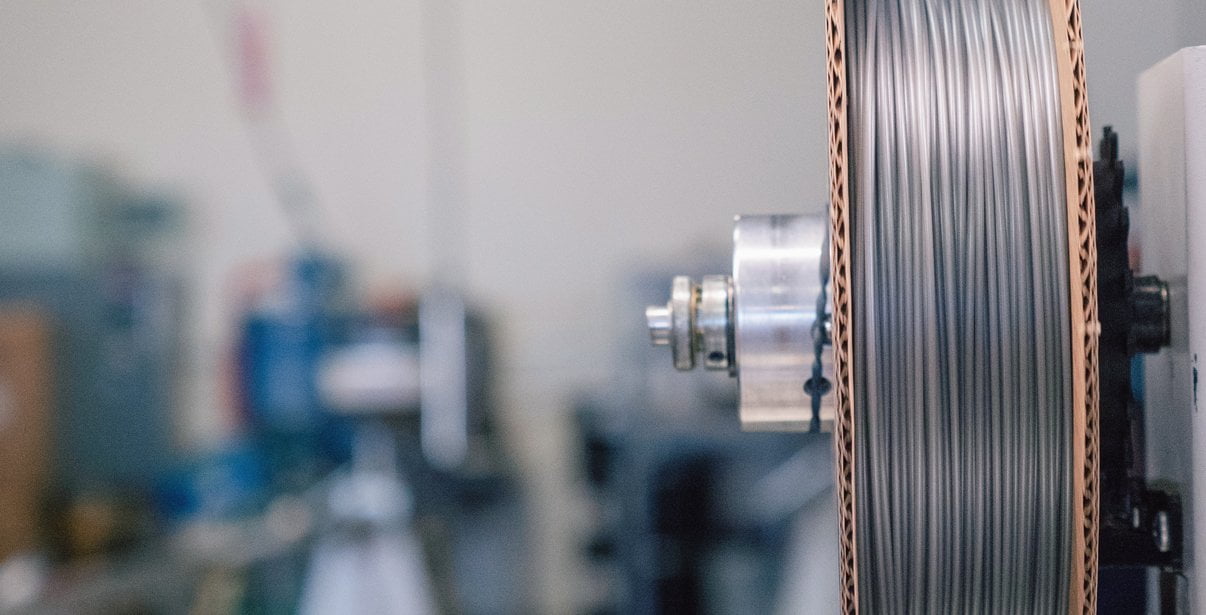
ProtoPasta é uma empresa situada nos Estados Unidos da América, de produção de filamentos para impressão 3D de alta qualidade.
Caracterizada pelos rolos feitos em cartão, esta marca é mundialmente famosa por ser especializada em materiais como PLA e ABS modificados com outros materiais, como o PLA Magnético; o PLA Condutivo; PLA de fibra de carbono; HTPLA de cobre, latão ou bronze; ou o ABS-PC.
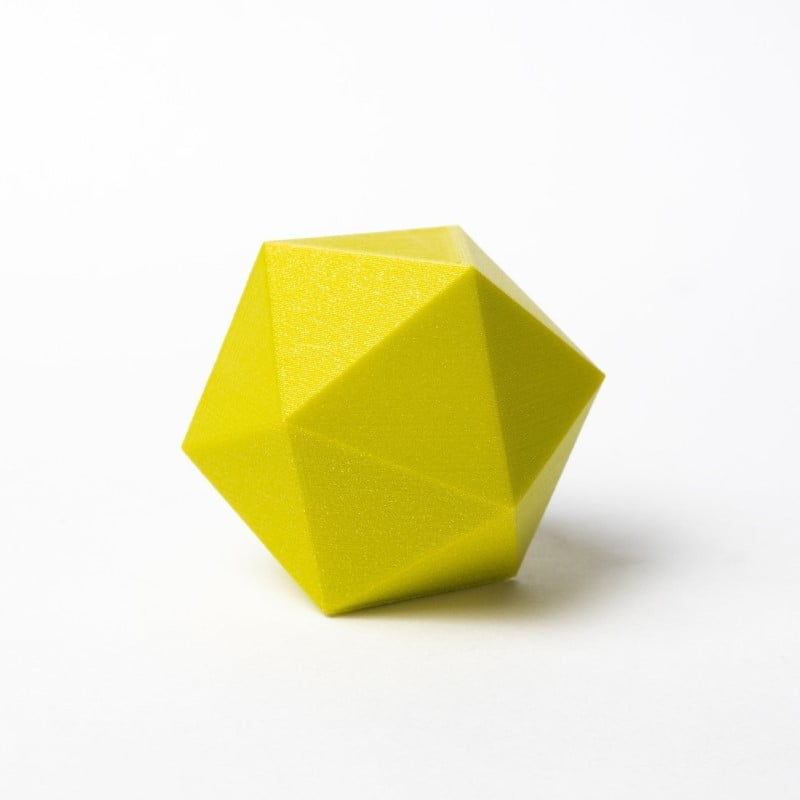
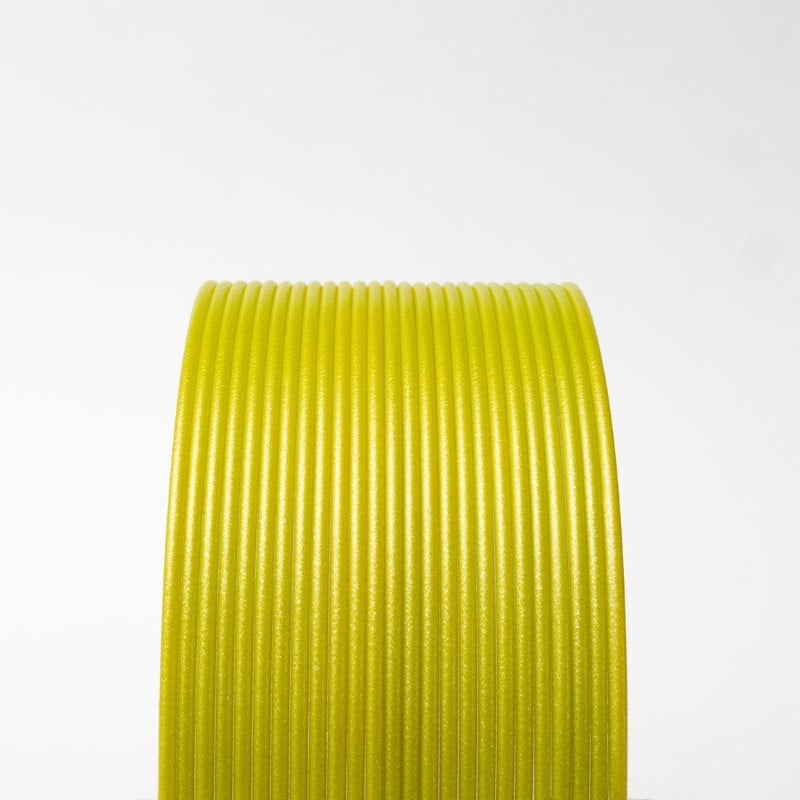
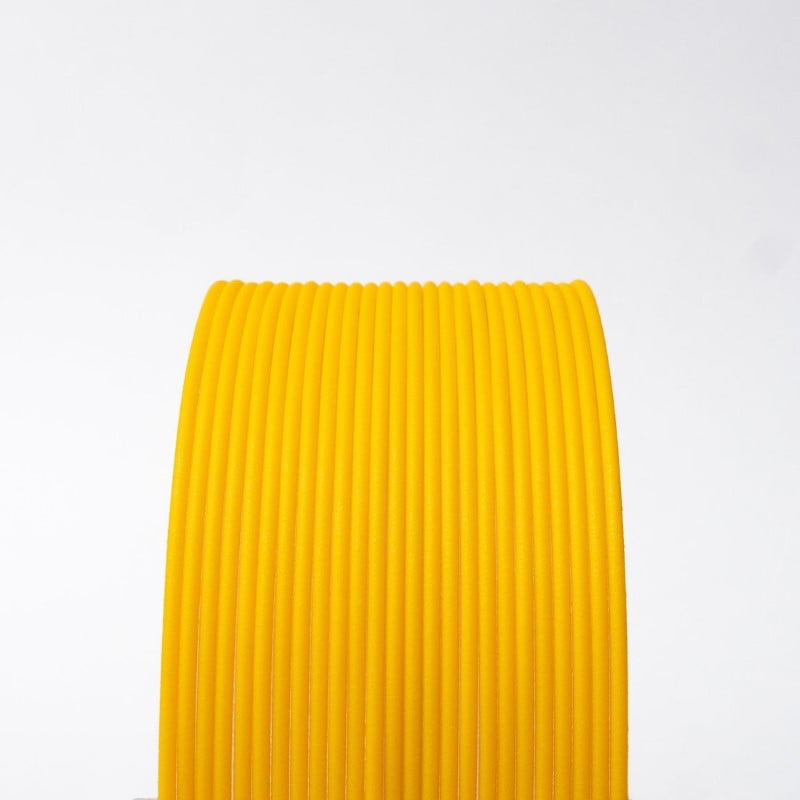
"Electric Lemonade" is a custom color designed by Steve Abrams (@Artobot on Instagram & Twitter) in collaboration with Proto-pasta at our 2nd Filament Workshop.
Scroll to the bottom workshop page to enjoy the video and reviews.
Below, check out Steve's workshop spools and a beautiful Electric Lemonade print.
For more of Steve's work, you can also visit his etsy store.
Like our other HTPLAs, Metallic HTPLA can be "Heat Treated" to increase crystallinity for "Higher Temperature" resistance compared to amorphous PLA, ABS, and co-polyesters like PETG! Glittler Flake HTPLA prints translucence, but turns opaque when heat treated (or crystallized). With a more crystalline structure, heat treated HTPLA parts can hold form to near melting, though temperatures where the material is practically useful vary greatly depending on geometry and load conditions! For this improved the performance, your prints should be baked in an oven until you see a change from translucent to opaque with reduced gloss. This visual change indicating the improved performance! We've seen the change take place in 5-10 minutes on thin walled parts but can take an hour or more. We've had good luck in a quality, at home convection oven at 110C (225F). Parts will get very "floppy" before becoming more firm, so please leave supports on your parts or support them and bake them on a flat, non-radiating surface (like glass, ceramic, or composite).
For this improved performance, your prints should be baked in an oven until you see a change from translucent pink to opaque pink with reduced gloss. This visual change indicates the improved performance! We've seen the change take place in 5-10 minutes on thin walled parts but can take an hour or more. We've had good luck in a quality, at home convection oven at 110C (225F). Parts will get very "floppy" before becoming more firm, so please leave supports on your parts or support them and bake them on a flat, non-radiating surface (like glass, ceramic, or composite).
In our experience, good results were achieved using standard PLA parameters ranging from 195-225C nozzle with standard build surface preparation (blue tape, glue stick, or BuildTak). No heated bed required but up to 60C is okay. Beware, if the bed temperature is too high, your part base could actually heat treat while printing, increasing warping and decreasing adhesion. Some shrinkage will occur in the heat treating process, so dimension critical parts may need to be scaled appropriately (as much as 2.5% in our experience).
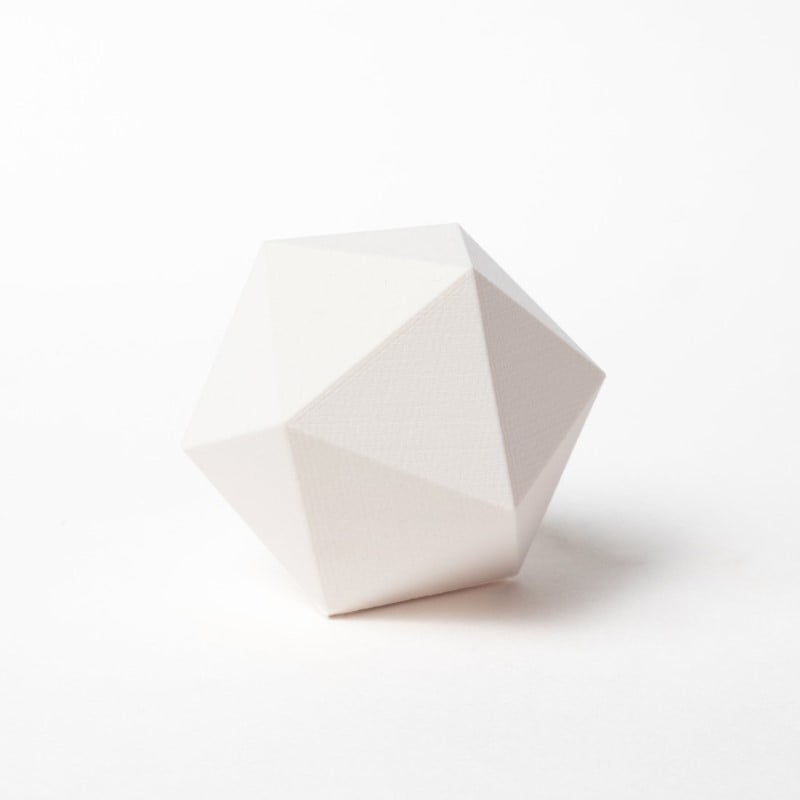
Looking for increased heat resistance without the need to switch to ABS? Protopasta High Temperature PLA offers heat deflection of up to 88° C (190.4° F) compared to standard PLA of 45-54° C (113-135° F). This makes it a great choice for moving parts (gears, RepRap pieces, etc) or prints that would face moderately high temperatures. Our High Temperature PLA is white, but can be painted after annealing.
We've created this page to bring you a premium PLA and HTPLA printing experience that rivals our premium material. Follow below to improve your 3D printing experience. In other words, here's your shortcut to awesomeness with pasta. If at the end of this document you have questions or need assistance, please contact us at [email protected].
Loose coils can be very tricky to manage. Going cowboy on your spool handling can quickly end up in a frustrating, tangled mess. Keep your loose coils wrangled with a spool holder like masterspool for a more trouble-free experience. Find out more about loose coil handling in Keith's blog post.
And for spooled filament, never let go of the loose end. When not in the printer extruder, tuck it away in the cardboard spool's corrugation! Also, avoid sharp bends and excessive force when loading filament into your printer.
At Proto-pasta, we make high quality filament. We aspire to make exceptional results easy, but a positive result is very much dependent on your hardware, set-up, adjustments, and process parameters. Matching hardware with process and material for a positive experience is not always straight-forward, but you can start by pairing the following settings with your printer for a good starting point, then tune or troubleshoot as required.
Volume flow rate together with temperature dictates how melted the material is. This is hardware & condition dependent based on hot end, nozzle & extruder type, material & manufacturer as well as layer fan type, position & settings. Extrusion width, layer thickness & speed changes affect volume flow which may change required/desired temperature.
Post your prints & tag us @Proto_pasta on Twitter and Instagram. Need more help? Consider typical pitfalls and fixes below.
We visited Joel and ended up with a helpful video on the subject:
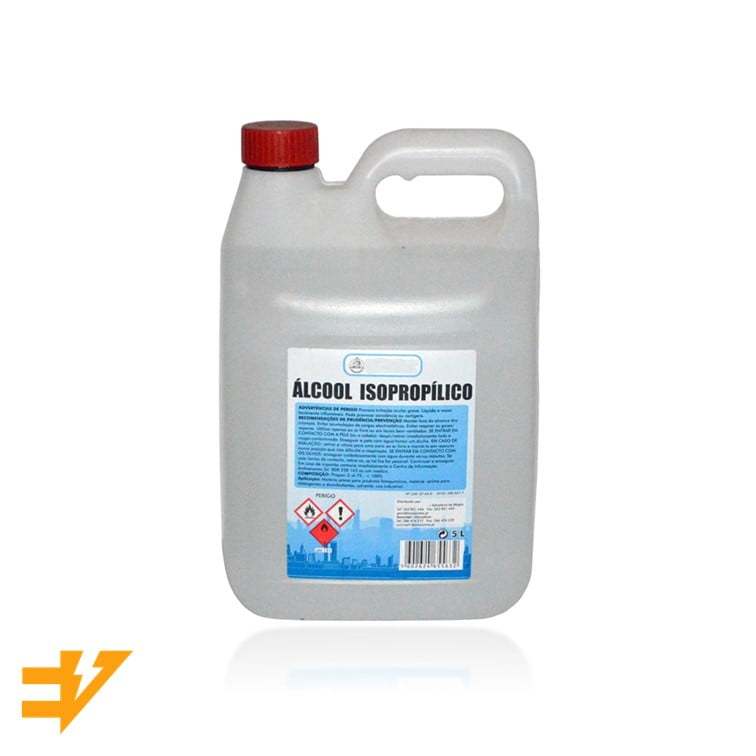
Para uma correcta manutenção da sua impressora 3D, recomendamos sempre que trocar de material de filamento 3D, a efectuar uma purga com filamento especial de limpeza.
Desta forma garante que não ficam vestígios de material nas paredes do nozzle, evitando o acumular de crosta que é criado sempre que efectua trocas de material.
Com este produto evita problema como "clogs" e "jams" e fará com que o seu nozzle mantenha-se sempre limpo, durando muito mais tempo.
Poderá encontrar a partir de 1.49€ no seguinte LINK

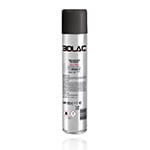
Para obter maior aderência à superfície da sua impressora 3D recomendamos a aplicar 3DLAC na base da plataforma.
Poderá encontrar no seguinte LINK
Este material é altamente higroscópico, absorvendo rapidamente a humidade do ar passados poucos minutos após aberto, impossibilitando desta forma a correcta impressão 3D do mesmo. O resultado das impressões 3D de materiais com humidade tendem a ser frágeis e de acabamento irregular ou em certos casos, torna-se simplesmente impossíveis de imprimir.
Deverá de usar soluções de caixas fechadas com dessecante como sílica ou caixas próprias secadoras de filamento.
Poderá encontrar no seguinte LINK
Download:
Technical and Safety Data Sheet
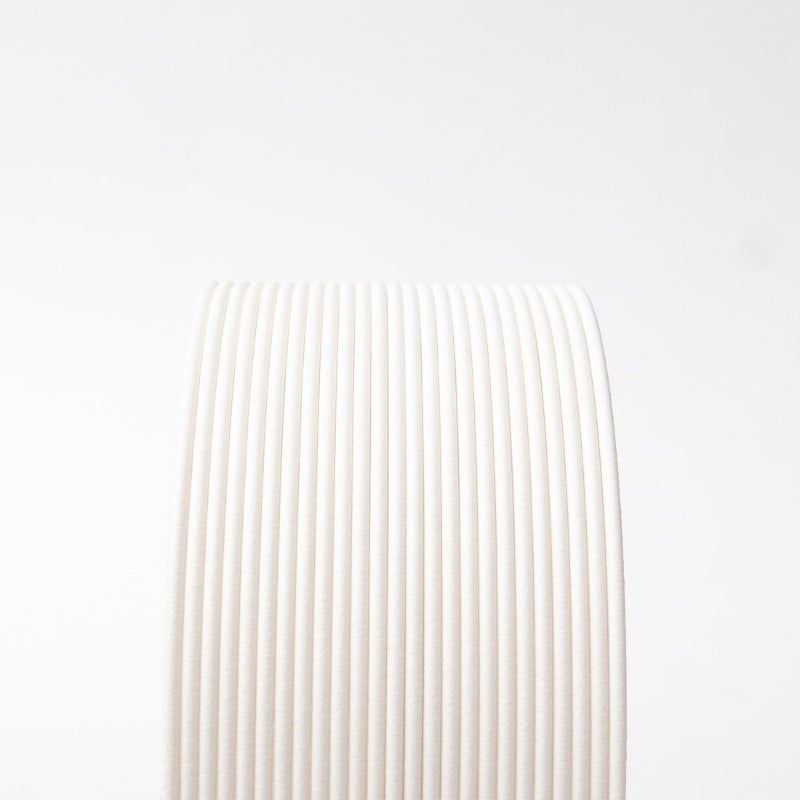
50g- Rolo
HTPLA Artobot "Electric Lemonade" Metallic Yellow HTPLA ( Community Inspired ) - Cor
1.75mm (+-0.05mm) - Espessura / Tolerância de diâmetro
Muito Fácil - Facilidade de Impressão
ProtoPasta é uma empresa situada nos Estados Unidos da América, de produção de filamentos para impressão 3D de alta qualidade.
Caracterizada pelos rolos feitos em cartão, esta marca é mundialmente famosa por ser especializada em materiais como PLA e ABS modificados com outros materiais, como o PLA Magnético; o PLA Condutivo; PLA de fibra de carbono; HTPLA de cobre, latão ou bronze; ou o ABS-PC.
Another shout out to Thomas Sanladerer (toms3d.org) for the challenge to make an ugly color during his visit.
We ended up with some greens that weren't terrible and found it's very difficult to make an ugly color.
To be honest, Lulzbot's company green is not my favorite color, but it was a fun challenge to recreate this color.
I was inspired by the recent Mini 2 release shortly after ERRF.
Realizing I'd missed seeing Lulzbot at ERRF, I followed my inspiration to make For the Lulz Metallic Green HTPLA .
Who knew adding sparkles would totally change my impression of this color? In the light it shifts from lemon to lime covering all the versions I've seen of this color.
I find it shockingly beautiful and I hope you do to! Enjoy!!!
Print with the ease of standard PLA with standard hardware and temperatures, but make fun, mesmerizing prints that stand out. Celebrate good times by printing toys, treasures, and keepsakes. If you want to make a print more fun, just add some metallic pop! Our metallic finish contains no actual metal and has little risk of clogging or wearing your nozzle, and it won't make a glittery mess, but beware the printing is sure to be addictive! Metallic particles are relatively small but have some orientation effects, giving top/bottom surfaces more shine than sidewall, so have some fun playing with orientation to see how the result changes! We recommend 0.2 mm layers for the best result.
Like our other HTPLAs, Metallic HTPLA can be "Heat Treated" to increase crystallinity for "Higher Temperature" resistance compared to amorphous PLA, ABS, and co-polyesters like PETG! Glittler Flake HTPLA prints translucence, but turns opaque when heat treated (or crystallized). With a more crystalline structure, heat treated HTPLA parts can hold form to near melting, though temperatures where the material is practically useful vary greatly depending on geometry and load conditions! For this improved the performance, your prints should be baked in an oven until you see a change from translucent to opaque with reduced gloss. This visual change indicating the improved performance! We've seen the change take place in 5-10 minutes on thin walled parts but can take an hour or more. We've had good luck in a quality, at home convection oven at 110C (225F). Parts will get very "floppy" before becoming more firm, so please leave supports on your parts or support them and bake them on a flat, non-radiating surface (like glass, ceramic, or composite).
For this improved performance, your prints should be baked in an oven until you see a change from translucent pink to opaque pink with reduced gloss. This visual change indicates the improved performance! We've seen the change take place in 5-10 minutes on thin walled parts but can take an hour or more. We've had good luck in a quality, at home convection oven at 110C (225F). Parts will get very "floppy" before becoming more firm, so please leave supports on your parts or support them and bake them on a flat, non-radiating surface (like glass, ceramic, or composite).
In our experience, good results were achieved using standard PLA parameters ranging from 195-225C nozzle with standard build surface preparation (blue tape, glue stick, or BuildTak). No heated bed required but up to 60C is okay. Beware, if the bed temperature is too high, your part base could actually heat treat while printing, increasing warping and decreasing adhesion. Some shrinkage will occur in the heat treating process, so dimension critical parts may need to be scaled appropriately (as much as 2.5% in our experience).
Looking for increased heat resistance without the need to switch to ABS? Protopasta High Temperature PLA offers heat deflection of up to 88° C (190.4° F) compared to standard PLA of 45-54° C (113-135° F). This makes it a great choice for moving parts (gears, RepRap pieces, etc) or prints that would face moderately high temperatures. Our High Temperature PLA is white, but can be painted after annealing.
We've created this page to bring you a premium PLA and HTPLA printing experience that rivals our premium material. Follow below to improve your 3D printing experience. In other words, here's your shortcut to awesomeness with pasta. If at the end of this document you have questions or need assistance, please contact us at [email protected].
Loose coils can be very tricky to manage. Going cowboy on your spool handling can quickly end up in a frustrating, tangled mess. Keep your loose coils wrangled with a spool holder like masterspool for a more trouble-free experience. Find out more about loose coil handling in Keith's blog post.
And for spooled filament, never let go of the loose end. When not in the printer extruder, tuck it away in the cardboard spool's corrugation! Also, avoid sharp bends and excessive force when loading filament into your printer.
At Proto-pasta, we make high quality filament. We aspire to make exceptional results easy, but a positive result is very much dependent on your hardware, set-up, adjustments, and process parameters. Matching hardware with process and material for a positive experience is not always straight-forward, but you can start by pairing the following settings with your printer for a good starting point, then tune or troubleshoot as required.
Volume flow rate together with temperature dictates how melted the material is. This is hardware & condition dependent based on hot end, nozzle & extruder type, material & manufacturer as well as layer fan type, position & settings. Extrusion width, layer thickness & speed changes affect volume flow which may change required/desired temperature.
Post your prints & tag us @Proto_pasta on Twitter and Instagram. Need more help? Consider typical pitfalls and fixes below.
We visited Joel and ended up with a helpful video on the subject:
Para uma correcta manutenção da sua impressora 3D, recomendamos sempre que trocar de material de filamento 3D, a efectuar uma purga com filamento especial de limpeza.
Desta forma garante que não ficam vestígios de material nas paredes do nozzle, evitando o acumular de crosta que é criado sempre que efectua trocas de material.
Com este produto evita problema como "clogs" e "jams" e fará com que o seu nozzle mantenha-se sempre limpo, durando muito mais tempo.
Poderá encontrar a partir de 1.49€ no seguinte LINK
Para obter maior aderência à superfície da sua impressora 3D recomendamos a aplicar 3DLAC na base da plataforma.
Poderá encontrar no seguinte LINK
Este material é altamente higroscópico, absorvendo rapidamente a humidade do ar passados poucos minutos após aberto, impossibilitando desta forma a correcta impressão 3D do mesmo. O resultado das impressões 3D de materiais com humidade tendem a ser frágeis e de acabamento irregular ou em certos casos, torna-se simplesmente impossíveis de imprimir.
Deverá de usar soluções de caixas fechadas com dessecante como sílica ou caixas próprias secadoras de filamento.
Poderá encontrar no seguinte LINK
Download:
Technical and Safety Data Sheet
50g- Rolo
HTPLA For the Lulz Metallic Green HTPLA ( Community Inspired ) - Cor
1.75mm (+-0.05mm) - Espessura / Tolerância de diâmetro
Muito Fácil - Facilidade de Impressão
ProtoPasta é uma empresa situada nos Estados Unidos da América, de produção de filamentos para impressão 3D de alta qualidade.
Caracterizada pelos rolos feitos em cartão, esta marca é mundialmente famosa por ser especializada em materiais como PLA e ABS modificados com outros materiais, como o PLA Magnético; o PLA Condutivo; PLA de fibra de carbono; HTPLA de cobre, latão ou bronze; ou o ABS-PC.
The look of Carbon Fiber without Carbon Fiber. Instead, Black Matte Fiber HTPLA uses plant fibers for a similar texture and sheen.
Great for both artistic and technical parts with no special hardware required!

A great alternative to Carbon or Glass Fibers, Black Matte Fiber HTPLA uses plant fibers great looks in both artistic and technical parts with no special hardware required!
Printed parts have a low luster, textured surface which creates a highly desirable contrast between light and shadow. Texture, color, and sheen can be somewhat manipulated by printer settings as well as post-processing. Printed parts can also be smoothed or weathered with paint for alternate aesthetics. The plant-based fibers lend well to adhesion of paint and other aesthetic coatings.
Based on Proto-pasta HTPLA, this Matte Fiber version can be heat treated to retain more stiffness to higher temperatures. Dimensional stability is improved compared to HTPLA without fibers. The plant-based fibers improve adhesion of glues and coatings. Performance is similar to Carbon Fiber HTPLA but processing of Matte Fiber does NOT require a wear resistant nozzle.
No special hardware or nozzles are required for this plant-based composite. This material is not overly brittle, but is stiff and will break under excessive load. It prints like PLA on non-heated beds. Suggested print temperature is 190-230C, but we had good luck with a slow 1st layer at 230C on cold blue tape and 210C thereafter for a balance of strength and aesthetic.
This material does absorb moisture and dry filament is recommend for best results. When saturated with moisture, this material oozes more readily. Lowering flow and/or temperatures can minimize oozing and improve detail, though higher temperatures are recommended for best mechanical properties. With higher temperatures, ooze artifacts can be removed post build.
This material can be shaved/carved with a sharp blade for a smooth finish. Experiment with weathering or other painting techniques for a unique look. Also, expect improved bonding strength with glue compared to plastic without fiber.
We've created this page to bring you a premium PLA and HTPLA printing experience that rivals our premium material. Follow below to improve your 3D printing experience. In other words, here's your shortcut to awesomeness with pasta. If at the end of this document you have questions or need assistance, please contact us at [email protected].
Loose coils can be very tricky to manage. Going cowboy on your spool handling can quickly end up in a frustrating, tangled mess. Keep your loose coils wrangled with a spool holder like masterspool for a more trouble-free experience. Find out more about loose coil handling in Keith's blog post.
And for spooled filament, never let go of the loose end. When not in the printer extruder, tuck it away in the cardboard spool's corrugation! Also, avoid sharp bends and excessive force when loading filament into your printer.
At Proto-pasta, we make high quality filament. We aspire to make exceptional results easy, but a positive result is very much dependent on your hardware, set-up, adjustments, and process parameters. Matching hardware with process and material for a positive experience is not always straight-forward, but you can start by pairing the following settings with your printer for a good starting point, then tune or troubleshoot as required.
Volume flow rate together with temperature dictates how melted the material is. This is hardware & condition dependent based on hot end, nozzle & extruder type, material & manufacturer as well as layer fan type, position & settings. Extrusion width, layer thickness & speed changes affect volume flow which may change required/desired temperature.
Post your prints & tag us @Proto_pasta on Twitter and Instagram. Need more help? Consider typical pitfalls and fixes below.
We visited Joel and ended up with a helpful video on the subject:
Para uma correcta manutenção da sua impressora 3D, recomendamos sempre que trocar de material de filamento 3D, a efectuar uma purga com filamento especial de limpeza.
Desta forma garante que não ficam vestígios de material nas paredes do nozzle, evitando o acumular de crosta que é criado sempre que efectua trocas de material.
Com este produto evita problema como "clogs" e "jams" e fará com que o seu nozzle mantenha-se sempre limpo, durando muito mais tempo.
Poderá encontrar a partir de 1.49€ no seguinte LINK
Para obter maior aderência à superfície da sua impressora 3D recomendamos a aplicar 3DLAC na base da plataforma.
Poderá encontrar no seguinte LINK
Este material é altamente higroscópico, absorvendo rapidamente a humidade do ar passados poucos minutos após aberto, impossibilitando desta forma a correcta impressão 3D do mesmo. O resultado das impressões 3D de materiais com humidade tendem a ser frágeis e de acabamento irregular ou em certos casos, torna-se simplesmente impossíveis de imprimir.
Deverá de usar soluções de caixas fechadas com dessecante como sílica ou caixas próprias secadoras de filamento.
Poderá encontrar no seguinte LINK
Download:
Technical and Safety Data Sheet
50g- Rolo
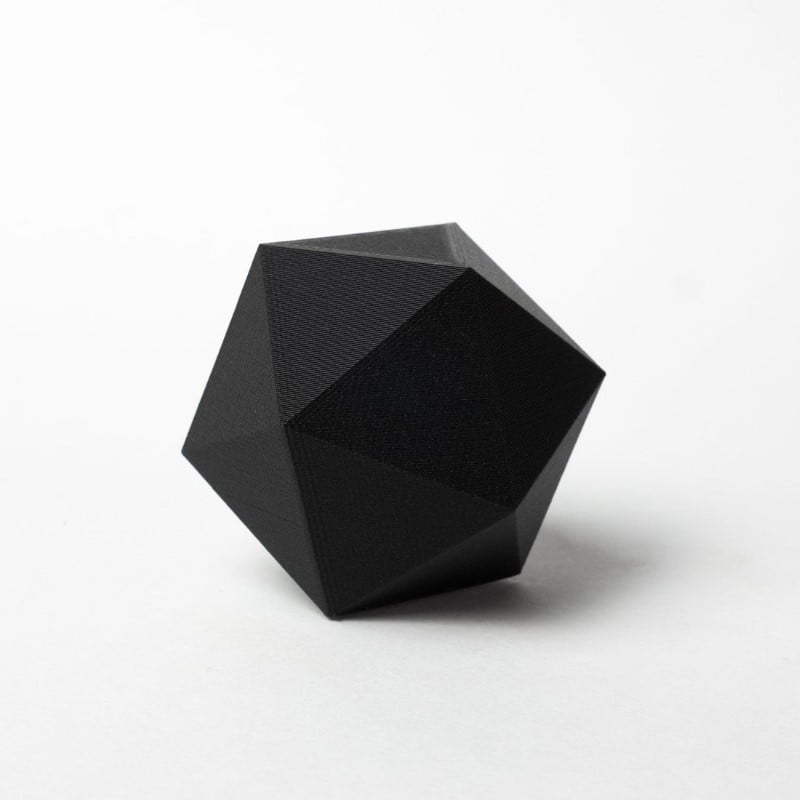
HTPLA Black ( Matte Fiber ) - Cor
1.75mm (+-0.05mm) - Espessura / Tolerância de diâmetro
Muito Fácil - Facilidade de Impressão
ProtoPasta é uma empresa situada nos Estados Unidos da América, de produção de filamentos para impressão 3D de alta qualidade.
Caracterizada pelos rolos feitos em cartão, esta marca é mundialmente famosa por ser especializada em materiais como PLA e ABS modificados com outros materiais, como o PLA Magnético; o PLA Condutivo; PLA de fibra de carbono; HTPLA de cobre, latão ou bronze; ou o ABS-PC.
A neutral gray reminiscent of concrete or stone.
Gray Matte Fiber HTPLA feels industrial, but uses plant fibers for texture and sheen.
Great for both artistic and technical parts with no special hardware required!
A great alternative to Carbon or Glass Fibers, Black Matte Fiber HTPLA uses plant fibers great looks in both artistic and technical parts with no special hardware required!
Printed parts have a low luster, textured surface which creates a highly desirable contrast between light and shadow. Texture, color, and sheen can be somewhat manipulated by printer settings as well as post-processing. Printed parts can also be smoothed or weathered with paint for alternate aesthetics. The plant-based fibers lend well to adhesion of paint and other aesthetic coatings.
Based on Proto-pasta HTPLA, this Matte Fiber version can be heat treated to retain more stiffness to higher temperatures. Dimensional stability is improved compared to HTPLA without fibers. The plant-based fibers improve adhesion of glues and coatings. Performance is similar to Carbon Fiber HTPLA but processing of Matte Fiber does NOT require a wear resistant nozzle.
No special hardware or nozzles are required for this plant-based composite. This material is not overly brittle, but is stiff and will break under excessive load. It prints like PLA on non-heated beds. Suggested print temperature is 190-230C, but we had good luck with a slow 1st layer at 230C on cold blue tape and 210C thereafter for a balance of strength and aesthetic.
This material does absorb moisture and dry filament is recommend for best results. When saturated with moisture, this material oozes more readily. Lowering flow and/or temperatures can minimize oozing and improve detail, though higher temperatures are recommended for best mechanical properties. With higher temperatures, ooze artifacts can be removed post build.
This material can be shaved/carved with a sharp blade for a smooth finish. Experiment with weathering or other painting techniques for a unique look. Also, expect improved bonding strength with glue compared to plastic without fiber.
We've created this page to bring you a premium PLA and HTPLA printing experience that rivals our premium material. Follow below to improve your 3D printing experience. In other words, here's your shortcut to awesomeness with pasta. If at the end of this document you have questions or need assistance, please contact us at [email protected].
Loose coils can be very tricky to manage. Going cowboy on your spool handling can quickly end up in a frustrating, tangled mess. Keep your loose coils wrangled with a spool holder like masterspool for a more trouble-free experience. Find out more about loose coil handling in Keith's blog post.
And for spooled filament, never let go of the loose end. When not in the printer extruder, tuck it away in the cardboard spool's corrugation! Also, avoid sharp bends and excessive force when loading filament into your printer.
At Proto-pasta, we make high quality filament. We aspire to make exceptional results easy, but a positive result is very much dependent on your hardware, set-up, adjustments, and process parameters. Matching hardware with process and material for a positive experience is not always straight-forward, but you can start by pairing the following settings with your printer for a good starting point, then tune or troubleshoot as required.
Volume flow rate together with temperature dictates how melted the material is. This is hardware & condition dependent based on hot end, nozzle & extruder type, material & manufacturer as well as layer fan type, position & settings. Extrusion width, layer thickness & speed changes affect volume flow which may change required/desired temperature.
Post your prints & tag us @Proto_pasta on Twitter and Instagram. Need more help? Consider typical pitfalls and fixes below.
We visited Joel and ended up with a helpful video on the subject:
Para uma correcta manutenção da sua impressora 3D, recomendamos sempre que trocar de material de filamento 3D, a efectuar uma purga com filamento especial de limpeza.
Desta forma garante que não ficam vestígios de material nas paredes do nozzle, evitando o acumular de crosta que é criado sempre que efectua trocas de material.
Com este produto evita problema como "clogs" e "jams" e fará com que o seu nozzle mantenha-se sempre limpo, durando muito mais tempo.
Poderá encontrar a partir de 1.49€ no seguinte LINK
Para obter maior aderência à superfície da sua impressora 3D recomendamos a aplicar 3DLAC na base da plataforma.
Poderá encontrar no seguinte LINK
Este material é altamente higroscópico, absorvendo rapidamente a humidade do ar passados poucos minutos após aberto, impossibilitando desta forma a correcta impressão 3D do mesmo. O resultado das impressões 3D de materiais com humidade tendem a ser frágeis e de acabamento irregular ou em certos casos, torna-se simplesmente impossíveis de imprimir.
Deverá de usar soluções de caixas fechadas com dessecante como sílica ou caixas próprias secadoras de filamento.
Poderá encontrar no seguinte LINK
Download:
Technical and Safety Data Sheet
50g- Rolo
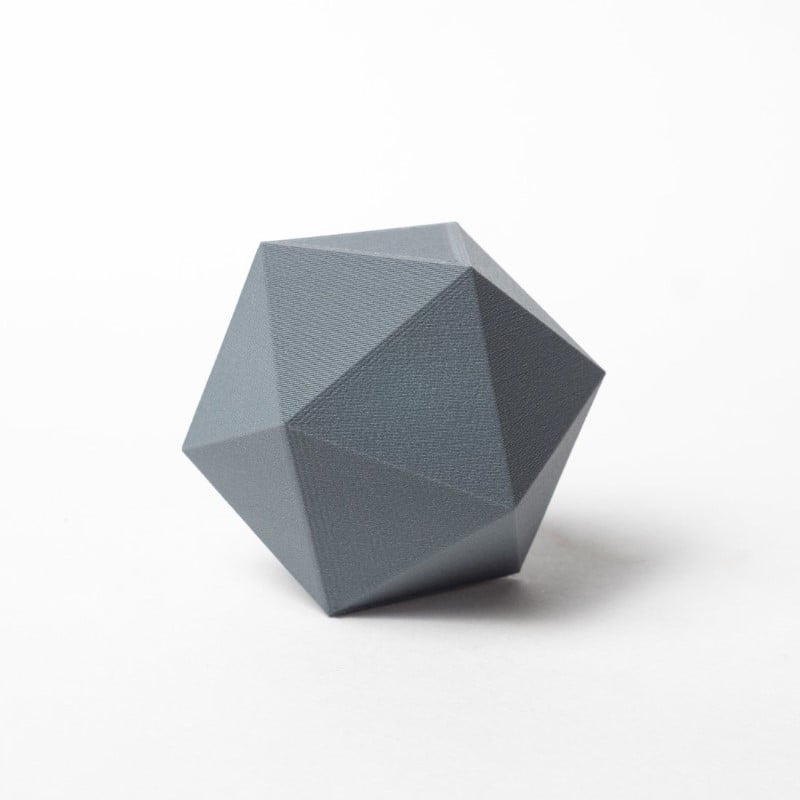
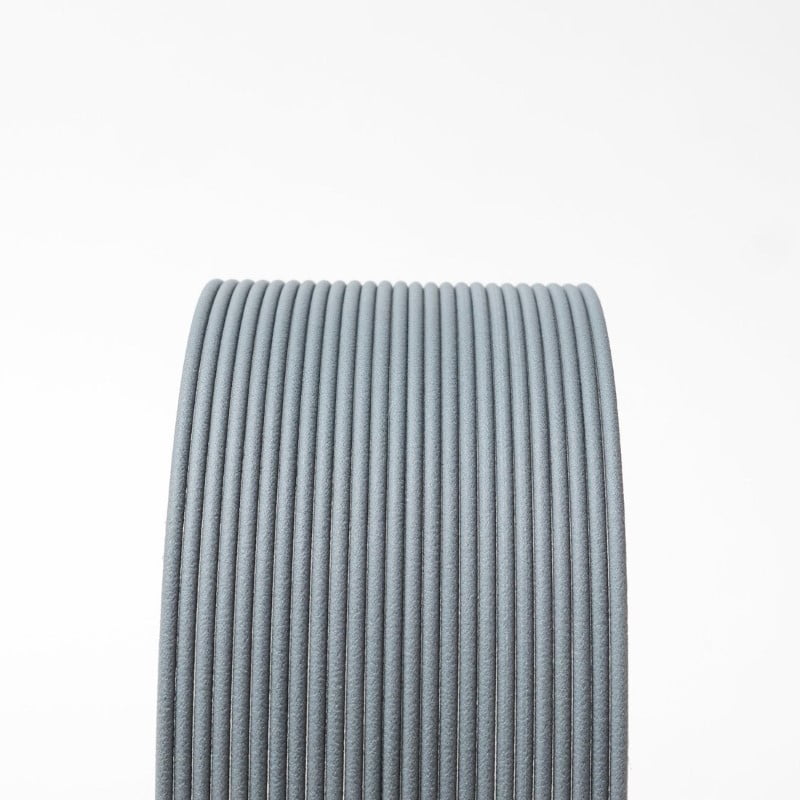
HTPLA Gray ( Matte Fiber ) - Cor
1.75mm (+-0.05mm) - Espessura / Tolerância de diâmetro
Muito Fácil - Facilidade de Impressão
ProtoPasta é uma empresa situada nos Estados Unidos da América, de produção de filamentos para impressão 3D de alta qualidade.
Caracterizada pelos rolos feitos em cartão, esta marca é mundialmente famosa por ser especializada em materiais como PLA e ABS modificados com outros materiais, como o PLA Magnético; o PLA Condutivo; PLA de fibra de carbono; HTPLA de cobre, latão ou bronze; ou o ABS-PC.
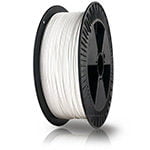
Made with plant fibers, but reminiscent of Ceramic, Marble, or Limestone, White Matte Fiber HTPLA brings superb finish to both artistic and technical parts with no special hardware required!
A great alternative to Carbon or Glass Fibers, Black Matte Fiber HTPLA uses plant fibers great looks in both artistic and technical parts with no special hardware required!
Printed parts have a low luster, textured surface which creates a highly desirable contrast between light and shadow. Texture, color, and sheen can be somewhat manipulated by printer settings as well as post-processing. Printed parts can also be smoothed or weathered with paint for alternate aesthetics. The plant-based fibers lend well to adhesion of paint and other aesthetic coatings.
Based on Proto-pasta HTPLA, this Matte Fiber version can be heat treated to retain more stiffness to higher temperatures. Dimensional stability is improved compared to HTPLA without fibers. The plant-based fibers improve adhesion of glues and coatings. Performance is similar to Carbon Fiber HTPLA but processing of Matte Fiber does NOT require a wear resistant nozzle.
No special hardware or nozzles are required for this plant-based composite. This material is not overly brittle, but is stiff and will break under excessive load. It prints like PLA on non-heated beds. Suggested print temperature is 190-230C, but we had good luck with a slow 1st layer at 230C on cold blue tape and 210C thereafter for a balance of strength and aesthetic.
This material does absorb moisture and dry filament is recommend for best results. When saturated with moisture, this material oozes more readily. Lowering flow and/or temperatures can minimize oozing and improve detail, though higher temperatures are recommended for best mechanical properties. With higher temperatures, ooze artifacts can be removed post build.
This material can be shaved/carved with a sharp blade for a smooth finish. Experiment with weathering or other painting techniques for a unique look. Also, expect improved bonding strength with glue compared to plastic without fiber.
We've created this page to bring you a premium PLA and HTPLA printing experience that rivals our premium material. Follow below to improve your 3D printing experience. In other words, here's your shortcut to awesomeness with pasta. If at the end of this document you have questions or need assistance, please contact us at [email protected].
Loose coils can be very tricky to manage. Going cowboy on your spool handling can quickly end up in a frustrating, tangled mess. Keep your loose coils wrangled with a spool holder like masterspool for a more trouble-free experience. Find out more about loose coil handling in Keith's blog post.
And for spooled filament, never let go of the loose end. When not in the printer extruder, tuck it away in the cardboard spool's corrugation! Also, avoid sharp bends and excessive force when loading filament into your printer.
At Proto-pasta, we make high quality filament. We aspire to make exceptional results easy, but a positive result is very much dependent on your hardware, set-up, adjustments, and process parameters. Matching hardware with process and material for a positive experience is not always straight-forward, but you can start by pairing the following settings with your printer for a good starting point, then tune or troubleshoot as required.
Volume flow rate together with temperature dictates how melted the material is. This is hardware & condition dependent based on hot end, nozzle & extruder type, material & manufacturer as well as layer fan type, position & settings. Extrusion width, layer thickness & speed changes affect volume flow which may change required/desired temperature.
Post your prints & tag us @Proto_pasta on Twitter and Instagram. Need more help? Consider typical pitfalls and fixes below.
We visited Joel and ended up with a helpful video on the subject:
Para uma correcta manutenção da sua impressora 3D, recomendamos sempre que trocar de material de filamento 3D, a efectuar uma purga com filamento especial de limpeza.
Desta forma garante que não ficam vestígios de material nas paredes do nozzle, evitando o acumular de crosta que é criado sempre que efectua trocas de material.
Com este produto evita problema como "clogs" e "jams" e fará com que o seu nozzle mantenha-se sempre limpo, durando muito mais tempo.
Poderá encontrar a partir de 1.49€ no seguinte LINK
Para obter maior aderência à superfície da sua impressora 3D recomendamos a aplicar 3DLAC na base da plataforma.
Poderá encontrar no seguinte LINK
Este material é altamente higroscópico, absorvendo rapidamente a humidade do ar passados poucos minutos após aberto, impossibilitando desta forma a correcta impressão 3D do mesmo. O resultado das impressões 3D de materiais com humidade tendem a ser frágeis e de acabamento irregular ou em certos casos, torna-se simplesmente impossíveis de imprimir.
Deverá de usar soluções de caixas fechadas com dessecante como sílica ou caixas próprias secadoras de filamento.
Poderá encontrar no seguinte LINK
Download:
Technical and Safety Data Sheet
50g- Rolo
HTPLA White ( Matte Fiber ) - Cor
1.75mm (+-0.05mm) - Espessura / Tolerância de diâmetro
Muito Fácil - Facilidade de Impressão
ProtoPasta é uma empresa situada nos Estados Unidos da América, de produção de filamentos para impressão 3D de alta qualidade.
Caracterizada pelos rolos feitos em cartão, esta marca é mundialmente famosa por ser especializada em materiais como PLA e ABS modificados com outros materiais, como o PLA Magnético; o PLA Condutivo; PLA de fibra de carbono; HTPLA de cobre, latão ou bronze; ou o ABS-PC.
A bright alternative to Carbon or Glass Fibers, Red Matte Fiber HTPLA uses plant fibers for texture and sheen.
Great for both artistic and technical parts with no special hardware required!

A great alternative to Carbon or Glass Fibers, Black Matte Fiber HTPLA uses plant fibers great looks in both artistic and technical parts with no special hardware required!
Printed parts have a low luster, textured surface which creates a highly desirable contrast between light and shadow. Texture, color, and sheen can be somewhat manipulated by printer settings as well as post-processing. Printed parts can also be smoothed or weathered with paint for alternate aesthetics. The plant-based fibers lend well to adhesion of paint and other aesthetic coatings.
Based on Proto-pasta HTPLA, this Matte Fiber version can be heat treated to retain more stiffness to higher temperatures. Dimensional stability is improved compared to HTPLA without fibers. The plant-based fibers improve adhesion of glues and coatings. Performance is similar to Carbon Fiber HTPLA but processing of Matte Fiber does NOT require a wear resistant nozzle.
No special hardware or nozzles are required for this plant-based composite. This material is not overly brittle, but is stiff and will break under excessive load. It prints like PLA on non-heated beds. Suggested print temperature is 190-230C, but we had good luck with a slow 1st layer at 230C on cold blue tape and 210C thereafter for a balance of strength and aesthetic.
This material does absorb moisture and dry filament is recommend for best results. When saturated with moisture, this material oozes more readily. Lowering flow and/or temperatures can minimize oozing and improve detail, though higher temperatures are recommended for best mechanical properties. With higher temperatures, ooze artifacts can be removed post build.
This material can be shaved/carved with a sharp blade for a smooth finish. Experiment with weathering or other painting techniques for a unique look. Also, expect improved bonding strength with glue compared to plastic without fiber.
We've created this page to bring you a premium PLA and HTPLA printing experience that rivals our premium material. Follow below to improve your 3D printing experience. In other words, here's your shortcut to awesomeness with pasta. If at the end of this document you have questions or need assistance, please contact us at [email protected].
Loose coils can be very tricky to manage. Going cowboy on your spool handling can quickly end up in a frustrating, tangled mess. Keep your loose coils wrangled with a spool holder like masterspool for a more trouble-free experience. Find out more about loose coil handling in Keith's blog post.
And for spooled filament, never let go of the loose end. When not in the printer extruder, tuck it away in the cardboard spool's corrugation! Also, avoid sharp bends and excessive force when loading filament into your printer.
At Proto-pasta, we make high quality filament. We aspire to make exceptional results easy, but a positive result is very much dependent on your hardware, set-up, adjustments, and process parameters. Matching hardware with process and material for a positive experience is not always straight-forward, but you can start by pairing the following settings with your printer for a good starting point, then tune or troubleshoot as required.
Volume flow rate together with temperature dictates how melted the material is. This is hardware & condition dependent based on hot end, nozzle & extruder type, material & manufacturer as well as layer fan type, position & settings. Extrusion width, layer thickness & speed changes affect volume flow which may change required/desired temperature.
Post your prints & tag us @Proto_pasta on Twitter and Instagram. Need more help? Consider typical pitfalls and fixes below.
We visited Joel and ended up with a helpful video on the subject:
Para uma correcta manutenção da sua impressora 3D, recomendamos sempre que trocar de material de filamento 3D, a efectuar uma purga com filamento especial de limpeza.
Desta forma garante que não ficam vestígios de material nas paredes do nozzle, evitando o acumular de crosta que é criado sempre que efectua trocas de material.
Com este produto evita problema como "clogs" e "jams" e fará com que o seu nozzle mantenha-se sempre limpo, durando muito mais tempo.
Poderá encontrar a partir de 1.49€ no seguinte LINK
Para obter maior aderência à superfície da sua impressora 3D recomendamos a aplicar 3DLAC na base da plataforma.
Poderá encontrar no seguinte LINK
Este material é altamente higroscópico, absorvendo rapidamente a humidade do ar passados poucos minutos após aberto, impossibilitando desta forma a correcta impressão 3D do mesmo. O resultado das impressões 3D de materiais com humidade tendem a ser frágeis e de acabamento irregular ou em certos casos, torna-se simplesmente impossíveis de imprimir.
Deverá de usar soluções de caixas fechadas com dessecante como sílica ou caixas próprias secadoras de filamento.
Poderá encontrar no seguinte LINK
Download:
Technical and Safety Data Sheet
50g- Rolo
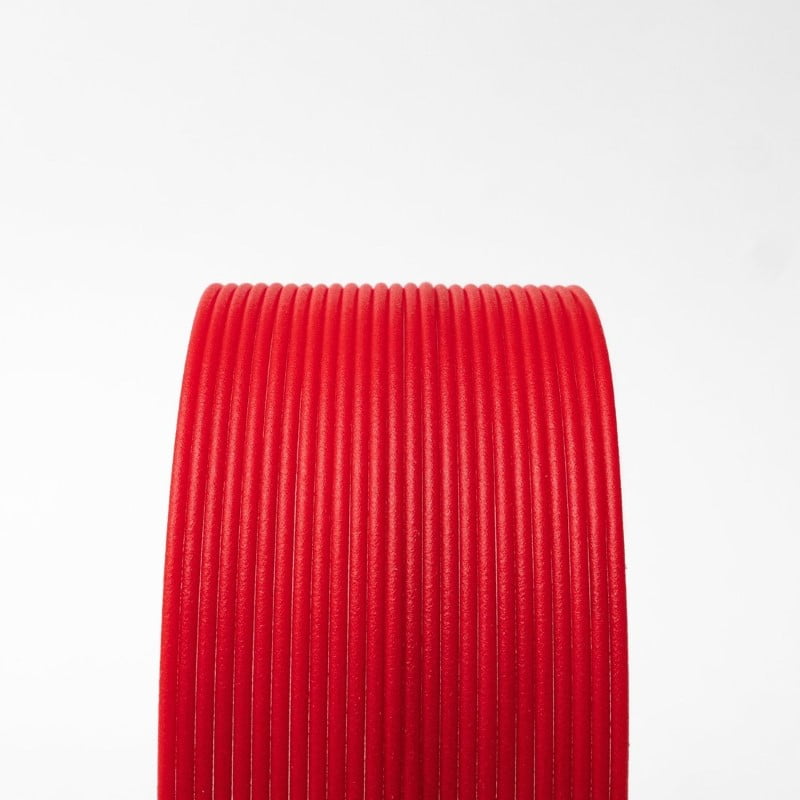
HTPLA Red ( Matte Fiber ) - Cor
1.75mm (+-0.05mm) - Espessura / Tolerância de diâmetro
Muito Fácil - Facilidade de Impressão
ProtoPasta é uma empresa situada nos Estados Unidos da América, de produção de filamentos para impressão 3D de alta qualidade.
Caracterizada pelos rolos feitos em cartão, esta marca é mundialmente famosa por ser especializada em materiais como PLA e ABS modificados com outros materiais, como o PLA Magnético; o PLA Condutivo; PLA de fibra de carbono; HTPLA de cobre, latão ou bronze; ou o ABS-PC.
A rich green reminiscent of turf.
Green Matte Fiber HTPLA uses plant fibers to create texture and sheen reminiscent of your favorite gaming table.
Great for architectural prints with no special hardware required!


A great alternative to Carbon or Glass Fibers, Black Matte Fiber HTPLA uses plant fibers great looks in both artistic and technical parts with no special hardware required!
Printed parts have a low luster, textured surface which creates a highly desirable contrast between light and shadow. Texture, color, and sheen can be somewhat manipulated by printer settings as well as post-processing. Printed parts can also be smoothed or weathered with paint for alternate aesthetics. The plant-based fibers lend well to adhesion of paint and other aesthetic coatings.
Based on Proto-pasta HTPLA, this Matte Fiber version can be heat treated to retain more stiffness to higher temperatures. Dimensional stability is improved compared to HTPLA without fibers. The plant-based fibers improve adhesion of glues and coatings. Performance is similar to Carbon Fiber HTPLA but processing of Matte Fiber does NOT require a wear resistant nozzle.
No special hardware or nozzles are required for this plant-based composite. This material is not overly brittle, but is stiff and will break under excessive load. It prints like PLA on non-heated beds. Suggested print temperature is 190-230C, but we had good luck with a slow 1st layer at 230C on cold blue tape and 210C thereafter for a balance of strength and aesthetic.
This material does absorb moisture and dry filament is recommend for best results. When saturated with moisture, this material oozes more readily. Lowering flow and/or temperatures can minimize oozing and improve detail, though higher temperatures are recommended for best mechanical properties. With higher temperatures, ooze artifacts can be removed post build.
This material can be shaved/carved with a sharp blade for a smooth finish. Experiment with weathering or other painting techniques for a unique look. Also, expect improved bonding strength with glue compared to plastic without fiber.
We've created this page to bring you a premium PLA and HTPLA printing experience that rivals our premium material. Follow below to improve your 3D printing experience. In other words, here's your shortcut to awesomeness with pasta. If at the end of this document you have questions or need assistance, please contact us at [email protected].
Loose coils can be very tricky to manage. Going cowboy on your spool handling can quickly end up in a frustrating, tangled mess. Keep your loose coils wrangled with a spool holder like masterspool for a more trouble-free experience. Find out more about loose coil handling in Keith's blog post.
And for spooled filament, never let go of the loose end. When not in the printer extruder, tuck it away in the cardboard spool's corrugation! Also, avoid sharp bends and excessive force when loading filament into your printer.
At Proto-pasta, we make high quality filament. We aspire to make exceptional results easy, but a positive result is very much dependent on your hardware, set-up, adjustments, and process parameters. Matching hardware with process and material for a positive experience is not always straight-forward, but you can start by pairing the following settings with your printer for a good starting point, then tune or troubleshoot as required.
Volume flow rate together with temperature dictates how melted the material is. This is hardware & condition dependent based on hot end, nozzle & extruder type, material & manufacturer as well as layer fan type, position & settings. Extrusion width, layer thickness & speed changes affect volume flow which may change required/desired temperature.
Post your prints & tag us @Proto_pasta on Twitter and Instagram. Need more help? Consider typical pitfalls and fixes below.
We visited Joel and ended up with a helpful video on the subject:
Para uma correcta manutenção da sua impressora 3D, recomendamos sempre que trocar de material de filamento 3D, a efectuar uma purga com filamento especial de limpeza.
Desta forma garante que não ficam vestígios de material nas paredes do nozzle, evitando o acumular de crosta que é criado sempre que efectua trocas de material.
Com este produto evita problema como "clogs" e "jams" e fará com que o seu nozzle mantenha-se sempre limpo, durando muito mais tempo.
Poderá encontrar a partir de 1.49€ no seguinte LINK
Para obter maior aderência à superfície da sua impressora 3D recomendamos a aplicar 3DLAC na base da plataforma.
Poderá encontrar no seguinte LINK
Este material é altamente higroscópico, absorvendo rapidamente a humidade do ar passados poucos minutos após aberto, impossibilitando desta forma a correcta impressão 3D do mesmo. O resultado das impressões 3D de materiais com humidade tendem a ser frágeis e de acabamento irregular ou em certos casos, torna-se simplesmente impossíveis de imprimir.
Deverá de usar soluções de caixas fechadas com dessecante como sílica ou caixas próprias secadoras de filamento.
Poderá encontrar no seguinte LINK
Download:
Technical and Safety Data Sheet
50g- Rolo
HTPLA Green ( Matte Fiber ) - Cor
1.75mm (+-0.05mm) - Espessura / Tolerância de diâmetro
Muito Fácil - Facilidade de Impressão
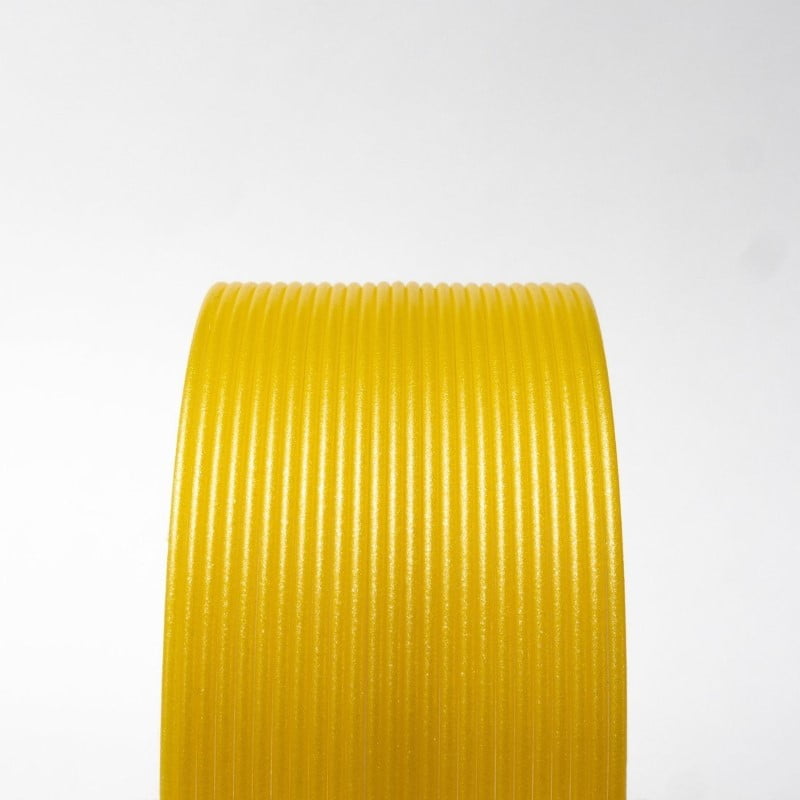
ProtoPasta é uma empresa situada nos Estados Unidos da América, de produção de filamentos para impressão 3D de alta qualidade.
Caracterizada pelos rolos feitos em cartão, esta marca é mundialmente famosa por ser especializada em materiais como PLA e ABS modificados com outros materiais, como o PLA Magnético; o PLA Condutivo; PLA de fibra de carbono; HTPLA de cobre, latão ou bronze; ou o ABS-PC.
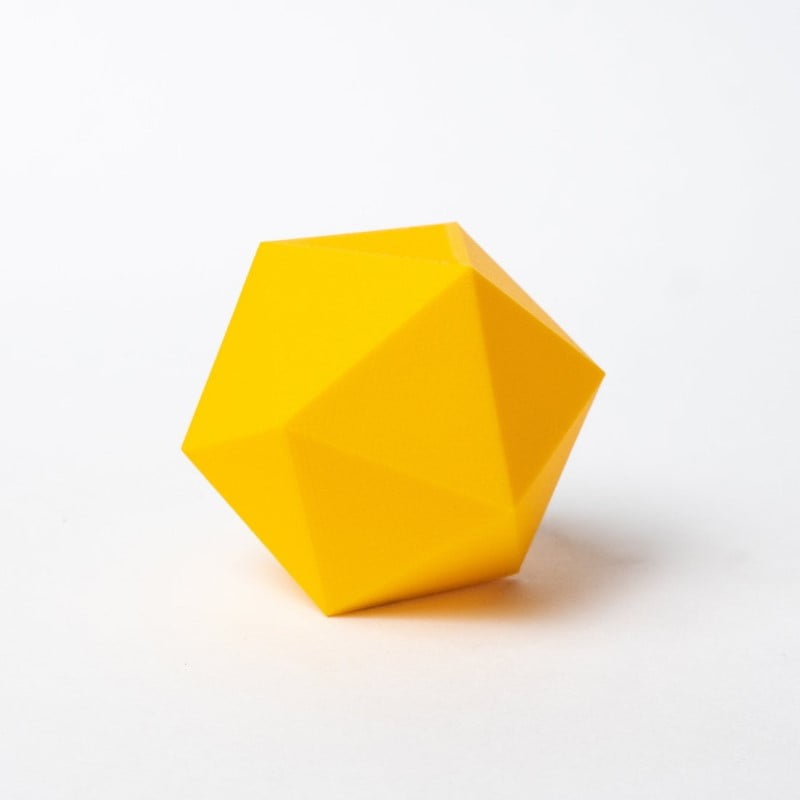
A bright alternative to Carbon or Glass Fibers, Yellow Matte Fiber HTPLA uses plant fibers for texture and sheen.
Great for both artistic and technical parts with no special hardware required!
A great alternative to Carbon or Glass Fibers, Black Matte Fiber HTPLA uses plant fibers great looks in both artistic and technical parts with no special hardware required!
Printed parts have a low luster, textured surface which creates a highly desirable contrast between light and shadow. Texture, color, and sheen can be somewhat manipulated by printer settings as well as post-processing. Printed parts can also be smoothed or weathered with paint for alternate aesthetics. The plant-based fibers lend well to adhesion of paint and other aesthetic coatings.
Based on Proto-pasta HTPLA, this Matte Fiber version can be heat treated to retain more stiffness to higher temperatures. Dimensional stability is improved compared to HTPLA without fibers. The plant-based fibers improve adhesion of glues and coatings. Performance is similar to Carbon Fiber HTPLA but processing of Matte Fiber does NOT require a wear resistant nozzle.
No special hardware or nozzles are required for this plant-based composite. This material is not overly brittle, but is stiff and will break under excessive load. It prints like PLA on non-heated beds. Suggested print temperature is 190-230C, but we had good luck with a slow 1st layer at 230C on cold blue tape and 210C thereafter for a balance of strength and aesthetic.
This material does absorb moisture and dry filament is recommend for best results. When saturated with moisture, this material oozes more readily. Lowering flow and/or temperatures can minimize oozing and improve detail, though higher temperatures are recommended for best mechanical properties. With higher temperatures, ooze artifacts can be removed post build.
This material can be shaved/carved with a sharp blade for a smooth finish. Experiment with weathering or other painting techniques for a unique look. Also, expect improved bonding strength with glue compared to plastic without fiber.
We've created this page to bring you a premium PLA and HTPLA printing experience that rivals our premium material. Follow below to improve your 3D printing experience. In other words, here's your shortcut to awesomeness with pasta. If at the end of this document you have questions or need assistance, please contact us at [email protected].
Loose coils can be very tricky to manage. Going cowboy on your spool handling can quickly end up in a frustrating, tangled mess. Keep your loose coils wrangled with a spool holder like masterspool for a more trouble-free experience. Find out more about loose coil handling in Keith's blog post.
And for spooled filament, never let go of the loose end. When not in the printer extruder, tuck it away in the cardboard spool's corrugation! Also, avoid sharp bends and excessive force when loading filament into your printer.
At Proto-pasta, we make high quality filament. We aspire to make exceptional results easy, but a positive result is very much dependent on your hardware, set-up, adjustments, and process parameters. Matching hardware with process and material for a positive experience is not always straight-forward, but you can start by pairing the following settings with your printer for a good starting point, then tune or troubleshoot as required.
Volume flow rate together with temperature dictates how melted the material is. This is hardware & condition dependent based on hot end, nozzle & extruder type, material & manufacturer as well as layer fan type, position & settings. Extrusion width, layer thickness & speed changes affect volume flow which may change required/desired temperature.
Post your prints & tag us @Proto_pasta on Twitter and Instagram. Need more help? Consider typical pitfalls and fixes below.
We visited Joel and ended up with a helpful video on the subject:
Para uma correcta manutenção da sua impressora 3D, recomendamos sempre que trocar de material de filamento 3D, a efectuar uma purga com filamento especial de limpeza.
Desta forma garante que não ficam vestígios de material nas paredes do nozzle, evitando o acumular de crosta que é criado sempre que efectua trocas de material.
Com este produto evita problema como "clogs" e "jams" e fará com que o seu nozzle mantenha-se sempre limpo, durando muito mais tempo.
Poderá encontrar a partir de 1.49€ no seguinte LINK
Para obter maior aderência à superfície da sua impressora 3D recomendamos a aplicar 3DLAC na base da plataforma.
Poderá encontrar no seguinte LINK
Este material é altamente higroscópico, absorvendo rapidamente a humidade do ar passados poucos minutos após aberto, impossibilitando desta forma a correcta impressão 3D do mesmo. O resultado das impressões 3D de materiais com humidade tendem a ser frágeis e de acabamento irregular ou em certos casos, torna-se simplesmente impossíveis de imprimir.
Deverá de usar soluções de caixas fechadas com dessecante como sílica ou caixas próprias secadoras de filamento.
Poderá encontrar no seguinte LINK
Download:
Technical and Safety Data Sheet
50g- Rolo
HTPLA Yellow ( Matte Fiber ) - Cor
1.75mm (+-0.05mm) - Espessura / Tolerância de diâmetro
Muito Fácil - Facilidade de Impressão
ProtoPasta é uma empresa situada nos Estados Unidos da América, de produção de filamentos para impressão 3D de alta qualidade.
Caracterizada pelos rolos feitos em cartão, esta marca é mundialmente famosa por ser especializada em materiais como PLA e ABS modificados com outros materiais, como o PLA Magnético; o PLA Condutivo; PLA de fibra de carbono; HTPLA de cobre, latão ou bronze; ou o ABS-PC.
The original is still the best! World's First Carbon Fiber PLA filament was kickstarted by ProtoPlant nearly 5 years ago.
Others try, but can't match the quality and ease of printing experience afforded by this product.
Available at a cost low enough for everyday printing, try a mammoth 3kg spool for large format printing!
1.75mm diameter 3kg spools contain more than 1 km of filament! How cool is that?!?!


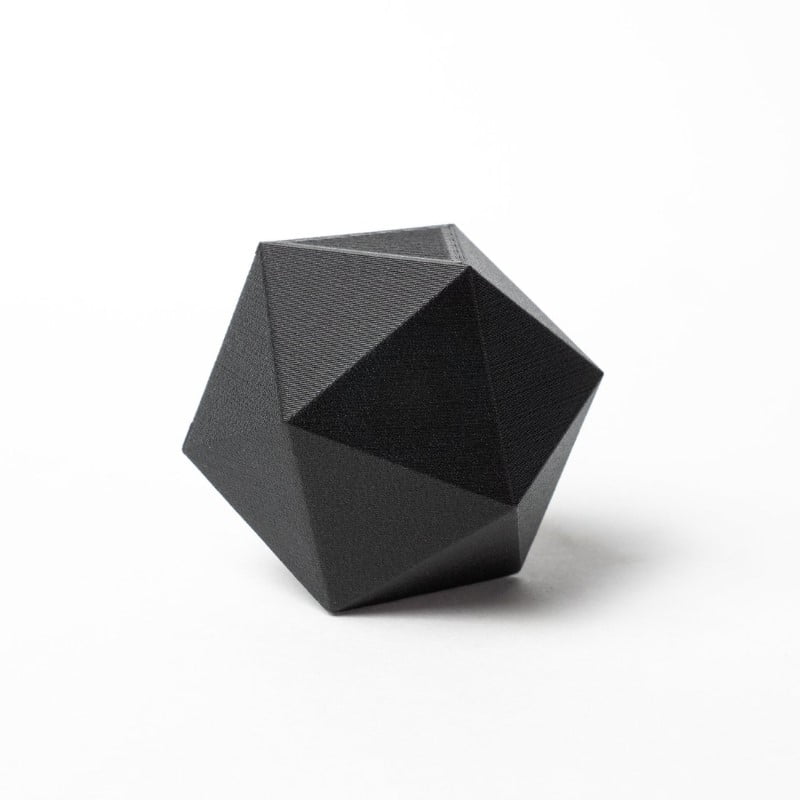
Protopasta Carbon Fiber PLA is based on our easy printing, high quality PLA. Made from the highest quality, dry ingredients and extruded with care in our Washington facility on our own purpose-built extrusion systems. CFPLA prints are demonstrably more rigid with easy processing (often using standard PLA settings) and support removal. Excellent layer adhesion and minimal warpage even without a heated bed make this a great everyday exotic for accurate parts. Layer lines disappear with the beautiful matte black finish. Also has a slight sheen due to the embedded carbon making it very photogenic!
**This filament is slightly more abrasive than standard PLA. Be prepared to replace your nozzle and do 1st layer adjustment after prolonged use or upgrade to a wear resistant nozzle for less maintenance.
In filament form, CFPLA is slightly more brittle than standard PLA, and requires extra care when handling.
Processing is comparable to standard PLA. No heated bed required. Process may be less consistent on smaller nozzles and/or bowden type machines,
We frequently print using direct-drive systems with 0.4mm nozzles and print as high as 240C, though suggest 0.6mm and 210-230C for the best experience.
We've created this page to bring you a premium PLA and HTPLA printing experience that rivals our premium material. Follow below to improve your 3D printing experience. In other words, here's your shortcut to awesomeness with pasta. If at the end of this document you have questions or need assistance, please contact us at [email protected].
Loose coils can be very tricky to manage. Going cowboy on your spool handling can quickly end up in a frustrating, tangled mess. Keep your loose coils wrangled with a spool holder like masterspool for a more trouble-free experience. Find out more about loose coil handling in Keith's blog post.
And for spooled filament, never let go of the loose end. When not in the printer extruder, tuck it away in the cardboard spool's corrugation! Also, avoid sharp bends and excessive force when loading filament into your printer.
At Proto-pasta, we make high quality filament. We aspire to make exceptional results easy, but a positive result is very much dependent on your hardware, set-up, adjustments, and process parameters. Matching hardware with process and material for a positive experience is not always straight-forward, but you can start by pairing the following settings with your printer for a good starting point, then tune or troubleshoot as required.
Volume flow rate together with temperature dictates how melted the material is. This is hardware & condition dependent based on hot end, nozzle & extruder type, material & manufacturer as well as layer fan type, position & settings. Extrusion width, layer thickness & speed changes affect volume flow which may change required/desired temperature.
Post your prints & tag us @Proto_pasta on Twitter and Instagram. Need more help? Consider typical pitfalls and fixes below.
We visited Joel and ended up with a helpful video on the subject:
Our most popular exotic material, prints made with our Carbon Fiber PLA are demonstrably more rigid, providing excellent structural strength and layer adhesion with very low warpage. It has a beautiful matte black finish with a slight sheen due to the embedded carbon.
What is it made out of?
Because of the chopped carbon, Protopasta Carbon Fiber PLA may have trouble getting through smaller nozzles. We have had good success using a .5mm nozzle and direct-drive spring loaded pinch-roll style extrusion head.Generally, our customers find it prints just like standard PLA on their machines (at around 195-210° F), though others find success running it a bit hotter (around 220° F). Experiment with your printer and see what works best for you.
Carbon fiber and your printer nozzle
The carbon fibers in our filament are processed for an optimum size: short enough to print in PLA without clogging nozzles, but long enough to provide the added rigidity carbon fiber is famous for. At this length, the chopped carbon fiber makes this filament more abrasive than standard PLA. Prolonged use may result in more wear on your 3D printer, particularly lower-end nozzles.
Para uma correcta manutenção da sua impressora 3D, recomendamos sempre que trocar de material de filamento 3D, a efectuar uma purga com filamento especial de limpeza.
Desta forma garante que não ficam vestígios de material nas paredes do nozzle, evitando o acumular de crosta que é criado sempre que efectua trocas de material.
Com este produto evita problema como "clogs" e "jams" e fará com que o seu nozzle mantenha-se sempre limpo, durando muito mais tempo.
Poderá encontrar a partir de 1.49€ no seguinte LINK
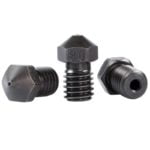
Este material é altamente abrasivo. Recomendamos a utilização de Nozzles de aço endurecido.
Poderá encontrar no seguinte LINK
Para obter maior aderência à superfície da sua impressora 3D recomendamos a aplicar 3DLAC na base da plataforma.
Poderá encontrar no seguinte LINK
Este material é altamente higroscópico, absorvendo rapidamente a humidade do ar passados poucos minutos após aberto, impossibilitando desta forma a correcta impressão 3D do mesmo. O resultado das impressões 3D de materiais com humidade tendem a ser frágeis e de acabamento irregular ou em certos casos, torna-se simplesmente impossíveis de imprimir.
Deverá de usar soluções de caixas fechadas com dessecante como sílica ou caixas próprias secadoras de filamento.
Poderá encontrar no seguinte LINK
Download:
Technical and Safety Data Sheet
50g- Rolo
PLA The Original ( Carbon Fiber Composite ) - Cor
1.75mm (+-0.05mm) - Espessura / Tolerância de diâmetro
Fácil - Facilidade de Impressão
ProtoPasta é uma empresa situada nos Estados Unidos da América, de produção de filamentos para impressão 3D de alta qualidade.
Caracterizada pelos rolos feitos em cartão, esta marca é mundialmente famosa por ser especializada em materiais como PLA e ABS modificados com outros materiais, como o PLA Magnético; o PLA Condutivo; PLA de fibra de carbono; HTPLA de cobre, latão ou bronze; ou o ABS-PC.
Our most popular exotic material, Protopasta Carbon Fiber Composite HTPLA is a combination of milled carbon fibers and high-performance PLA.
Resulting 3D prints made with our Carbon Fiber HTPLA are demonstrably more rigid, providing excellent structural strength and layer adhesion with very low warpage.
The embedded carbon provides a beautiful matte black finish with a slight sheen, resulting in 3D prints with exceptional accuracy, finish, and performance!

Proto-pasta Carbon Fiber Composite HTPLA is a combination of milled carbon fibers and high-performance, heat treatable PLA (HTPLA). Resulting 3D printed prototypes and end-use parts are characterized by exceptionally stability of form and potential use up to 155 deg C (310 deg F) when heat treated.
Printed parts have a beautiful matte black finish with layer hiding sheen and texture. The carbon fibers give the surface a nice sheen and with layer heights under 0.1mm the layers blend into the texture and almost disappear.
Printed prototypes and end use parts using Protopasta Carbon Fiber HTPLA are characterized by exceptional stability of form and potential use up to 155 deg C (310 deg F) when heat treated. Carbon fiber's rigidity and hardness results in prints with improved form and function compared to standard HTPLA without carbon fibers. Excellent layer adhesion and minimal warpage (even without a heated bed) make this a great everyday filament for accurate parts. Increased rigidity from the carbon fiber means increased structural support but decreased flexibility, making our Carbon Fiber HTPLA an ideal material for frames, supports, shells, propellers, tools... really anything not expected (or desired) to bend. It is particularly loved by drone builders and and RC hobbyists.
Adaptable to most PLA-compatible printers. Heated bed recommended for process ease, quality, and reliability, but not required. Printer should allow 3rd party filament, parameter adjustment, and nozzle replacement. Specialized machine adaptation and maintenance may be required for Proto-pasta materials, particularly in continued use of abrasive materials. Some machines may require specific considerations for filament placement, path, adjustments, settings, or other preparation & maintenance.
Abrasive materials like Carbon Fiber and Metal Composites may cause premature wear of in line components such as bowden tubes, drive gears, nozzles, and other items in the filament travel path. Serviceable hardware including replaceable nozzles suggested. Wear resistant nozzles are recommended for extended use. Nozzles wear most quickly with flattening of the tip which affects nozzle diameter & distance to build plate. Inconsistent extrusion, inaccuracy & process instability. Extrusion width & first layer distance adjustments and/or replacement of nozzle. For more on nozzle replacement consider this blog demonstrating nozzle replacement & adjustments on a Prusa MK3. Reduce nozzle wear by minimizing over-extrusion & infill.
Printed parts using Carbon Fiber HTPLA can be shaved/carved with a sharp blade for a smooth finish. Experiment with weathering or other painting techniques for a unique look. Also, expect improved bonding strength with glue compared to plastic without carbon fiber.
Carbon Fiber HTPLA is optimized for heat treating (also known as annealing or crystallizing) for higher temperature use. Heat treating creates a more crystalline molecular structure for maintaining stiffness to near melting, thus extending the useful range of HTPLA, but crystallization also creates shrinkage. HTPLA parts should be scaled in slicer to compensate for shrinkage when heat treating.
Additional post processes might inlcude sanding or painting. The addition of carbon fiber can lend well to ease of sanding and adhesion of coatings like paint, however, there are also additional safety considerations when generating dust through sanding and fumes through coating. Please seek safe practices with appropriate persona protective (PPE) and ventilation.
We've created this page to bring you a premium PLA and HTPLA printing experience that rivals our premium material. Follow below to improve your 3D printing experience. In other words, here's your shortcut to awesomeness with pasta. If at the end of this document you have questions or need assistance, please contact us at [email protected].
Loose coils can be very tricky to manage. Going cowboy on your spool handling can quickly end up in a frustrating, tangled mess. Keep your loose coils wrangled with a spool holder like masterspool for a more trouble-free experience. Find out more about loose coil handling in Keith's blog post.
And for spooled filament, never let go of the loose end. When not in the printer extruder, tuck it away in the cardboard spool's corrugation! Also, avoid sharp bends and excessive force when loading filament into your printer.
At Proto-pasta, we make high quality filament. We aspire to make exceptional results easy, but a positive result is very much dependent on your hardware, set-up, adjustments, and process parameters. Matching hardware with process and material for a positive experience is not always straight-forward, but you can start by pairing the following settings with your printer for a good starting point, then tune or troubleshoot as required.
Volume flow rate together with temperature dictates how melted the material is. This is hardware & condition dependent based on hot end, nozzle & extruder type, material & manufacturer as well as layer fan type, position & settings. Extrusion width, layer thickness & speed changes affect volume flow which may change required/desired temperature.
Post your prints & tag us @Proto_pasta on Twitter and Instagram. Need more help? Consider typical pitfalls and fixes below.
We visited Joel and ended up with a helpful video on the subject:
Our most popular exotic material, prints made with our Carbon Fiber PLA are demonstrably more rigid, providing excellent structural strength and layer adhesion with very low warpage. It has a beautiful matte black finish with a slight sheen due to the embedded carbon.
What is it made out of?
Because of the chopped carbon, Protopasta Carbon Fiber PLA may have trouble getting through smaller nozzles. We have had good success using a .5mm nozzle and direct-drive spring loaded pinch-roll style extrusion head.Generally, our customers find it prints just like standard PLA on their machines (at around 195-210° F), though others find success running it a bit hotter (around 220° F). Experiment with your printer and see what works best for you.
Carbon fiber and your printer nozzle
The carbon fibers in our filament are processed for an optimum size: short enough to print in PLA without clogging nozzles, but long enough to provide the added rigidity carbon fiber is famous for. At this length, the chopped carbon fiber makes this filament more abrasive than standard PLA. Prolonged use may result in more wear on your 3D printer, particularly lower-end nozzles.
Para uma correcta manutenção da sua impressora 3D, recomendamos sempre que trocar de material de filamento 3D, a efectuar uma purga com filamento especial de limpeza.
Desta forma garante que não ficam vestígios de material nas paredes do nozzle, evitando o acumular de crosta que é criado sempre que efectua trocas de material.
Com este produto evita problema como "clogs" e "jams" e fará com que o seu nozzle mantenha-se sempre limpo, durando muito mais tempo.
Poderá encontrar a partir de 1.49€ no seguinte LINK
Este material é altamente abrasivo. Recomendamos a utilização de Nozzles de aço endurecido.
Poderá encontrar no seguinte LINK
Para obter maior aderência à superfície da sua impressora 3D recomendamos a aplicar 3DLAC na base da plataforma.
Poderá encontrar no seguinte LINK
Este material é altamente higroscópico, absorvendo rapidamente a humidade do ar passados poucos minutos após aberto, impossibilitando desta forma a correcta impressão 3D do mesmo. O resultado das impressões 3D de materiais com humidade tendem a ser frágeis e de acabamento irregular ou em certos casos, torna-se simplesmente impossíveis de imprimir.
Deverá de usar soluções de caixas fechadas com dessecante como sílica ou caixas próprias secadoras de filamento.
Poderá encontrar no seguinte LINK
Download:
Technical and Safety Data Sheet
50g- Rolo
HTPLA Black ( Carbon Fiber Composite ) - Cor
1.75mm (+-0.05mm) - Espessura / Tolerância de diâmetro
Fácil - Facilidade de Impressão