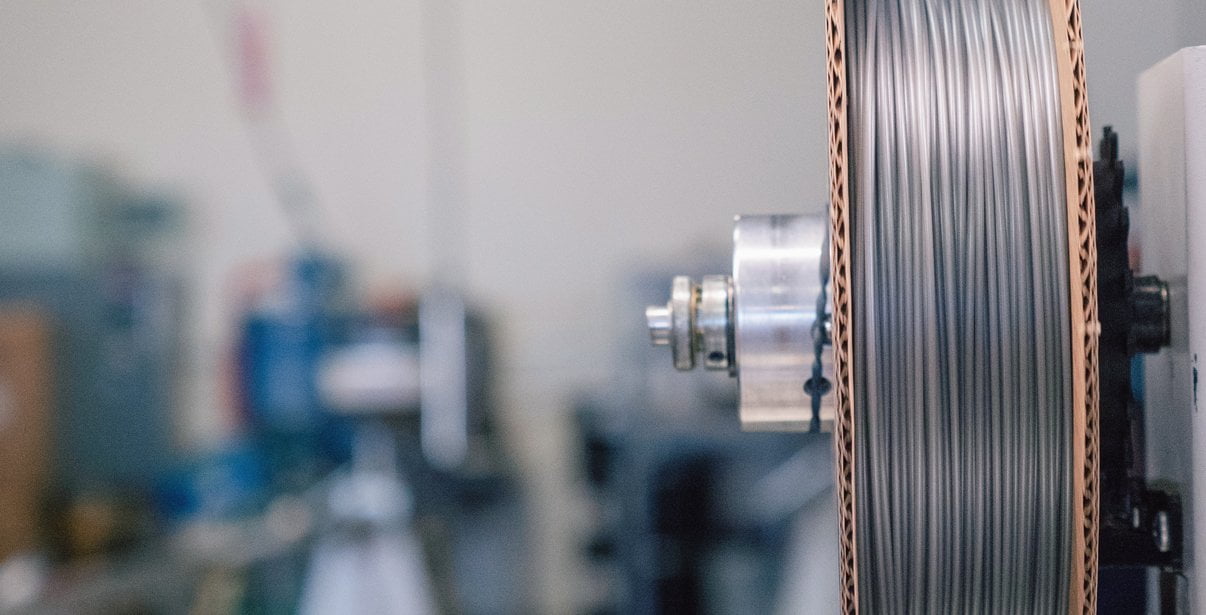
ProtoPasta é uma empresa situada nos Estados Unidos da América, de produção de filamentos para impressão 3D de alta qualidade.
Caracterizada pelos rolos feitos em cartão, esta marca é mundialmente famosa por ser especializada em materiais como PLA e ABS modificados com outros materiais, como o PLA Magnético; o PLA Condutivo; PLA de fibra de carbono; HTPLA de cobre, latão ou bronze; ou o ABS-PC.
Now with improved layer adhesion, increased resilience to break, higher melt flow, and, in general, greater consistency for more trouble-free, higher performance printing experience!
Have you ever wanted to create something with your 3D printer that includes electronics?
Maybe an LED, touch sensor, or some other genius invention to solve the world’s problems?
Then Protopasta Conductive PLA is the perfect material for you!

Here is a link to some projects:
http://www.thingiverse.com/AL3xD/collections/conductive
And the original kickstarter:
http://www.kickstarter.com/projects/1375236253/electrically-conductive-pla-3d-printer-filament

We've created this page to bring you a premium PLA and HTPLA printing experience that rivals our premium material. Follow below to improve your 3D printing experience. In other words, here's your shortcut to awesomeness with pasta. If at the end of this document you have questions or need assistance, please contact us at support@protoplant.com.
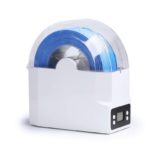
Loose coils can be very tricky to manage. Going cowboy on your spool handling can quickly end up in a frustrating, tangled mess. Keep your loose coils wrangled with a spool holder like masterspool for a more trouble-free experience. Find out more about loose coil handling in Keith's blog post.
And for spooled filament, never let go of the loose end. When not in the printer extruder, tuck it away in the cardboard spool's corrugation! Also, avoid sharp bends and excessive force when loading filament into your printer.
At Proto-pasta, we make high quality filament. We aspire to make exceptional results easy, but a positive result is very much dependent on your hardware, set-up, adjustments, and process parameters. Matching hardware with process and material for a positive experience is not always straight-forward, but you can start by pairing the following settings with your printer for a good starting point, then tune or troubleshoot as required.
Volume flow rate together with temperature dictates how melted the material is. This is hardware & condition dependent based on hot end, nozzle & extruder type, material & manufacturer as well as layer fan type, position & settings. Extrusion width, layer thickness & speed changes affect volume flow which may change required/desired temperature.
Post your prints & tag us @Proto_pasta on Twitter and Instagram. Need more help? Consider typical pitfalls and fixes below.
We visited Joel and ended up with a helpful video on the subject:
Have you ever wanted to create something with your 3D printer that includes electronics? Maybe an LED, touch sensor, or some other genius invention to solve the world’s problems? Then Protopasta Conductive PLA is the perfect material for you.
How Conductive Is It?
The measure normally used to characterize a conductor is “volume resistivity” with the units of Ohm-cm. This can be confusing because it is not obvious what it means like “miles per hour.” It is simply the resistance through a 1cm X 1cm X 1cm cube of material, with full sheet contact at 2 opposing surfaces. It is often misprinted as ohm/cm which is not a common unit of measure.
We measured the conductivity using a fixture we machined that clamps a sample between 2 sheet conductors and 1cm cubes printed on a Printrbot Simple Metal and machined from solid resin. Here are the results:
Link to original kickstarter for more information:
http://www.kickstarter.com/projects/1375236253/electrically-conductive-pla-3d-printer-filament
Suggested Applications
Protopasta Conductive PLA is a great choice for low-voltage circuitry applications, touch sensor projects, and using prints to interact with touch screens (which require low conductivity, that's why you can't use your smart phone screen with gloves on). As a general rule, anything you can run through a 1K resistor should be doable with our material (if you design the conductors to be the right size). This will easily run a low current Arduino, if you are not powering much with it. Also, experiment with ESD or 3D printed bearings!
Here is a link to some projects:
http://www.thingiverse.com/AL3xD/collections/conductive
What is it made out of?
Protopasta Conductive PLA is a compound of Natureworks 4043D PLA, a dispersant and conductive carbon black. In filament form, it is quite flexible, and is compatable with any PLA printing printer.
Strength and Performance
We have not done substantial mechanical testing on this product but have some subjective parameters that should be useful in comparing this material with others:
Print Settings
Protopasta Conductive PLA is quite easy to print and is compatible with most printers that can print PLA.
Para uma correcta manutenção da sua impressora 3D, recomendamos sempre que trocar de material de filamento 3D, a efectuar uma purga com filamento especial de limpeza.
Desta forma garante que não ficam vestígios de material nas paredes do nozzle, evitando o acumular de crosta que é criado sempre que efectua trocas de material.
Com este produto evita problema como "clogs" e "jams" e fará com que o seu nozzle mantenha-se sempre limpo, durando muito mais tempo.
Poderá encontrar a partir de 1.49€ no seguinte LINK

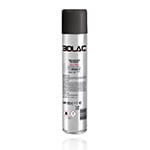
Para obter maior aderência à superfície da sua impressora 3D recomendamos a aplicar 3DLAC na base da plataforma.
Poderá encontrar no seguinte LINK
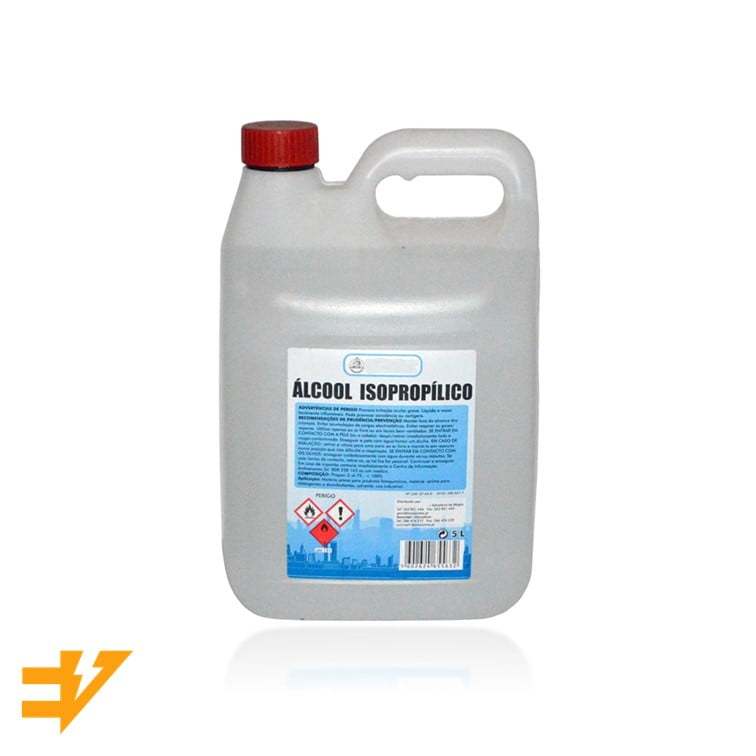
Este material é altamente higroscópico, absorvendo rapidamente a humidade do ar passados poucos minutos após aberto, impossibilitando desta forma a correcta impressão 3D do mesmo. O resultado das impressões 3D de materiais com humidade tendem a ser frágeis e de acabamento irregular ou em certos casos, torna-se simplesmente impossíveis de imprimir.
Deverá de usar soluções de caixas fechadas com dessecante como sílica ou caixas próprias secadoras de filamento.
Poderá encontrar no seguinte LINK
Download:
Technical and Safety Data Sheet
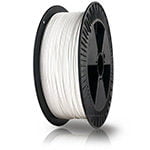
50g- Rolo
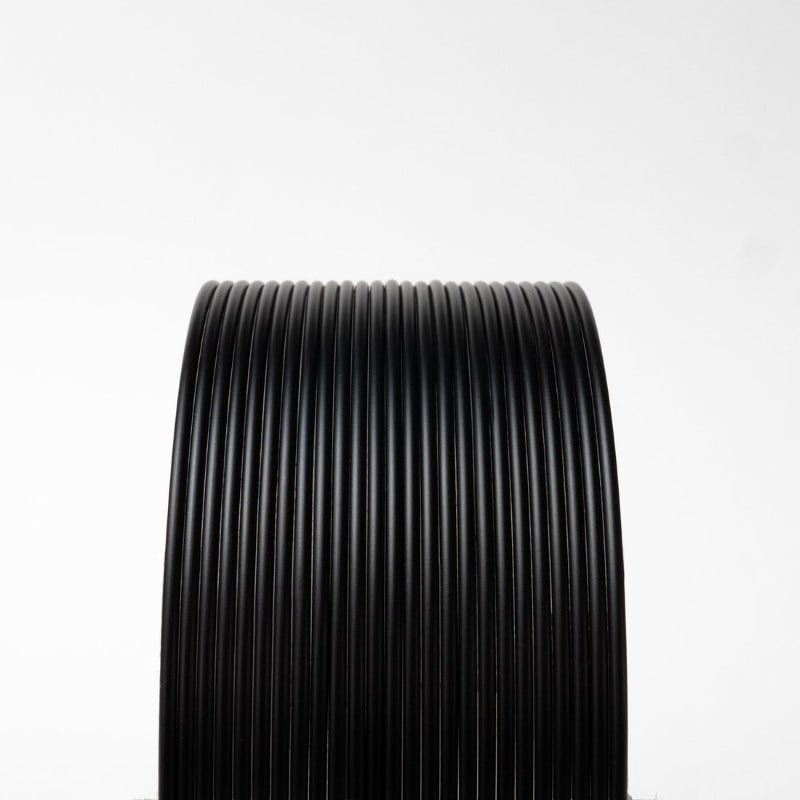
PLA Black ( Electrically Conductive Composite ) - Cor
1.75mm (+-0.05mm) - Espessura / Tolerância de diâmetro
Moderado - Facilidade de Impressão
ProtoPasta é uma empresa situada nos Estados Unidos da América, de produção de filamentos para impressão 3D de alta qualidade.
Caracterizada pelos rolos feitos em cartão, esta marca é mundialmente famosa por ser especializada em materiais como PLA e ABS modificados com outros materiais, como o PLA Magnético; o PLA Condutivo; PLA de fibra de carbono; HTPLA de cobre, latão ou bronze; ou o ABS-PC.
Protopasta Polycarbonate-ABS Alloy is an incredibly tough material designed for strong, resilient parts.
Properties are excellent and greatly improved over standard ABS.

Processing is more challenging. For best results, a heated bed is required to control warpage and improve layer adhesion. Cross-sectional area should be minimized.
PC-ABS is moisture sensitive.
Even when stored in a bag with desiccant, drying in an oven for ~ 1hr at 85C-95C may be required for bubble free high strength prints.
In our experience, good results are achieved when printing small parts at 270-290C on a heated bed at 110C up to 140C.
For larger prints with good layer adhesion and minimal distortion, an enclosure is ideal.
A fan favorite, our Polycarbonate-ABS (PC-ABS) Alloy is an incredibly tough material designed for strong, resilient parts.
This unique material provides vast improvements (over standard ABS) in heat deflection, impact resistance, rigidity, and flexibility.
What are the hardware requirements?
PC-ABS is a high performance material that produces excellent prints, but it is a finicky material prone to warping during the printing process if temperatures are not consistent.
A heated bed (120° is optimal) and 260°+ hot-end are required, an enclosure to is highly recommended.
How should I store it?
Our PC-ABS filament is very moisture sensitive and should be kept bagged with desiccant. Drying in an oven at 85-95° C for an hour may be required for good printing.
The filament is very tough and easy to feed into the printer.
Print Settings
You will have to play around with printer settings to determine what works best on your machine, but start with your heated bed at 120° C and hot end at 260° C and go from there.
Layer adhesion can be an issue if the part is large or the temperature is too low.
We have had good success printing parts ~60mm long at 260°-280° C using a .5mm nozzle and direct-drive spring loaded pinch-roll style extrusion head.
A heated bed set to 120 C will help warpage and layer adhesion on larger/thicker parts.
Density:
1.13 g/cm3 (1130 kg/m3)
Parameters:
Bed Temp (REQUIRED): 120°+ C
Hot End Temp: 260 – 280° C
Full enclosure recommended
Para uma correcta manutenção da sua impressora 3D, recomendamos sempre que trocar de material de filamento 3D, a efectuar uma purga com filamento especial de limpeza.
Desta forma garante que não ficam vestígios de material nas paredes do nozzle, evitando o acumular de crosta que é criado sempre que efectua trocas de material.
Com este produto evita problema como "clogs" e "jams" e fará com que o seu nozzle mantenha-se sempre limpo, durando muito mais tempo.
Poderá encontrar a partir de 1.49€ no seguinte LINK

Este material é considerado de difícil aderência à superfície da plataforma de impressão 3D de vidro ou PEI. Para evitar problemas de warpping e de aderência das peças, recomendamos a aplicar potenciador de aderência especial para PC Policarbonato.
Poderá encontrar no seguinte LINK
Este material é altamente higroscópico, absorvendo rapidamente a humidade do ar passados poucos minutos após aberto, impossibilitando desta forma a correcta impressão 3D do mesmo. O resultado das impressões 3D de materiais com humidade tendem a ser frágeis e de acabamento irregular ou em certos casos, torna-se simplesmente impossíveis de imprimir.
Deverá de usar soluções de caixas fechadas com dessecante como sílica ou caixas próprias secadoras de filamento.
Poderá encontrar no seguinte LINK
Download:
Technical and Safety Data Sheet
500g- Rolo
High Temperature Polycarbonate-ABS Alloy - Cor
1.75mm (+-0.05mm) - Espessura / Tolerância de diâmetro
Difícil - Facilidade de Impressão
ProtoPasta é uma empresa situada nos Estados Unidos da América, de produção de filamentos para impressão 3D de alta qualidade.
Caracterizada pelos rolos feitos em cartão, esta marca é mundialmente famosa por ser especializada em materiais como PLA e ABS modificados com outros materiais, como o PLA Magnético; o PLA Condutivo; PLA de fibra de carbono; HTPLA de cobre, latão ou bronze; ou o ABS-PC.
Now with improved layer adhesion, increased resilience to break, higher melt flow, and, in general, greater consistency for more trouble-free, higher performance printing experience!
Have you ever wanted to create something with your 3D printer that includes electronics?
Maybe an LED, touch sensor, or some other genius invention to solve the world’s problems?
Then Protopasta Conductive PLA is the perfect material for you!
Here is a link to some projects:
http://www.thingiverse.com/AL3xD/collections/conductive
And the original kickstarter:
http://www.kickstarter.com/projects/1375236253/electrically-conductive-pla-3d-printer-filament
We've created this page to bring you a premium PLA and HTPLA printing experience that rivals our premium material. Follow below to improve your 3D printing experience. In other words, here's your shortcut to awesomeness with pasta. If at the end of this document you have questions or need assistance, please contact us at support@protoplant.com.
Loose coils can be very tricky to manage. Going cowboy on your spool handling can quickly end up in a frustrating, tangled mess. Keep your loose coils wrangled with a spool holder like masterspool for a more trouble-free experience. Find out more about loose coil handling in Keith's blog post.
And for spooled filament, never let go of the loose end. When not in the printer extruder, tuck it away in the cardboard spool's corrugation! Also, avoid sharp bends and excessive force when loading filament into your printer.
At Proto-pasta, we make high quality filament. We aspire to make exceptional results easy, but a positive result is very much dependent on your hardware, set-up, adjustments, and process parameters. Matching hardware with process and material for a positive experience is not always straight-forward, but you can start by pairing the following settings with your printer for a good starting point, then tune or troubleshoot as required.
Volume flow rate together with temperature dictates how melted the material is. This is hardware & condition dependent based on hot end, nozzle & extruder type, material & manufacturer as well as layer fan type, position & settings. Extrusion width, layer thickness & speed changes affect volume flow which may change required/desired temperature.
Post your prints & tag us @Proto_pasta on Twitter and Instagram. Need more help? Consider typical pitfalls and fixes below.
We visited Joel and ended up with a helpful video on the subject:
Have you ever wanted to create something with your 3D printer that includes electronics? Maybe an LED, touch sensor, or some other genius invention to solve the world’s problems? Then Protopasta Conductive PLA is the perfect material for you.
How Conductive Is It?
The measure normally used to characterize a conductor is “volume resistivity” with the units of Ohm-cm. This can be confusing because it is not obvious what it means like “miles per hour.” It is simply the resistance through a 1cm X 1cm X 1cm cube of material, with full sheet contact at 2 opposing surfaces. It is often misprinted as ohm/cm which is not a common unit of measure.
We measured the conductivity using a fixture we machined that clamps a sample between 2 sheet conductors and 1cm cubes printed on a Printrbot Simple Metal and machined from solid resin. Here are the results:
Link to original kickstarter for more information:
http://www.kickstarter.com/projects/1375236253/electrically-conductive-pla-3d-printer-filament
Suggested Applications
Protopasta Conductive PLA is a great choice for low-voltage circuitry applications, touch sensor projects, and using prints to interact with touch screens (which require low conductivity, that's why you can't use your smart phone screen with gloves on). As a general rule, anything you can run through a 1K resistor should be doable with our material (if you design the conductors to be the right size). This will easily run a low current Arduino, if you are not powering much with it. Also, experiment with ESD or 3D printed bearings!
Here is a link to some projects:
http://www.thingiverse.com/AL3xD/collections/conductive
What is it made out of?
Protopasta Conductive PLA is a compound of Natureworks 4043D PLA, a dispersant and conductive carbon black. In filament form, it is quite flexible, and is compatable with any PLA printing printer.
Strength and Performance
We have not done substantial mechanical testing on this product but have some subjective parameters that should be useful in comparing this material with others:
Print Settings
Protopasta Conductive PLA is quite easy to print and is compatible with most printers that can print PLA.
Para uma correcta manutenção da sua impressora 3D, recomendamos sempre que trocar de material de filamento 3D, a efectuar uma purga com filamento especial de limpeza.
Desta forma garante que não ficam vestígios de material nas paredes do nozzle, evitando o acumular de crosta que é criado sempre que efectua trocas de material.
Com este produto evita problema como "clogs" e "jams" e fará com que o seu nozzle mantenha-se sempre limpo, durando muito mais tempo.
Poderá encontrar a partir de 1.49€ no seguinte LINK
Para obter maior aderência à superfície da sua impressora 3D recomendamos a aplicar 3DLAC na base da plataforma.
Poderá encontrar no seguinte LINK
Este material é altamente higroscópico, absorvendo rapidamente a humidade do ar passados poucos minutos após aberto, impossibilitando desta forma a correcta impressão 3D do mesmo. O resultado das impressões 3D de materiais com humidade tendem a ser frágeis e de acabamento irregular ou em certos casos, torna-se simplesmente impossíveis de imprimir.
Deverá de usar soluções de caixas fechadas com dessecante como sílica ou caixas próprias secadoras de filamento.
Poderá encontrar no seguinte LINK
Download:
Technical and Safety Data Sheet
500g- Rolo
PLA Black ( Electrically Conductive Composite ) - Cor
1.75mm (+-0.05mm) - Espessura / Tolerância de diâmetro
Moderado - Facilidade de Impressão
ProtoPasta é uma empresa situada nos Estados Unidos da América, de produção de filamentos para impressão 3D de alta qualidade.
Caracterizada pelos rolos feitos em cartão, esta marca é mundialmente famosa por ser especializada em materiais como PLA e ABS modificados com outros materiais, como o PLA Magnético; o PLA Condutivo; PLA de fibra de carbono; HTPLA de cobre, latão ou bronze; ou o ABS-PC.
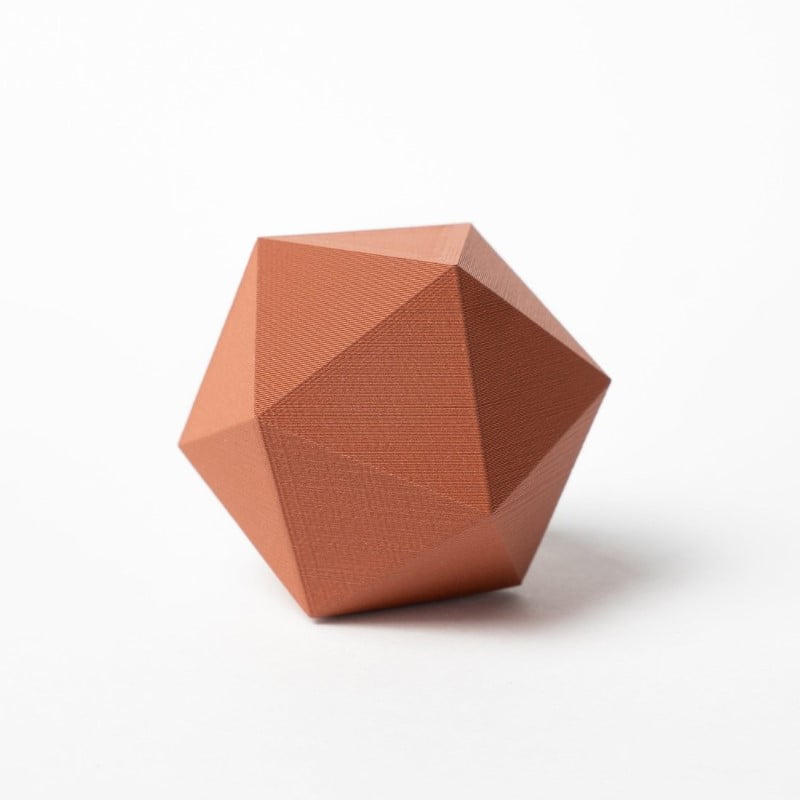
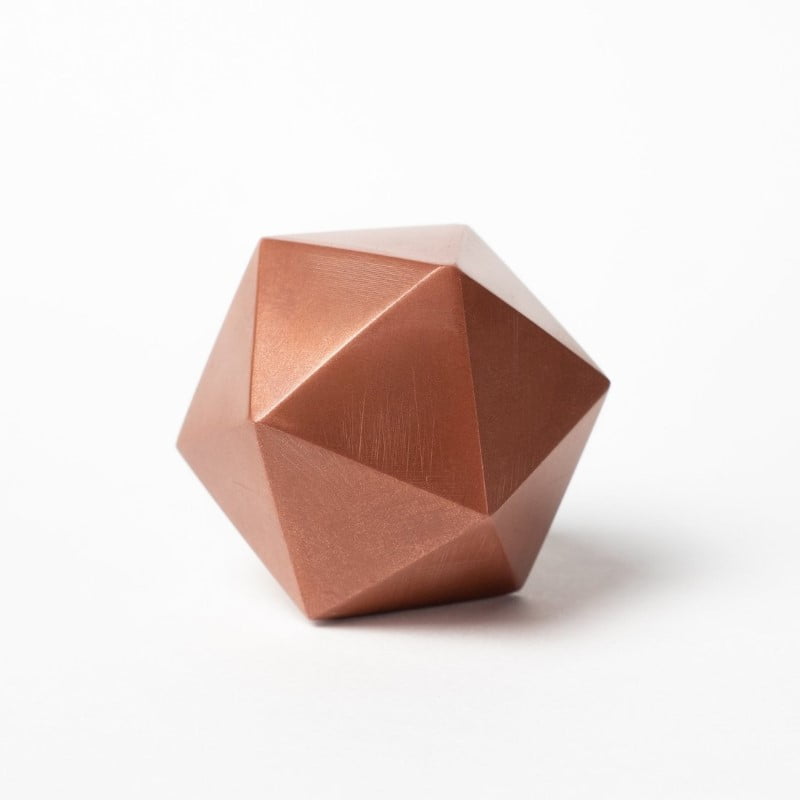
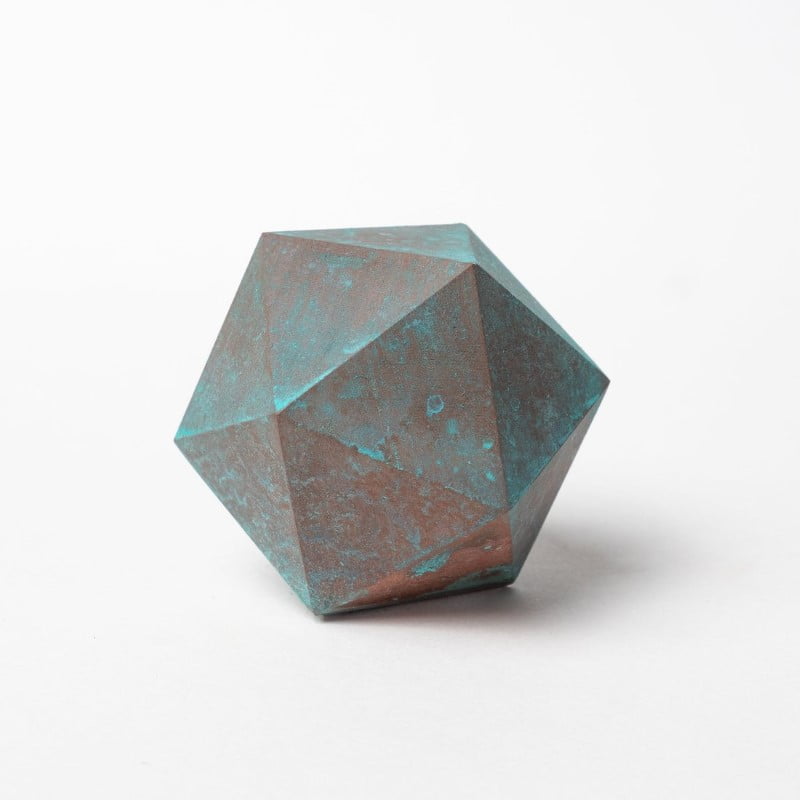
Introducing Copper-Filled Metal Composite HTPLA .
Using real copper powder, we've created a premium heat treatable metal PLA filament for 3D prints that finish just like real metal!
Our copper composite filament is as versatile as it is beautiful, printing like plastic, but finishing like real metal for beautiful, durable parts from most standard 3D printers.
Whether you want your prints to be polished with the same bright mirror finish of shiny copper coins or a naturally rustic finish with an acquired patina reminiscent of an aged copper sculpture, the possibilities are endless with this specialty metal PLA filament.
With so many finishing options, the sky is the limit!
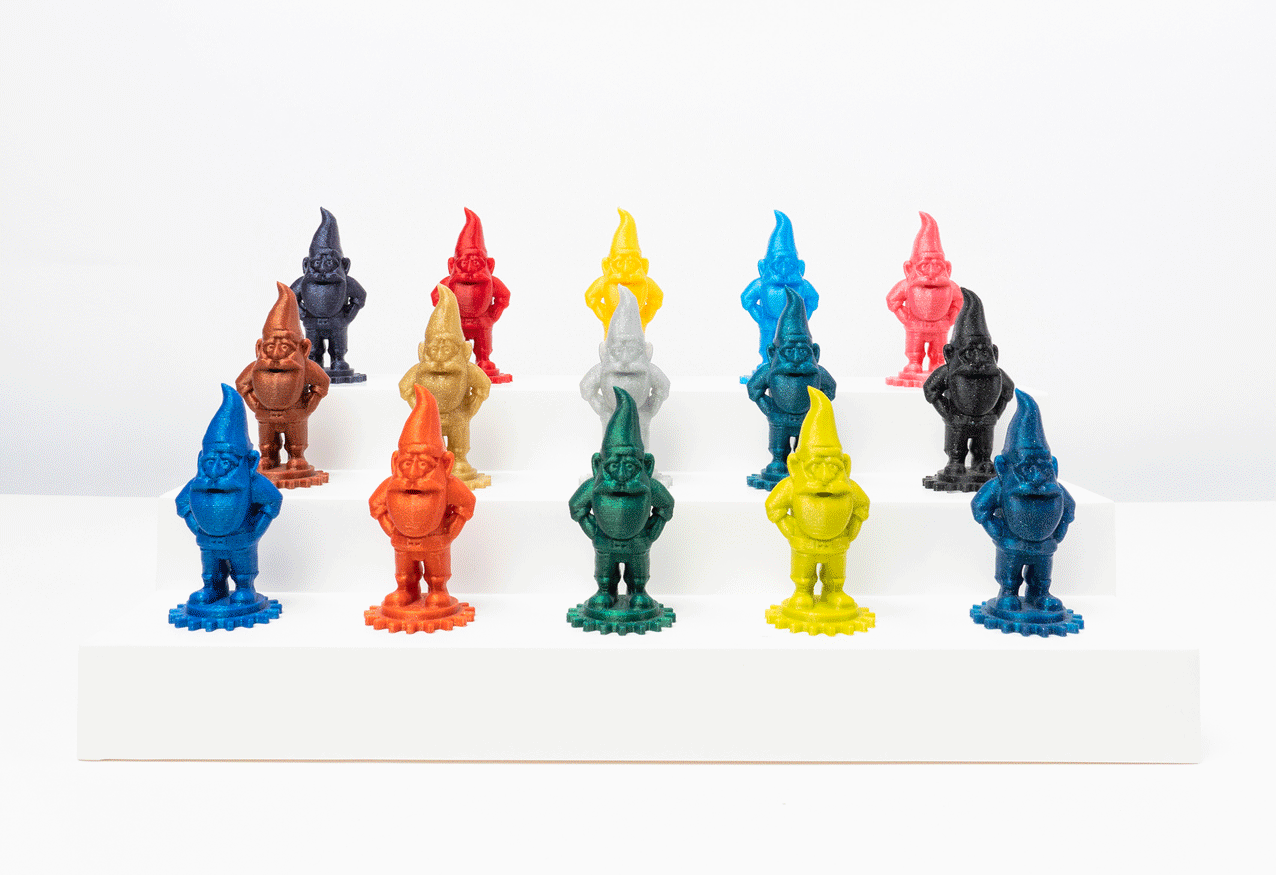
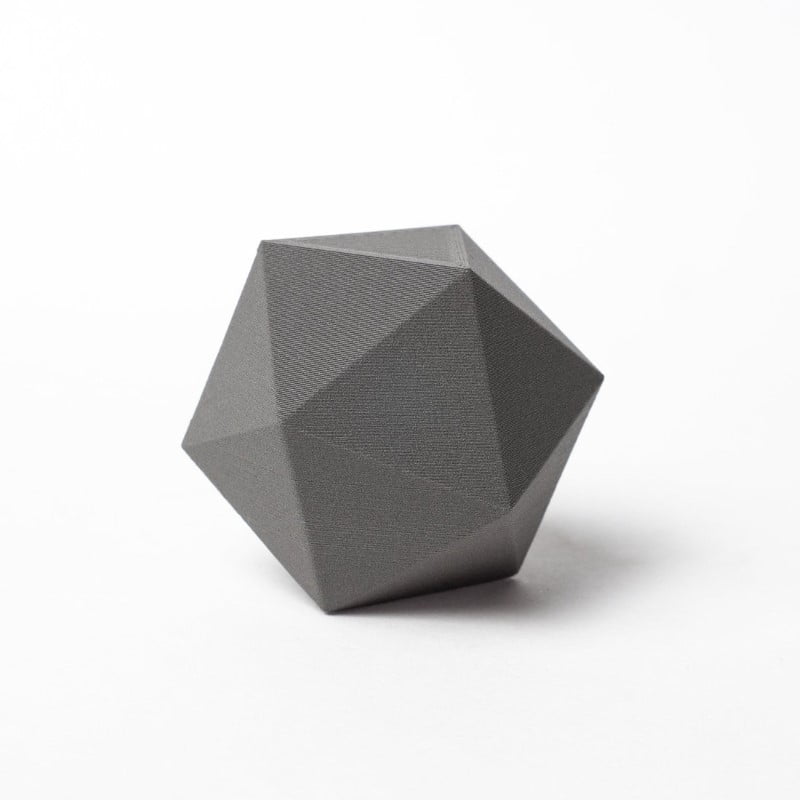
Try these techniques separately or combine! Change the order or try something new. If you discover a new technique, make something beautiful, or discover something unexpected, share it! When you've got that perfect, WOW finish, consider preserving it with a clear coat or brush applicable water-based, food-safe, and dishwasher safe coating like Modge Podge. Practice your finishing a on a test piece like Protognome (download here).
This material has been flow optimized and has less moisture uptake than standard PLAs, however composites are still sometimes more tricky to print depending on hardware and software settings. The main challenge is to keep mass flow up (larger nozzle + fast speed) and in a single direction (minimal retraction) to avoid heat soak. More on that topic here.
We've created this page to bring you a premium PLA and HTPLA printing experience that rivals our premium material. Follow below to improve your 3D printing experience. In other words, here's your shortcut to awesomeness with pasta. If at the end of this document you have questions or need assistance, please contact us at support@protoplant.com.
Loose coils can be very tricky to manage. Going cowboy on your spool handling can quickly end up in a frustrating, tangled mess. Keep your loose coils wrangled with a spool holder like masterspool for a more trouble-free experience. Find out more about loose coil handling in Keith's blog post.
And for spooled filament, never let go of the loose end. When not in the printer extruder, tuck it away in the cardboard spool's corrugation! Also, avoid sharp bends and excessive force when loading filament into your printer.
At Proto-pasta, we make high quality filament. We aspire to make exceptional results easy, but a positive result is very much dependent on your hardware, set-up, adjustments, and process parameters. Matching hardware with process and material for a positive experience is not always straight-forward, but you can start by pairing the following settings with your printer for a good starting point, then tune or troubleshoot as required.
Volume flow rate together with temperature dictates how melted the material is. This is hardware & condition dependent based on hot end, nozzle & extruder type, material & manufacturer as well as layer fan type, position & settings. Extrusion width, layer thickness & speed changes affect volume flow which may change required/desired temperature.
Post your prints & tag us @Proto_pasta on Twitter and Instagram. Need more help? Consider typical pitfalls and fixes below.
We visited Joel and ended up with a helpful video on the subject:
Para uma correcta manutenção da sua impressora 3D, recomendamos sempre que trocar de material de filamento 3D, a efectuar uma purga com filamento especial de limpeza.
Desta forma garante que não ficam vestígios de material nas paredes do nozzle, evitando o acumular de crosta que é criado sempre que efectua trocas de material.
Com este produto evita problema como "clogs" e "jams" e fará com que o seu nozzle mantenha-se sempre limpo, durando muito mais tempo.
Poderá encontrar a partir de 1.49€ no seguinte LINK
Este material é altamente abrasivo. Recomendamos a utilização de Nozzles de aço endurecido.
Poderá encontrar no seguinte LINK
Para obter maior aderência à superfície da sua impressora 3D recomendamos a aplicar 3DLAC na base da plataforma.
Poderá encontrar no seguinte LINK
Este material é altamente higroscópico, absorvendo rapidamente a humidade do ar passados poucos minutos após aberto, impossibilitando desta forma a correcta impressão 3D do mesmo. O resultado das impressões 3D de materiais com humidade tendem a ser frágeis e de acabamento irregular ou em certos casos, torna-se simplesmente impossíveis de imprimir.
Deverá de usar soluções de caixas fechadas com dessecante como sílica ou caixas próprias secadoras de filamento.
Poderá encontrar no seguinte LINK
Download:
Technical and Safety Data Sheet
500g- Rolo
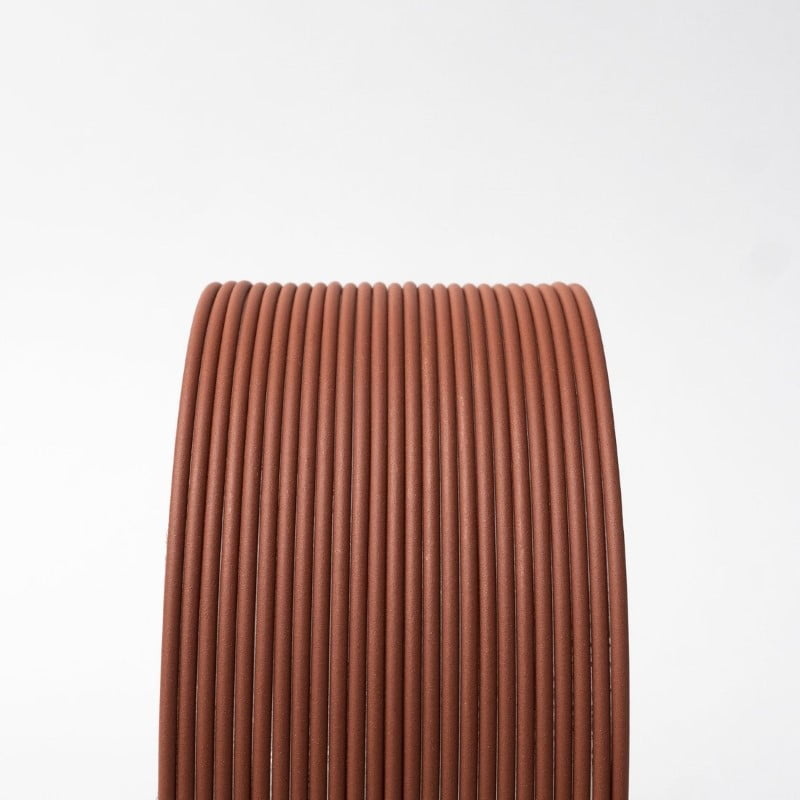
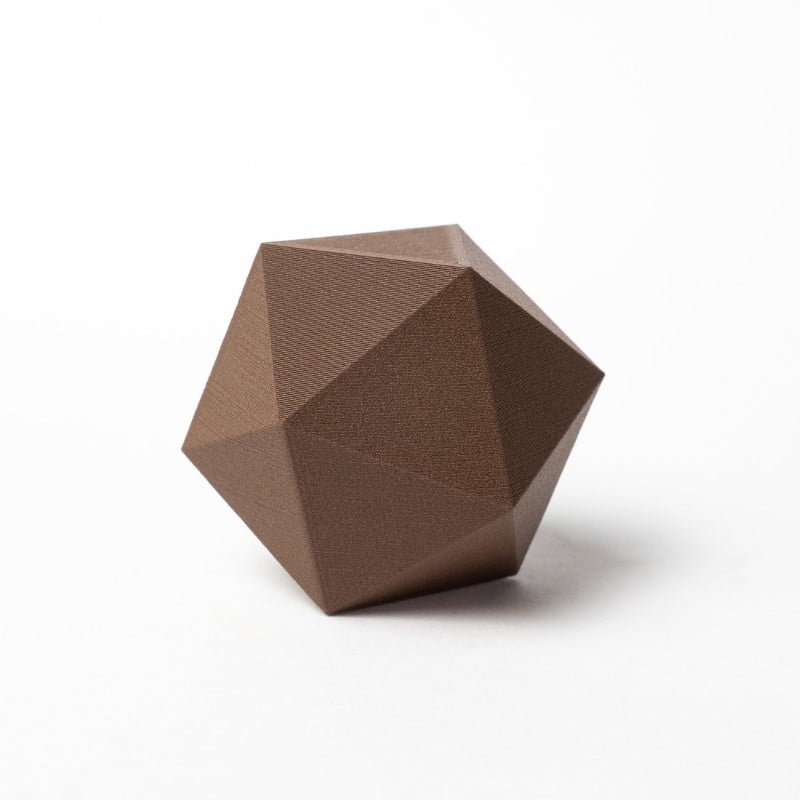
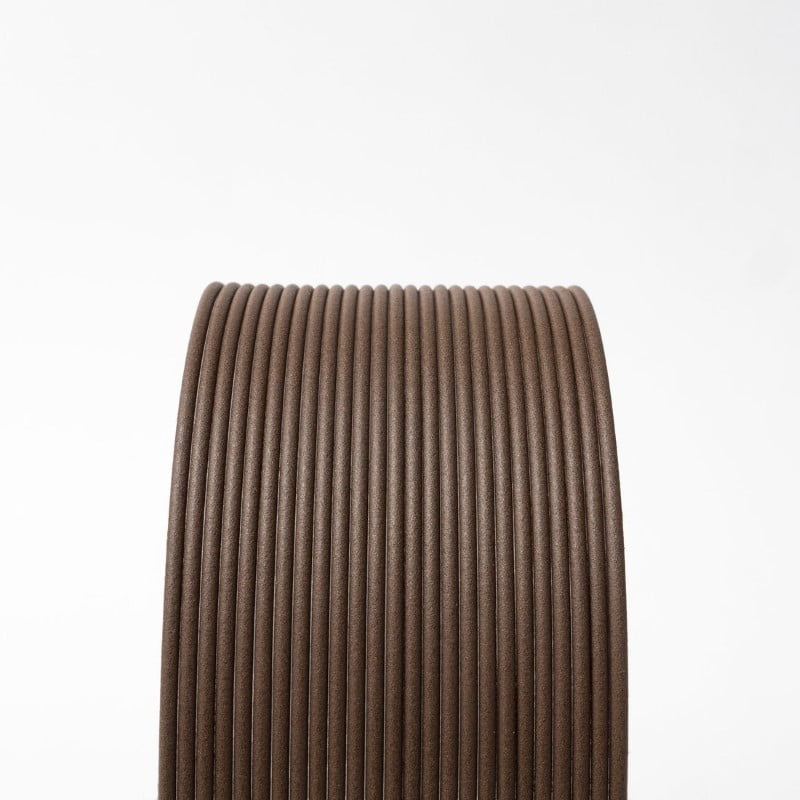
PLA Copper-filled ( Metal Composite ) - Cor
1.75mm (+-0.05mm) - Espessura / Tolerância de diâmetro
Fácil - Facilidade de Impressão
ProtoPasta é uma empresa situada nos Estados Unidos da América, de produção de filamentos para impressão 3D de alta qualidade.
Caracterizada pelos rolos feitos em cartão, esta marca é mundialmente famosa por ser especializada em materiais como PLA e ABS modificados com outros materiais, como o PLA Magnético; o PLA Condutivo; PLA de fibra de carbono; HTPLA de cobre, latão ou bronze; ou o ABS-PC.
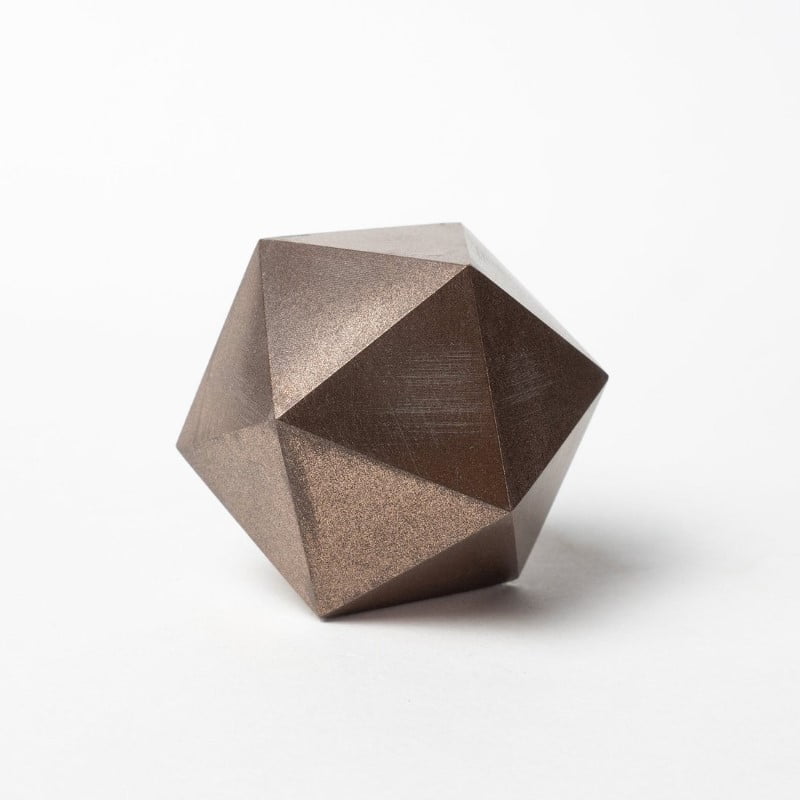
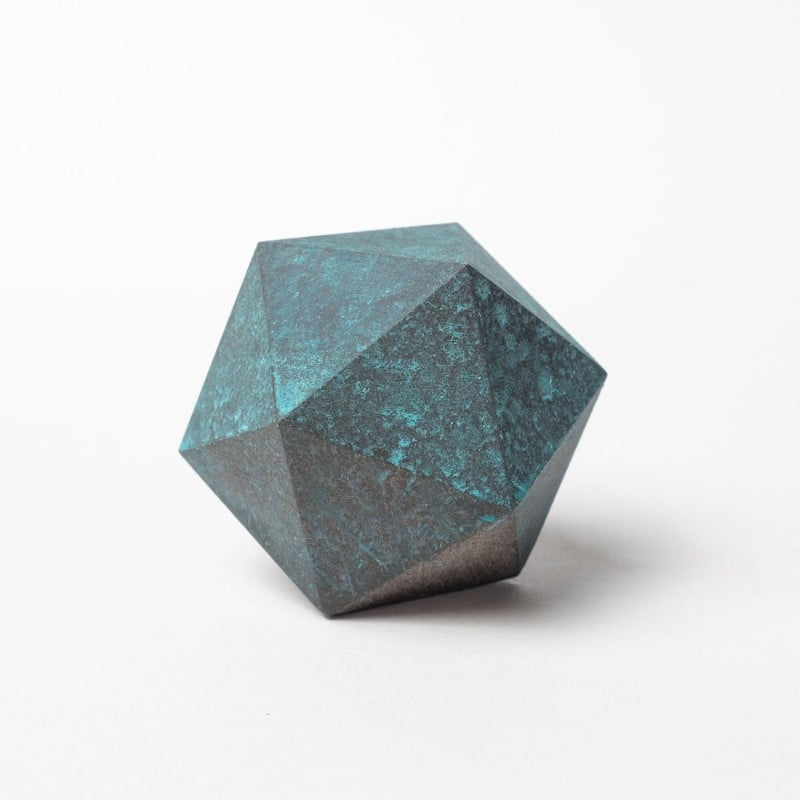
Introducing Bronze-Filled Metal Composite HTPLA .
Using real bronze powder, we've created a premium heat treatable metal PLA filament for 3D prints that finish just like real metal!
Our bronze composite filament is as versatile as it is beautiful, printing like plastic, but finishing like real metal for beautiful, durable parts from most standard 3D printers.
Whether you want your prints to be polished with the same bright mirror finish of shiny bronze coins or a naturally rustic finish with an acquired patina reminiscent of an aged bronze sculpture, the possibilities are endless with this specialty metal PLA filament.
With so many finishing options, the sky is the limit!
Scroll down or click the link below for more product specific details, finishing options, and application ideas for Bronze-Filled Metal Composite HTPLA.
Try these techniques separately or combine! Change the order or try something new. If you discover a new technique, make something beautiful, or discover something unexpected, share it! When you've got that perfect, WOW finish, consider preserving it with a clear coat or brush applicable water-based, food-safe, and dishwasher safe coating like Modge Podge. Practice your finishing a on a test piece like Protognome (download here).
This material has been flow optimized and has less moisture uptake than standard PLAs, however composites are still sometimes more tricky to print depending on hardware and software settings. The main challenge is to keep mass flow up (larger nozzle + fast speed) and in a single direction (minimal retraction) to avoid heat soak. More on that topic here.
We've created this page to bring you a premium PLA and HTPLA printing experience that rivals our premium material. Follow below to improve your 3D printing experience. In other words, here's your shortcut to awesomeness with pasta. If at the end of this document you have questions or need assistance, please contact us at support@protoplant.com.
Loose coils can be very tricky to manage. Going cowboy on your spool handling can quickly end up in a frustrating, tangled mess. Keep your loose coils wrangled with a spool holder like masterspool for a more trouble-free experience. Find out more about loose coil handling in Keith's blog post.
And for spooled filament, never let go of the loose end. When not in the printer extruder, tuck it away in the cardboard spool's corrugation! Also, avoid sharp bends and excessive force when loading filament into your printer.
At Proto-pasta, we make high quality filament. We aspire to make exceptional results easy, but a positive result is very much dependent on your hardware, set-up, adjustments, and process parameters. Matching hardware with process and material for a positive experience is not always straight-forward, but you can start by pairing the following settings with your printer for a good starting point, then tune or troubleshoot as required.
Volume flow rate together with temperature dictates how melted the material is. This is hardware & condition dependent based on hot end, nozzle & extruder type, material & manufacturer as well as layer fan type, position & settings. Extrusion width, layer thickness & speed changes affect volume flow which may change required/desired temperature.
Post your prints & tag us @Proto_pasta on Twitter and Instagram. Need more help? Consider typical pitfalls and fixes below.
We visited Joel and ended up with a helpful video on the subject:
Para uma correcta manutenção da sua impressora 3D, recomendamos sempre que trocar de material de filamento 3D, a efectuar uma purga com filamento especial de limpeza.
Desta forma garante que não ficam vestígios de material nas paredes do nozzle, evitando o acumular de crosta que é criado sempre que efectua trocas de material.
Com este produto evita problema como "clogs" e "jams" e fará com que o seu nozzle mantenha-se sempre limpo, durando muito mais tempo.
Poderá encontrar a partir de 1.49€ no seguinte LINK
Este material é altamente abrasivo. Recomendamos a utilização de Nozzles de aço endurecido.
Poderá encontrar no seguinte LINK
Para obter maior aderência à superfície da sua impressora 3D recomendamos a aplicar 3DLAC na base da plataforma.
Poderá encontrar no seguinte LINK
Este material é altamente higroscópico, absorvendo rapidamente a humidade do ar passados poucos minutos após aberto, impossibilitando desta forma a correcta impressão 3D do mesmo. O resultado das impressões 3D de materiais com humidade tendem a ser frágeis e de acabamento irregular ou em certos casos, torna-se simplesmente impossíveis de imprimir.
Deverá de usar soluções de caixas fechadas com dessecante como sílica ou caixas próprias secadoras de filamento.
Poderá encontrar no seguinte LINK
Download:
Technical and Safety Data Sheet
500g- Rolo
PLA Bronze-filled ( Metal Composite ) - Cor
1.75mm (+-0.05mm) - Espessura / Tolerância de diâmetro
Fácil - Facilidade de Impressão
ProtoPasta é uma empresa situada nos Estados Unidos da América, de produção de filamentos para impressão 3D de alta qualidade.
Caracterizada pelos rolos feitos em cartão, esta marca é mundialmente famosa por ser especializada em materiais como PLA e ABS modificados com outros materiais, como o PLA Magnético; o PLA Condutivo; PLA de fibra de carbono; HTPLA de cobre, latão ou bronze; ou o ABS-PC.
Protopasta Stainless Steel PLA filament is a dense material that prints as easily as standard PLA but results in heavy cast metal looking prints that can be brushed, sanded, or polished post-print to achieve amazing results.
Using real steel powder, this premium, metal-filled steel PLA filament is perfect for jewelry, costumes, props, figurines, crafting, robots, or any other 3D prints needing a truly stainless steel finish.


Introducing Stainless Steel-Filled Metal Composite PLA. Using real steel powder, we've created a premium metal PLA filament for 3D prints that finish just like real stainless steel! Our steel composite filament is as versatile as it is beautiful, printing like plastic, but finishing like real metal for beautiful, durable parts from most standard 3D printers.
We suggest experimenting with polishing using this starter kit (includes instructional videos).
**This filament is more abrasive than standard PLA. Be prepared to replace your nozzle and do 1st layer adjustment. Try a wear resistant and/or larger diameter nozzle for increased service intervals.
Try these techniques separately or combine! Change the order or try something new. If you discover a new technique, make something beautiful, or discover something unexpected, share it! When you've got that perfect, WOW finish, consider preserving it with a clear coat or brush applicable water-based, food-safe, and dishwasher safe coating like Modge Podge. Practice your finishing a on a test piece like Protognome (download here).
This material has been flow optimized and has less moisture uptake than standard PLAs, however composites are still sometimes more tricky to print depending on hardware and software settings. The main challenge is to keep mass flow up (larger nozzle + fast speed) and in a single direction (minimal retraction) to avoid heat soak. More on that topic here.
We've created this page to bring you a premium PLA and HTPLA printing experience that rivals our premium material. Follow below to improve your 3D printing experience. In other words, here's your shortcut to awesomeness with pasta. If at the end of this document you have questions or need assistance, please contact us at support@protoplant.com.
Loose coils can be very tricky to manage. Going cowboy on your spool handling can quickly end up in a frustrating, tangled mess. Keep your loose coils wrangled with a spool holder like masterspool for a more trouble-free experience. Find out more about loose coil handling in Keith's blog post.
And for spooled filament, never let go of the loose end. When not in the printer extruder, tuck it away in the cardboard spool's corrugation! Also, avoid sharp bends and excessive force when loading filament into your printer.
At Proto-pasta, we make high quality filament. We aspire to make exceptional results easy, but a positive result is very much dependent on your hardware, set-up, adjustments, and process parameters. Matching hardware with process and material for a positive experience is not always straight-forward, but you can start by pairing the following settings with your printer for a good starting point, then tune or troubleshoot as required.
Volume flow rate together with temperature dictates how melted the material is. This is hardware & condition dependent based on hot end, nozzle & extruder type, material & manufacturer as well as layer fan type, position & settings. Extrusion width, layer thickness & speed changes affect volume flow which may change required/desired temperature.
Post your prints & tag us @Proto_pasta on Twitter and Instagram. Need more help? Consider typical pitfalls and fixes below.
We visited Joel and ended up with a helpful video on the subject:
Protopasta Stainless Steel PLA is a dense material that prints as easily as standard PLA but results in heavy prints that can be finished post-print to achieve amazing results. Perfect for jewelry, costumes, props, figurines, crafting, robots, and more!
What is it made out of?
Protopasta Stainless Steel PLA is a compound of Natureworks 4043D PLA and finely ground, powderized stainless steel. In filament form, it is rather brittle, and should be handled with care to avoid breakage.
Is it stronger?
No. Protopasta Stainless Steel offers the aesthetic and density of metal, but because the stainless steel is finely powderized and encased in PLA, it is not stronger than standard PLA.
Is it conductive?
No. The stainless steel is too small and separated by the PLA to offer any noticeable amount of conductivity. You should try our Conductive PLA!
Finishing Techniques
In an unfinished form, prints look like cast metal. They can be left that way, or finished through a variety of methods to achieve different results. Here are some of the methods we have tried so far:
Spool Amount: Density vs. Length
3D printer filament is sold in grams /kg, even in the case of exotic materials with greater density. Our Stainless Steel PLA is quite dense compared to standard PLA. As a result, a 500 g spool of Stainless Steel PLA contains about 90 meters of filament, vs. nearly 200 meters on a 500 g spool of standard PLA.
Printer Settings
Protopasta Stainless Steel PLA prints well using standard PLA settings, however, it may have trouble getitng through smaller nozzles. We have had good success printing at 215° C using a .5mm nozzle and direct-drive spring loaded pinch-roll style extrusion head.
Density:
2.4 g/cm3 (2400 kg/m3)
Parameters:
Bed Temp (if available, is not required): 50° C
Hot End Temp: 195 – 220° C
Para uma correcta manutenção da sua impressora 3D, recomendamos sempre que trocar de material de filamento 3D, a efectuar uma purga com filamento especial de limpeza.
Desta forma garante que não ficam vestígios de material nas paredes do nozzle, evitando o acumular de crosta que é criado sempre que efectua trocas de material.
Com este produto evita problema como "clogs" e "jams" e fará com que o seu nozzle mantenha-se sempre limpo, durando muito mais tempo.
Poderá encontrar a partir de 1.49€ no seguinte LINK
Este material é altamente abrasivo. Recomendamos a utilização de Nozzles de aço endurecido.
Poderá encontrar no seguinte LINK
Para obter maior aderência à superfície da sua impressora 3D recomendamos a aplicar 3DLAC na base da plataforma.
Poderá encontrar no seguinte LINK
Este material é altamente higroscópico, absorvendo rapidamente a humidade do ar passados poucos minutos após aberto, impossibilitando desta forma a correcta impressão 3D do mesmo. O resultado das impressões 3D de materiais com humidade tendem a ser frágeis e de acabamento irregular ou em certos casos, torna-se simplesmente impossíveis de imprimir.
Deverá de usar soluções de caixas fechadas com dessecante como sílica ou caixas próprias secadoras de filamento.
Poderá encontrar no seguinte LINK
Download:
Technical and Safety Data Sheet
500g- Rolo
PLA Steel-filled ( Metal Composite ) - Cor
1.75mm (+-0.05mm) - Espessura / Tolerância de diâmetro
Fácil - Facilidade de Impressão
ProtoPasta é uma empresa situada nos Estados Unidos da América, de produção de filamentos para impressão 3D de alta qualidade.
Caracterizada pelos rolos feitos em cartão, esta marca é mundialmente famosa por ser especializada em materiais como PLA e ABS modificados com outros materiais, como o PLA Magnético; o PLA Condutivo; PLA de fibra de carbono; HTPLA de cobre, latão ou bronze; ou o ABS-PC.
Prints like PLA, behaves like metal! Experience our most "attractive" material yet!!!
Protopasta Rustable Magnetic Iron Metal PLA Composite is actually ferromagnetic.
It responds to magnets and behaves similarly to pure iron! Encapsulated in plastic, the iron maintains a stable matte, cast metal finish as printed, but can be rusted when desired.
More product specific details and application ideas for our Rustable Magnetic Iron Metal PLA Composite can be found below.

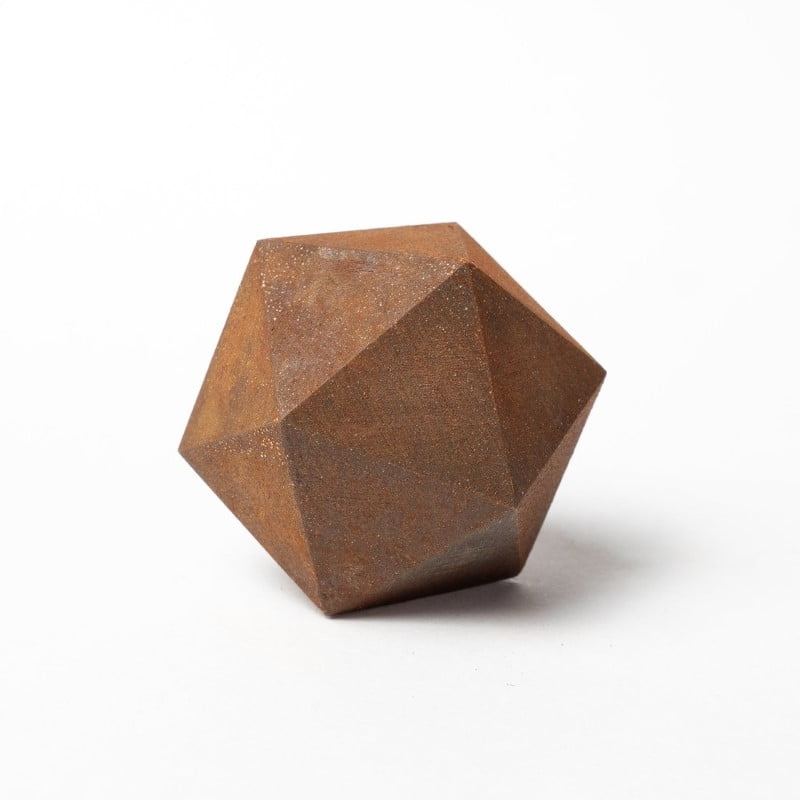
Proto-pasta Rustable Magnetic Iron Metal PLA Composite is actually ferromagnetic. It responds to magnets and behaves similarly to pure iron! Encapsulated in plastic, the iron maintains a stable matte, cast metal finish as printed, but can be rusted when desired. Here is why Proto-pasta Iron PLA is so interesting:
We recommend experimenting with creating a rusty patina like this:
**This filament is more abrasive than standard PLA. Be prepared to replace your nozzle and do 1st layer adjustment. Try a wear resistant and/or larger diameter nozzle for increased service intervals.
In filament form, FEPLA is slightly more brittle than standard PLA, and requires extra care when handling.
Processing is comparable to standard PLA. No heated bed required. Process may be less consistent on smaller nozzles and/or bowden type machines. We frequently print using direct-drive systems with 0.4 mm nozzles, though prefer 0.6 mm and 190-210C (standard PLA or a bit cooler) for the best experience.
This material has been flow optimized and has less moisture uptake than standard PLAs, however composites are still sometimes more tricky to print depending on hardware and software settings. The main challenge is to keep mass flow up (larger nozzle + fast speed) and in a single direction (minimal retraction) to avoid heat soak.
We've created this page to bring you a premium PLA and HTPLA printing experience that rivals our premium material. Follow below to improve your 3D printing experience. In other words, here's your shortcut to awesomeness with pasta. If at the end of this document you have questions or need assistance, please contact us at support@protoplant.com.
Loose coils can be very tricky to manage. Going cowboy on your spool handling can quickly end up in a frustrating, tangled mess. Keep your loose coils wrangled with a spool holder like masterspool for a more trouble-free experience. Find out more about loose coil handling in Keith's blog post.
And for spooled filament, never let go of the loose end. When not in the printer extruder, tuck it away in the cardboard spool's corrugation! Also, avoid sharp bends and excessive force when loading filament into your printer.
At Proto-pasta, we make high quality filament. We aspire to make exceptional results easy, but a positive result is very much dependent on your hardware, set-up, adjustments, and process parameters. Matching hardware with process and material for a positive experience is not always straight-forward, but you can start by pairing the following settings with your printer for a good starting point, then tune or troubleshoot as required.
Volume flow rate together with temperature dictates how melted the material is. This is hardware & condition dependent based on hot end, nozzle & extruder type, material & manufacturer as well as layer fan type, position & settings. Extrusion width, layer thickness & speed changes affect volume flow which may change required/desired temperature.
Post your prints & tag us @Proto_pasta on Twitter and Instagram. Need more help? Consider typical pitfalls and fixes below.
We visited Joel and ended up with a helpful video on the subject:
Protopasta Magnetic Iron PLA - as its name implies - responds to magnets and behaves similarly to pure iron, even to the point of rusting! Magnetism opens up a new world of practical applications and fun creations, and is an especially great choice for costume pieces and props!
What is it made out of?
Protopasta Magnetic Iron PLA is a compound of Natureworks 4043D PLA and finely ground iron powder. In filament form, it is rather brittle, and should be handled with care to avoid breakage.
Magnetic vs. Ferromagnetic
Iron is defined as “magnetic” but it is, more accurately speaking, ferromagnetic. That means it is attracted to magnetic fields. In short, magnets stick to it. So, you should note that magnets stick to prints made from Magnetic Iron PLA, but printed objects will not function as magnets. We call our material “Magnetic Iron PLA” to communicate that this material allows users to include the added benefits of magnetism when designing and printing 3D objects.
Could I magnetize my finished prints?
We haven't tested this ourselves, but it makes sense that thin prints could be magnetized by rubbing them 10-100 times across the positive side of a large magnet. Ferromagnets will tend to stay magnetized to some extent after being subjected to an external magnetic field due to a fascinating process called hysteresis. We will test this theory in a future blog post.
Permanent magnetism requires the use a strong electromagnetic coil (around 2 Tesla), but that process would melt your print, so as awesome as it sounds, don't try it.
Is It Stronger?
No. The strength of Protopasta Magnetic Iron PLA is similar, and likely somewhat less, than the strength of standard PLA. The iron in the filament is too finely ground to provide an increase in overall strength.
Is it conductive?
No. The iron is too small and separated by the PLA to offer any noticeable amount of conductivity. You should try our Conductive PLA!
Rusting Magnetic Iron Prints
To rust a print made with Magnetic PLA, lightly abrade the surface of your print with a wire brush to expose more iron particles to the air, then submerge the print in a salty solution for 2-3 days (or longer, if you're going for a very rusty look!).
Spool Amount: Density vs. Length
3D printer filament is sold in grams /kg, even in the case of exotic materials with greater density. Our Magnetic Iron PLA is quite dense compared to standard PLA. As a result, a 500 g spool of Magnetic Iron PLA contains about 100 meters of filament, vs. nearly 200 meters on a 500 g spool of standard PLA.
Printer Settings
Protopasta Magnetic Iron PLA prints at similar temperatures as standard PLA, though we have found it seems to like it about 10 degrees cooler than what we usually print PLA at. Quick cooling seems to increase the tendency to warp, so you might try turning your fan off and slowing your printer down a bit. Experiment and see what work best with your machine.
Density:
1.8 g/cm3 (1800 kg/m3)
Parameters:
Bed Temp (if available, is not required): 50° C
Hot End Temp: 185– 195° C
Para uma correcta manutenção da sua impressora 3D, recomendamos sempre que trocar de material de filamento 3D, a efectuar uma purga com filamento especial de limpeza.
Desta forma garante que não ficam vestígios de material nas paredes do nozzle, evitando o acumular de crosta que é criado sempre que efectua trocas de material.
Com este produto evita problema como "clogs" e "jams" e fará com que o seu nozzle mantenha-se sempre limpo, durando muito mais tempo.
Poderá encontrar a partir de 1.49€ no seguinte LINK
Este material é altamente abrasivo. Recomendamos a utilização de Nozzles de aço endurecido.
Poderá encontrar no seguinte LINK
Para obter maior aderência à superfície da sua impressora 3D recomendamos a aplicar 3DLAC na base da plataforma.
Poderá encontrar no seguinte LINK
Este material é altamente higroscópico, absorvendo rapidamente a humidade do ar passados poucos minutos após aberto, impossibilitando desta forma a correcta impressão 3D do mesmo. O resultado das impressões 3D de materiais com humidade tendem a ser frágeis e de acabamento irregular ou em certos casos, torna-se simplesmente impossíveis de imprimir.
Deverá de usar soluções de caixas fechadas com dessecante como sílica ou caixas próprias secadoras de filamento.
Poderá encontrar no seguinte LINK
Download:
Technical and Safety Data Sheet
500g- Rolo
PLA Iron-filled ( Metal Composite ) - Cor
1.75mm (+-0.05mm) - Espessura / Tolerância de diâmetro
Fácil - Facilidade de Impressão
ProtoPasta é uma empresa situada nos Estados Unidos da América, de produção de filamentos para impressão 3D de alta qualidade.
Caracterizada pelos rolos feitos em cartão, esta marca é mundialmente famosa por ser especializada em materiais como PLA e ABS modificados com outros materiais, como o PLA Magnético; o PLA Condutivo; PLA de fibra de carbono; HTPLA de cobre, latão ou bronze; ou o ABS-PC.
The original is still the best! World's First Carbon Fiber PLA filament was kickstarted by ProtoPlant nearly 5 years ago.
Others try, but can't match the quality and ease of printing experience afforded by this product.
Available at a cost low enough for everyday printing, try a mammoth 3kg spool for large format printing!
1.75mm diameter 3kg spools contain more than 1 km of filament! How cool is that?!?!

Protopasta Carbon Fiber PLA is based on our easy printing, high quality PLA. Made from the highest quality, dry ingredients and extruded with care in our Washington facility on our own purpose-built extrusion systems. CFPLA prints are demonstrably more rigid with easy processing (often using standard PLA settings) and support removal. Excellent layer adhesion and minimal warpage even without a heated bed make this a great everyday exotic for accurate parts. Layer lines disappear with the beautiful matte black finish. Also has a slight sheen due to the embedded carbon making it very photogenic!
**This filament is slightly more abrasive than standard PLA. Be prepared to replace your nozzle and do 1st layer adjustment after prolonged use or upgrade to a wear resistant nozzle for less maintenance.
In filament form, CFPLA is slightly more brittle than standard PLA, and requires extra care when handling.
Processing is comparable to standard PLA. No heated bed required. Process may be less consistent on smaller nozzles and/or bowden type machines,
We frequently print using direct-drive systems with 0.4mm nozzles and print as high as 240C, though suggest 0.6mm and 210-230C for the best experience.
We've created this page to bring you a premium PLA and HTPLA printing experience that rivals our premium material. Follow below to improve your 3D printing experience. In other words, here's your shortcut to awesomeness with pasta. If at the end of this document you have questions or need assistance, please contact us at support@protoplant.com.
Loose coils can be very tricky to manage. Going cowboy on your spool handling can quickly end up in a frustrating, tangled mess. Keep your loose coils wrangled with a spool holder like masterspool for a more trouble-free experience. Find out more about loose coil handling in Keith's blog post.
And for spooled filament, never let go of the loose end. When not in the printer extruder, tuck it away in the cardboard spool's corrugation! Also, avoid sharp bends and excessive force when loading filament into your printer.
At Proto-pasta, we make high quality filament. We aspire to make exceptional results easy, but a positive result is very much dependent on your hardware, set-up, adjustments, and process parameters. Matching hardware with process and material for a positive experience is not always straight-forward, but you can start by pairing the following settings with your printer for a good starting point, then tune or troubleshoot as required.
Volume flow rate together with temperature dictates how melted the material is. This is hardware & condition dependent based on hot end, nozzle & extruder type, material & manufacturer as well as layer fan type, position & settings. Extrusion width, layer thickness & speed changes affect volume flow which may change required/desired temperature.
Post your prints & tag us @Proto_pasta on Twitter and Instagram. Need more help? Consider typical pitfalls and fixes below.
We visited Joel and ended up with a helpful video on the subject:
Our most popular exotic material, prints made with our Carbon Fiber PLA are demonstrably more rigid, providing excellent structural strength and layer adhesion with very low warpage. It has a beautiful matte black finish with a slight sheen due to the embedded carbon.
What is it made out of?
Because of the chopped carbon, Protopasta Carbon Fiber PLA may have trouble getting through smaller nozzles. We have had good success using a .5mm nozzle and direct-drive spring loaded pinch-roll style extrusion head.Generally, our customers find it prints just like standard PLA on their machines (at around 195-210° F), though others find success running it a bit hotter (around 220° F). Experiment with your printer and see what works best for you.
Carbon fiber and your printer nozzle
The carbon fibers in our filament are processed for an optimum size: short enough to print in PLA without clogging nozzles, but long enough to provide the added rigidity carbon fiber is famous for. At this length, the chopped carbon fiber makes this filament more abrasive than standard PLA. Prolonged use may result in more wear on your 3D printer, particularly lower-end nozzles.
Para uma correcta manutenção da sua impressora 3D, recomendamos sempre que trocar de material de filamento 3D, a efectuar uma purga com filamento especial de limpeza.
Desta forma garante que não ficam vestígios de material nas paredes do nozzle, evitando o acumular de crosta que é criado sempre que efectua trocas de material.
Com este produto evita problema como "clogs" e "jams" e fará com que o seu nozzle mantenha-se sempre limpo, durando muito mais tempo.
Poderá encontrar a partir de 1.49€ no seguinte LINK
Este material é altamente abrasivo. Recomendamos a utilização de Nozzles de aço endurecido.
Poderá encontrar no seguinte LINK
Para obter maior aderência à superfície da sua impressora 3D recomendamos a aplicar 3DLAC na base da plataforma.
Poderá encontrar no seguinte LINK
Este material é altamente higroscópico, absorvendo rapidamente a humidade do ar passados poucos minutos após aberto, impossibilitando desta forma a correcta impressão 3D do mesmo. O resultado das impressões 3D de materiais com humidade tendem a ser frágeis e de acabamento irregular ou em certos casos, torna-se simplesmente impossíveis de imprimir.
Deverá de usar soluções de caixas fechadas com dessecante como sílica ou caixas próprias secadoras de filamento.
Poderá encontrar no seguinte LINK
Download:
Technical and Safety Data Sheet
500g- Rolo
PLA The Original ( Carbon Fiber Composite ) - Cor
1.75mm (+-0.05mm) - Espessura / Tolerância de diâmetro
Fácil - Facilidade de Impressão
ProtoPasta é uma empresa situada nos Estados Unidos da América, de produção de filamentos para impressão 3D de alta qualidade.
Caracterizada pelos rolos feitos em cartão, esta marca é mundialmente famosa por ser especializada em materiais como PLA e ABS modificados com outros materiais, como o PLA Magnético; o PLA Condutivo; PLA de fibra de carbono; HTPLA de cobre, latão ou bronze; ou o ABS-PC.
No sparkles or fancy finishes here, just good-as-new, single-source 100% post-industrial recycled PETG (also know as CPE or co-polyester) resin extruded into filament and spooled onto cardboard spools to minimize environmental impact and maximize value.
Many filaments are wound onto wasteful plastic spools because it's cheap and easy, but cardboard is sturdy enough for single use, saves shipping weight, and is easily recycled when done!
Proto-pasta filament is first dried, then extruded without moisture using air cooling for exceptional quality.
Minimal waste, no water use, and no additives because less is more when meeting basic needs.

We've created this page to bring you a premium PLA and HTPLA printing experience that rivals our premium material. Follow below to improve your 3D printing experience. In other words, here's your shortcut to awesomeness with pasta. If at the end of this document you have questions or need assistance, please contact us at support@protoplant.com.
Loose coils can be very tricky to manage. Going cowboy on your spool handling can quickly end up in a frustrating, tangled mess. Keep your loose coils wrangled with a spool holder like masterspool for a more trouble-free experience. Find out more about loose coil handling in Keith's blog post.
And for spooled filament, never let go of the loose end. When not in the printer extruder, tuck it away in the cardboard spool's corrugation! Also, avoid sharp bends and excessive force when loading filament into your printer.
At Proto-pasta, we make high quality filament. We aspire to make exceptional results easy, but a positive result is very much dependent on your hardware, set-up, adjustments, and process parameters. Matching hardware with process and material for a positive experience is not always straight-forward, but you can start by pairing the following settings with your printer for a good starting point, then tune or troubleshoot as required.
Volume flow rate together with temperature dictates how melted the material is. This is hardware & condition dependent based on hot end, nozzle & extruder type, material & manufacturer as well as layer fan type, position & settings. Extrusion width, layer thickness & speed changes affect volume flow which may change required/desired temperature.
Post your prints & tag us @Proto_pasta on Twitter and Instagram. Need more help? Consider typical pitfalls and fixes below.
We visited Joel and ended up with a helpful video on the subject:
Para uma correcta manutenção da sua impressora 3D, recomendamos sempre que trocar de material de filamento 3D, a efectuar uma purga com filamento especial de limpeza.
Desta forma garante que não ficam vestígios de material nas paredes do nozzle, evitando o acumular de crosta que é criado sempre que efectua trocas de material.
Com este produto evita problema como "clogs" e "jams" e fará com que o seu nozzle mantenha-se sempre limpo, durando muito mais tempo.
Poderá encontrar a partir de 1.49€ no seguinte LINK
Para obter maior aderência à superfície da sua impressora 3D recomendamos a aplicar 3DLAC na base da plataforma.
Poderá encontrar no seguinte LINK
Este material é altamente higroscópico, absorvendo rapidamente a humidade do ar passados poucos minutos após aberto, impossibilitando desta forma a correcta impressão 3D do mesmo. O resultado das impressões 3D de materiais com humidade tendem a ser frágeis e de acabamento irregular ou em certos casos, torna-se simplesmente impossíveis de imprimir.
Deverá de usar soluções de caixas fechadas com dessecante como sílica ou caixas próprias secadoras de filamento.
Poderá encontrar no seguinte LINK
Download:
Technical and Safety Data Sheet
1kg- Rolo
PETG Back-to-basics Clear 100% Post-industrial Recycled - Cor
1.75mm (+-0.05mm) - Espessura / Tolerância de diâmetro
Fácil - Facilidade de Impressão
ProtoPasta é uma empresa situada nos Estados Unidos da América, de produção de filamentos para impressão 3D de alta qualidade.
Caracterizada pelos rolos feitos em cartão, esta marca é mundialmente famosa por ser especializada em materiais como PLA e ABS modificados com outros materiais, como o PLA Magnético; o PLA Condutivo; PLA de fibra de carbono; HTPLA de cobre, latão ou bronze; ou o ABS-PC.
No sparkles or fancy finishes here, just high clarity SK GE300 PETG (also know as CPE or co-polyester) resin extruded into filament and spooled onto cardboard spools to minimize environmental impact and maximize value.
Many filaments are wound onto wasteful plastic spools because it's cheap and easy, but cardboard is sturdy enough for single use, saves shipping weight, and is easily recycled when done!
Protopasta filament is first dried, then extruded without moisture using air cooling for exceptional quality.
Minimal waste, no water use, and no additives because less is more when meeting basic needs.
We've created this page to bring you a premium PLA and HTPLA printing experience that rivals our premium material. Follow below to improve your 3D printing experience. In other words, here's your shortcut to awesomeness with pasta. If at the end of this document you have questions or need assistance, please contact us at support@protoplant.com.
Loose coils can be very tricky to manage. Going cowboy on your spool handling can quickly end up in a frustrating, tangled mess. Keep your loose coils wrangled with a spool holder like masterspool for a more trouble-free experience. Find out more about loose coil handling in Keith's blog post.
And for spooled filament, never let go of the loose end. When not in the printer extruder, tuck it away in the cardboard spool's corrugation! Also, avoid sharp bends and excessive force when loading filament into your printer.
At Proto-pasta, we make high quality filament. We aspire to make exceptional results easy, but a positive result is very much dependent on your hardware, set-up, adjustments, and process parameters. Matching hardware with process and material for a positive experience is not always straight-forward, but you can start by pairing the following settings with your printer for a good starting point, then tune or troubleshoot as required.
Volume flow rate together with temperature dictates how melted the material is. This is hardware & condition dependent based on hot end, nozzle & extruder type, material & manufacturer as well as layer fan type, position & settings. Extrusion width, layer thickness & speed changes affect volume flow which may change required/desired temperature.
Post your prints & tag us @Proto_pasta on Twitter and Instagram. Need more help? Consider typical pitfalls and fixes below.
We visited Joel and ended up with a helpful video on the subject:
Para uma correcta manutenção da sua impressora 3D, recomendamos sempre que trocar de material de filamento 3D, a efectuar uma purga com filamento especial de limpeza.
Desta forma garante que não ficam vestígios de material nas paredes do nozzle, evitando o acumular de crosta que é criado sempre que efectua trocas de material.
Com este produto evita problema como "clogs" e "jams" e fará com que o seu nozzle mantenha-se sempre limpo, durando muito mais tempo.
Poderá encontrar a partir de 1.49€ no seguinte LINK
Para obter maior aderência à superfície da sua impressora 3D recomendamos a aplicar 3DLAC na base da plataforma.
Poderá encontrar no seguinte LINK
Este material é altamente higroscópico, absorvendo rapidamente a humidade do ar passados poucos minutos após aberto, impossibilitando desta forma a correcta impressão 3D do mesmo. O resultado das impressões 3D de materiais com humidade tendem a ser frágeis e de acabamento irregular ou em certos casos, torna-se simplesmente impossíveis de imprimir.
Deverá de usar soluções de caixas fechadas com dessecante como sílica ou caixas próprias secadoras de filamento.
Poderá encontrar no seguinte LINK
Download:
Technical and Safety Data Sheet
1kg- Rolo
PETG Back-to-basics Clear GE300 - Cor
1.75mm (+-0.05mm) - Espessura / Tolerância de diâmetro
Fácil - Facilidade de Impressão