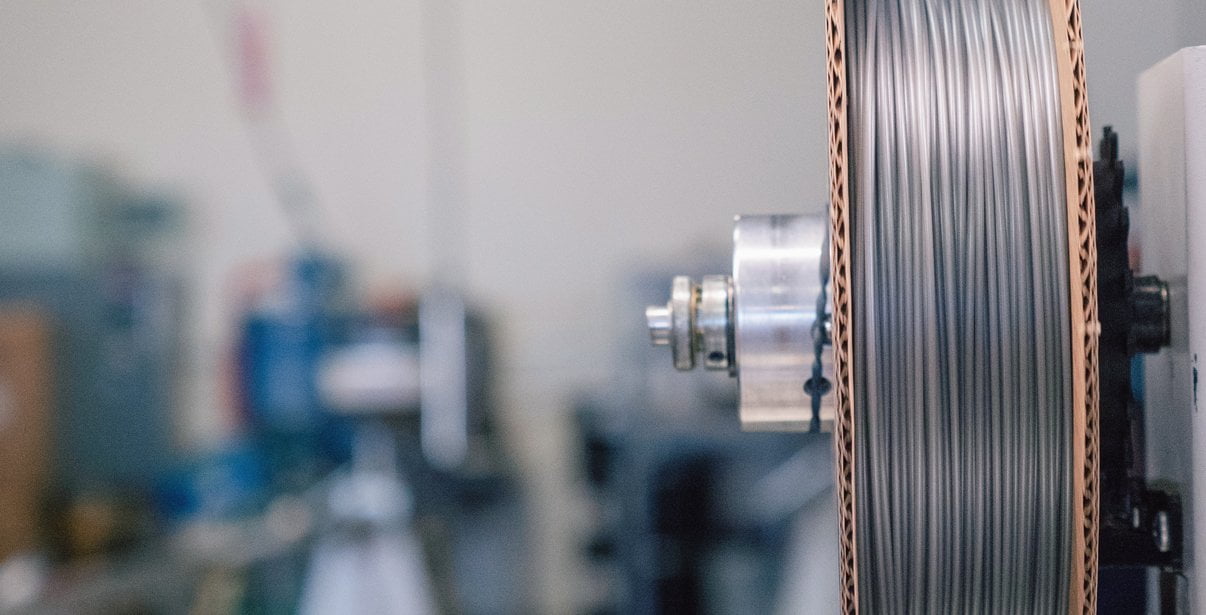
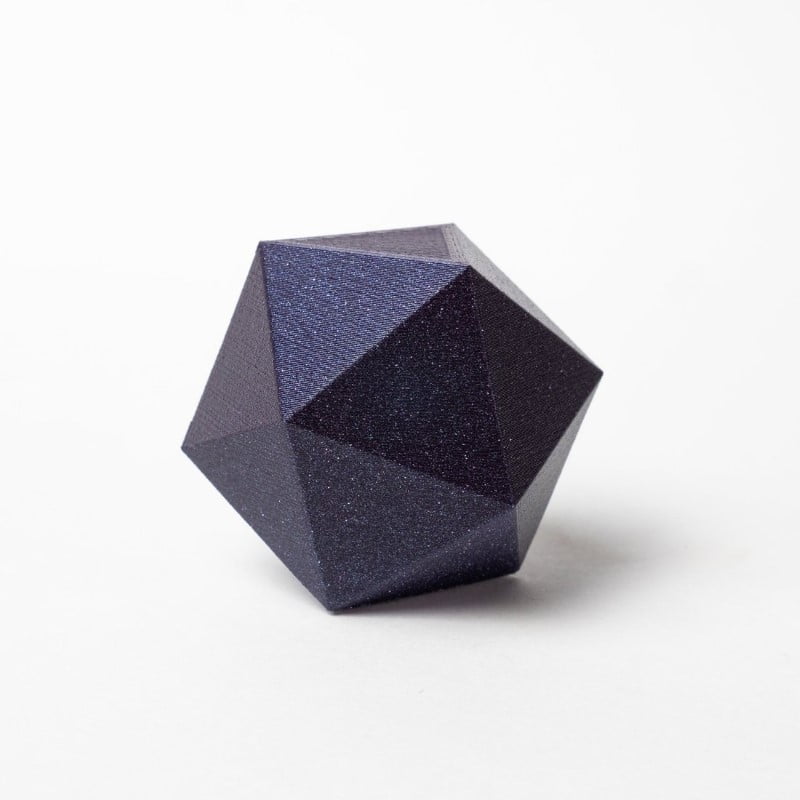
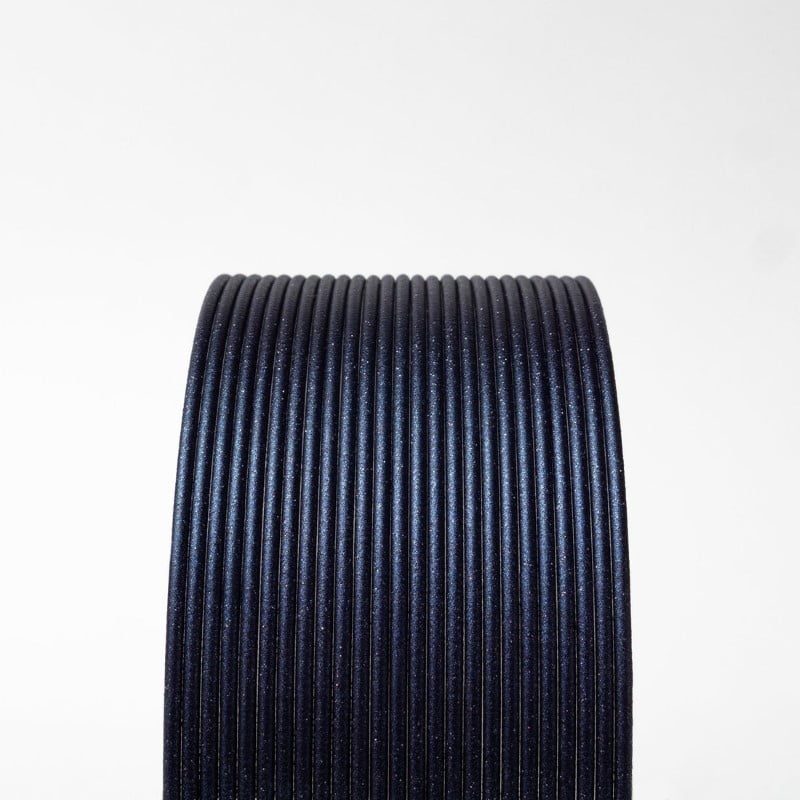
ProtoPasta é uma empresa situada nos Estados Unidos da América, de produção de filamentos para impressão 3D de alta qualidade.
Caracterizada pelos rolos feitos em cartão, esta marca é mundialmente famosa por ser especializada em materiais como PLA e ABS modificados com outros materiais, como o PLA Magnético; o PLA Condutivo; PLA de fibra de carbono; HTPLA de cobre, latão ou bronze; ou o ABS-PC.
"Electric Lemonade" is a custom color designed by Steve Abrams (@Artobot on Instagram & Twitter) in collaboration with Proto-pasta at our 2nd Filament Workshop.
Scroll to the bottom workshop page to enjoy the video and reviews.
Below, check out Steve's workshop spools and a beautiful Electric Lemonade print.
For more of Steve's work, you can also visit his etsy store.
Like our other HTPLAs, Metallic HTPLA can be "Heat Treated" to increase crystallinity for "Higher Temperature" resistance compared to amorphous PLA, ABS, and co-polyesters like PETG! Glittler Flake HTPLA prints translucence, but turns opaque when heat treated (or crystallized). With a more crystalline structure, heat treated HTPLA parts can hold form to near melting, though temperatures where the material is practically useful vary greatly depending on geometry and load conditions! For this improved the performance, your prints should be baked in an oven until you see a change from translucent to opaque with reduced gloss. This visual change indicating the improved performance! We've seen the change take place in 5-10 minutes on thin walled parts but can take an hour or more. We've had good luck in a quality, at home convection oven at 110C (225F). Parts will get very "floppy" before becoming more firm, so please leave supports on your parts or support them and bake them on a flat, non-radiating surface (like glass, ceramic, or composite).
For this improved performance, your prints should be baked in an oven until you see a change from translucent pink to opaque pink with reduced gloss. This visual change indicates the improved performance! We've seen the change take place in 5-10 minutes on thin walled parts but can take an hour or more. We've had good luck in a quality, at home convection oven at 110C (225F). Parts will get very "floppy" before becoming more firm, so please leave supports on your parts or support them and bake them on a flat, non-radiating surface (like glass, ceramic, or composite).
In our experience, good results were achieved using standard PLA parameters ranging from 195-225C nozzle with standard build surface preparation (blue tape, glue stick, or BuildTak). No heated bed required but up to 60C is okay. Beware, if the bed temperature is too high, your part base could actually heat treat while printing, increasing warping and decreasing adhesion. Some shrinkage will occur in the heat treating process, so dimension critical parts may need to be scaled appropriately (as much as 2.5% in our experience).
Looking for increased heat resistance without the need to switch to ABS? Protopasta High Temperature PLA offers heat deflection of up to 88° C (190.4° F) compared to standard PLA of 45-54° C (113-135° F). This makes it a great choice for moving parts (gears, RepRap pieces, etc) or prints that would face moderately high temperatures. Our High Temperature PLA is white, but can be painted after annealing.
We've created this page to bring you a premium PLA and HTPLA printing experience that rivals our premium material. Follow below to improve your 3D printing experience. In other words, here's your shortcut to awesomeness with pasta. If at the end of this document you have questions or need assistance, please contact us at [email protected].
Loose coils can be very tricky to manage. Going cowboy on your spool handling can quickly end up in a frustrating, tangled mess. Keep your loose coils wrangled with a spool holder like masterspool for a more trouble-free experience. Find out more about loose coil handling in Keith's blog post.
And for spooled filament, never let go of the loose end. When not in the printer extruder, tuck it away in the cardboard spool's corrugation! Also, avoid sharp bends and excessive force when loading filament into your printer.
At Proto-pasta, we make high quality filament. We aspire to make exceptional results easy, but a positive result is very much dependent on your hardware, set-up, adjustments, and process parameters. Matching hardware with process and material for a positive experience is not always straight-forward, but you can start by pairing the following settings with your printer for a good starting point, then tune or troubleshoot as required.
Volume flow rate together with temperature dictates how melted the material is. This is hardware & condition dependent based on hot end, nozzle & extruder type, material & manufacturer as well as layer fan type, position & settings. Extrusion width, layer thickness & speed changes affect volume flow which may change required/desired temperature.
Post your prints & tag us @Proto_pasta on Twitter and Instagram. Need more help? Consider typical pitfalls and fixes below.
We visited Joel and ended up with a helpful video on the subject:
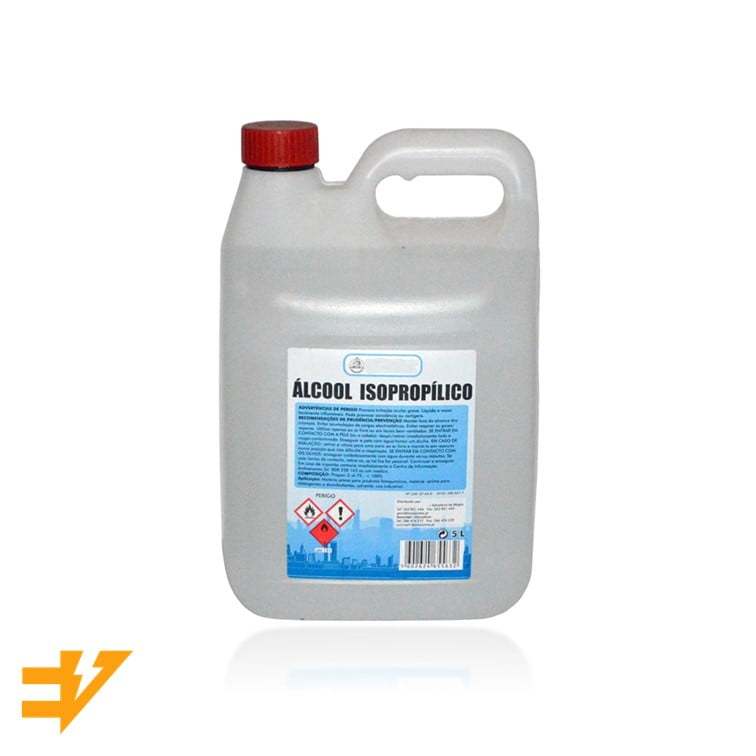
Para uma correcta manutenção da sua impressora 3D, recomendamos sempre que trocar de material de filamento 3D, a efectuar uma purga com filamento especial de limpeza.
Desta forma garante que não ficam vestígios de material nas paredes do nozzle, evitando o acumular de crosta que é criado sempre que efectua trocas de material.
Com este produto evita problema como "clogs" e "jams" e fará com que o seu nozzle mantenha-se sempre limpo, durando muito mais tempo.
Poderá encontrar a partir de 1.49€ no seguinte LINK

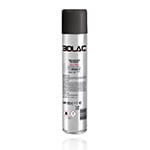
Para obter maior aderência à superfície da sua impressora 3D recomendamos a aplicar 3DLAC na base da plataforma.
Poderá encontrar no seguinte LINK
Este material é altamente higroscópico, absorvendo rapidamente a humidade do ar passados poucos minutos após aberto, impossibilitando desta forma a correcta impressão 3D do mesmo. O resultado das impressões 3D de materiais com humidade tendem a ser frágeis e de acabamento irregular ou em certos casos, torna-se simplesmente impossíveis de imprimir.
Deverá de usar soluções de caixas fechadas com dessecante como sílica ou caixas próprias secadoras de filamento.
Poderá encontrar no seguinte LINK
Download:
Technical and Safety Data Sheet
500g- Rolo
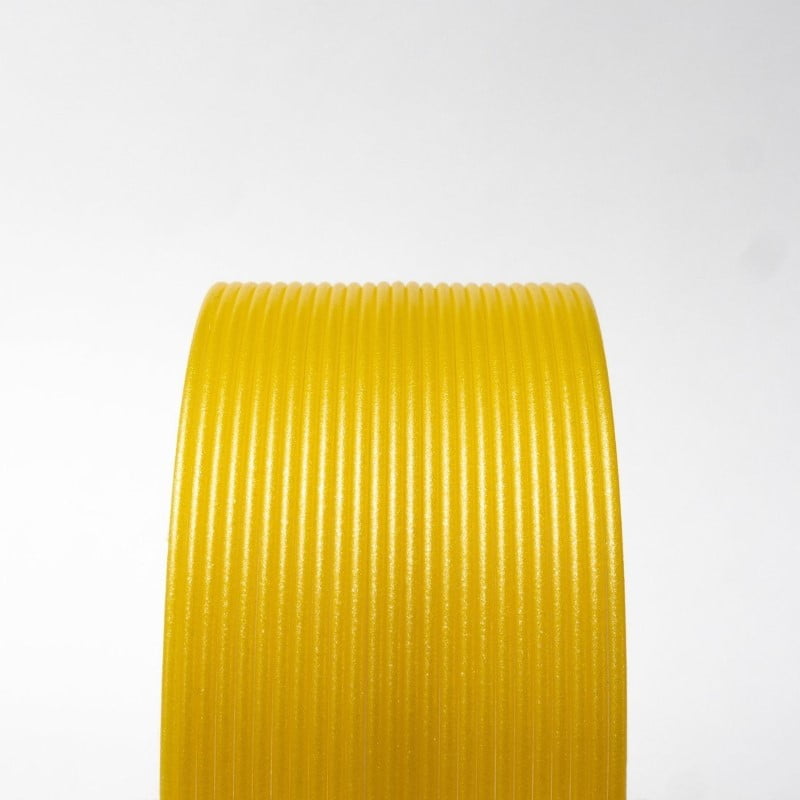
HTPLA Artobot "Electric Lemonade" Metallic Yellow HTPLA ( Community Inspired ) - Cor
1.75mm (+-0.05mm) - Espessura / Tolerância de diâmetro
Muito Fácil - Facilidade de Impressão
ProtoPasta é uma empresa situada nos Estados Unidos da América, de produção de filamentos para impressão 3D de alta qualidade.
Caracterizada pelos rolos feitos em cartão, esta marca é mundialmente famosa por ser especializada em materiais como PLA e ABS modificados com outros materiais, como o PLA Magnético; o PLA Condutivo; PLA de fibra de carbono; HTPLA de cobre, latão ou bronze; ou o ABS-PC.
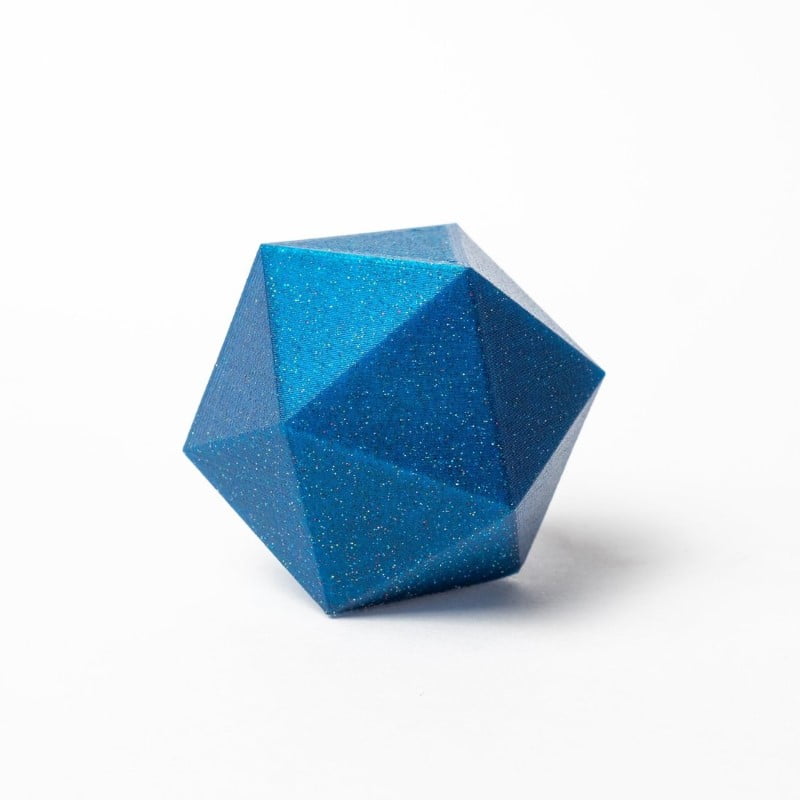
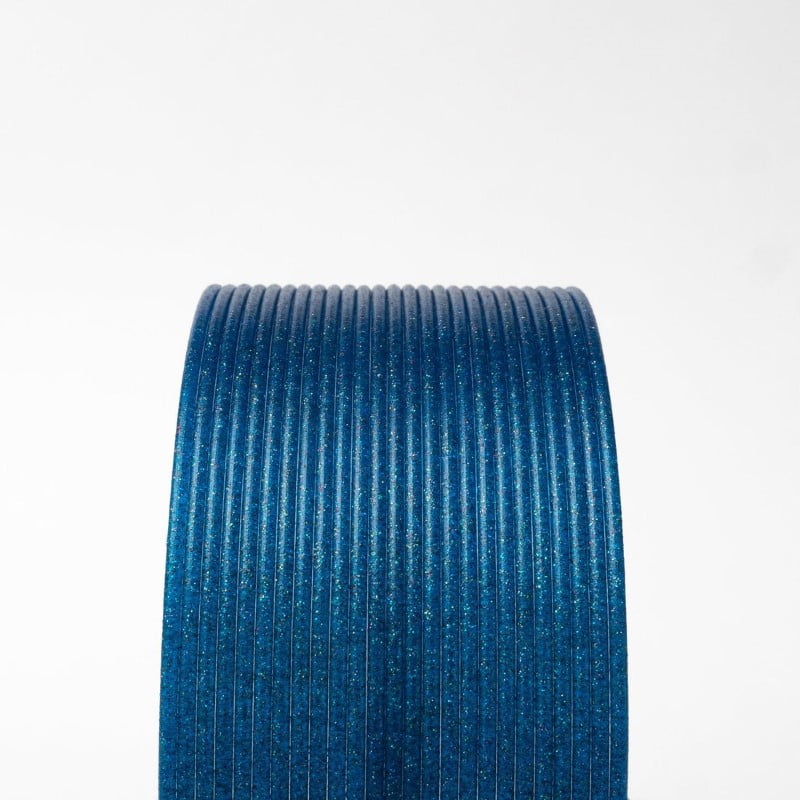
Designed by Protopasta Filament-making Workshop attendee Ben Nickles and voted "favorite " by the attendees, I introduce to you Blue Wonder Glitter Flake HTPLA .
On July 21st, our workshop attendees got first access to our new gold and multi-color glitter flake concentrate during our first ever filament-making workshop!
Ben seized the day in designing this one-of-a-kind metallic blue PLA filament and everyone loved it so much that we agreed to release it, commemorating the experience.
Other than being an original creation, you might wonder how this blue is different than others? Well, it's translucent and has big multi-color flecks!
For this improved the performance, your prints should be baked in an oven until you see a change from translucent to opaque with reduced gloss. This visual change indicating the improved performance! We've seen the change take place in 5-10 minutes on thin walled parts but can take an hour or more. We've had good luck in a quality, at home convection oven at 110C (225F). Parts will get very "floppy" before becoming more firm, so please leave supports on your parts or support them and bake them on a flat, non-radiating surface (like glass, ceramic, or composite).
No abrasive fillers so expect normal wear with standard nozzles.
In our experience, good results were achieved using standard PLA parameters ranging from 195-225C nozzle with standard build surface preparation (blue tape, glue stick, or BuildTak). No heated bed required but up to 60C is okay. Beware, if the bed temperature is too high, your part base could actually heat treat while printing, increasing warping and decreasing adhesion. Some shrinkage will occur in the heat treating process, so dimension critical parts may need to be scaled appropriately (as much as 2.5% in our experience).
Looking for increased heat resistance without the need to switch to ABS? Protopasta High Temperature PLA offers heat deflection of up to 88° C (190.4° F) compared to standard PLA of 45-54° C (113-135° F). This makes it a great choice for moving parts (gears, RepRap pieces, etc) or prints that would face moderately high temperatures. Our High Temperature PLA is white, but can be painted after annealing.
We've created this page to bring you a premium PLA and HTPLA printing experience that rivals our premium material. Follow below to improve your 3D printing experience. In other words, here's your shortcut to awesomeness with pasta. If at the end of this document you have questions or need assistance, please contact us at [email protected].
Loose coils can be very tricky to manage. Going cowboy on your spool handling can quickly end up in a frustrating, tangled mess. Keep your loose coils wrangled with a spool holder like masterspool for a more trouble-free experience. Find out more about loose coil handling in Keith's blog post.
And for spooled filament, never let go of the loose end. When not in the printer extruder, tuck it away in the cardboard spool's corrugation! Also, avoid sharp bends and excessive force when loading filament into your printer.
At Proto-pasta, we make high quality filament. We aspire to make exceptional results easy, but a positive result is very much dependent on your hardware, set-up, adjustments, and process parameters. Matching hardware with process and material for a positive experience is not always straight-forward, but you can start by pairing the following settings with your printer for a good starting point, then tune or troubleshoot as required.
Volume flow rate together with temperature dictates how melted the material is. This is hardware & condition dependent based on hot end, nozzle & extruder type, material & manufacturer as well as layer fan type, position & settings. Extrusion width, layer thickness & speed changes affect volume flow which may change required/desired temperature.
Post your prints & tag us @Proto_pasta on Twitter and Instagram. Need more help? Consider typical pitfalls and fixes below.
We visited Joel and ended up with a helpful video on the subject:
Para uma correcta manutenção da sua impressora 3D, recomendamos sempre que trocar de material de filamento 3D, a efectuar uma purga com filamento especial de limpeza.
Desta forma garante que não ficam vestígios de material nas paredes do nozzle, evitando o acumular de crosta que é criado sempre que efectua trocas de material.
Com este produto evita problema como "clogs" e "jams" e fará com que o seu nozzle mantenha-se sempre limpo, durando muito mais tempo.
Poderá encontrar a partir de 1.49€ no seguinte LINK
Para obter maior aderência à superfície da sua impressora 3D recomendamos a aplicar 3DLAC na base da plataforma.
Poderá encontrar no seguinte LINK
Este material é altamente higroscópico, absorvendo rapidamente a humidade do ar passados poucos minutos após aberto, impossibilitando desta forma a correcta impressão 3D do mesmo. O resultado das impressões 3D de materiais com humidade tendem a ser frágeis e de acabamento irregular ou em certos casos, torna-se simplesmente impossíveis de imprimir.
Deverá de usar soluções de caixas fechadas com dessecante como sílica ou caixas próprias secadoras de filamento.
Poderá encontrar no seguinte LINK
Download:
Technical and Safety Data Sheet
500g- Rolo
HTPLA Wonder Blue HTPLA with Multi-color Glitter ( Community Inspired ) - Cor
1.75mm (+-0.05mm) - Espessura / Tolerância de diâmetro
Muito Fácil - Facilidade de Impressão
ProtoPasta é uma empresa situada nos Estados Unidos da América, de produção de filamentos para impressão 3D de alta qualidade.
Caracterizada pelos rolos feitos em cartão, esta marca é mundialmente famosa por ser especializada em materiais como PLA e ABS modificados com outros materiais, como o PLA Magnético; o PLA Condutivo; PLA de fibra de carbono; HTPLA de cobre, latão ou bronze; ou o ABS-PC.
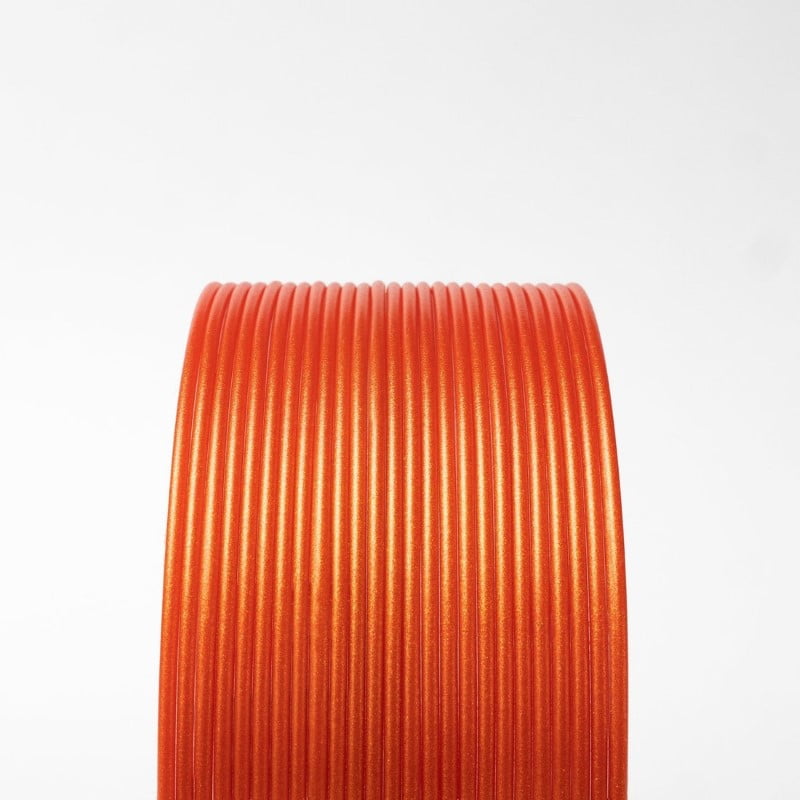
Special thanks to Thomas Sanladerer (toms3d.org) for visiting Protoplant and participating in the design and manufacture of his very own Protopasta color, Tangerine Orange Metallic (TOM) Gold HTPLA .
Inspired by wild, dynamic colors like those made popular by Lotus Cars, this color dynamically shifts in the light from gold to orange.
We hope sharing the process of making and the resulting one-of-a-kind product inspires you to print beautiful, cherished things!
For this improved the performance, your prints should be baked in an oven until you see a change from translucent to opaque with reduced gloss. This visual change indicating the improved performance! We've seen the change take place in 5-10 minutes on thin walled parts but can take an hour or more. We've had good luck in a quality, at home convection oven at 110C (225F). Parts will get very "floppy" before becoming more firm, so please leave supports on your parts or support them and bake them on a flat, non-radiating surface (like glass, ceramic, or composite).
No abrasive fillers so expect normal wear with standard nozzles.
In our experience, good results were achieved using standard PLA parameters ranging from 195-225C nozzle with standard build surface preparation (blue tape, glue stick, or BuildTak). No heated bed required but up to 60C is okay. Beware, if the bed temperature is too high, your part base could actually heat treat while printing, increasing warping and decreasing adhesion. Some shrinkage will occur in the heat treating process, so dimension critical parts may need to be scaled appropriately (as much as 2.5% in our experience).
HTPLA prints well at 205-225 C, however it's important to match temp to your hardware & volume flow rate. With a typical hotend, you should be able to print at 205 C without jamming at a low flow rate. In machines with hardware that tends towards jamming, consider this video with Joel Telling.
Lower volume flows require lower temps, while higher volume flows require higher temps. In the previously-mentioned video, one way to overcome jamming is to set your temp to a higher-than-typical 240 C. This should then be matched with a high flow rate for a quality printing result.
For direct drives with a short distance between drive gears & nozzle, volume flows can approach 7-8 cubic mm/s or more if printing hot to overcome jamming. For bowden tubes where the distance between drive gear & nozzle are great or less powerful hotends, as little as 2 and as much as 4 cubic mm/s may be the limit. Beware of unintended speed changes from faster infills & slowing down for outlines or short layers. Consider our Ultimaker-specific blog for more on this topic.
A constant speed throughout the part is ideal from an extrusion perspective. Knowing your extrusion width, layer thickness & speed you can calculate your volume flow rate with the calculator like found in the previously-mentioned Ultimaker blog. Alternatively, if you know your volume flow rate limit, extrusion width & layer thickness, you can calculate your speed limit.
PLA & HTPLA are amorphous in structure as printed (no heat treating) & though both are adequate performers in an office environment, they have poor temperature stability, loosing significant stiffness at temps nearing 60 C. Different than standard PLA, HTPLA is designed to survive heat treating for higher temp stability in a no/minimal load condition to near onset of melting (155 C). That's an astonishing improvement in thermal stability compared to standard PLA after a quick bake in the oven after printing.
In as little as 5-10 minutes for small, thin parts, HTPLA quickly crystallizes in an oven at 95-115 C (200-240 F) to become more stiff & hold form above glass transition (60 C). Depending on part geometry, setup & technique, parts can deform and shrink. Best results are with flat and/or supported parts with 100% infill. In this instance we experienced x/y shrinkage of about 2% & growth of about 1% in z.
Be sure to avoid hot spots (non-radiating surfaces & no glowing coils) in the oven used for baking & experiment before baking a prized part. Un-printed filament works great for experimentation & translucent makes the transformation most visible! Heat treating is an art, but the resulting improved thermal performance, if needed, is well-worth exploring. You'll be shocked by the improved thermal stability of your HTPLA parts!!!
Looking for increased heat resistance without the need to switch to ABS? Protopasta High Temperature PLA offers heat deflection of up to 88° C (190.4° F) compared to standard PLA of 45-54° C (113-135° F). This makes it a great choice for moving parts (gears, RepRap pieces, etc) or prints that would face moderately high temperatures. Our High Temperature PLA is white, but can be painted after annealing.
We've created this page to bring you a premium PLA and HTPLA printing experience that rivals our premium material. Follow below to improve your 3D printing experience. In other words, here's your shortcut to awesomeness with pasta. If at the end of this document you have questions or need assistance, please contact us at [email protected].
Loose coils can be very tricky to manage. Going cowboy on your spool handling can quickly end up in a frustrating, tangled mess. Keep your loose coils wrangled with a spool holder like masterspool for a more trouble-free experience. Find out more about loose coil handling in Keith's blog post.
And for spooled filament, never let go of the loose end. When not in the printer extruder, tuck it away in the cardboard spool's corrugation! Also, avoid sharp bends and excessive force when loading filament into your printer.
At Proto-pasta, we make high quality filament. We aspire to make exceptional results easy, but a positive result is very much dependent on your hardware, set-up, adjustments, and process parameters. Matching hardware with process and material for a positive experience is not always straight-forward, but you can start by pairing the following settings with your printer for a good starting point, then tune or troubleshoot as required.
Volume flow rate together with temperature dictates how melted the material is. This is hardware & condition dependent based on hot end, nozzle & extruder type, material & manufacturer as well as layer fan type, position & settings. Extrusion width, layer thickness & speed changes affect volume flow which may change required/desired temperature.
Post your prints & tag us @Proto_pasta on Twitter and Instagram. Need more help? Consider typical pitfalls and fixes below.
We visited Joel and ended up with a helpful video on the subject:
Para uma correcta manutenção da sua impressora 3D, recomendamos sempre que trocar de material de filamento 3D, a efectuar uma purga com filamento especial de limpeza.
Desta forma garante que não ficam vestígios de material nas paredes do nozzle, evitando o acumular de crosta que é criado sempre que efectua trocas de material.
Com este produto evita problema como "clogs" e "jams" e fará com que o seu nozzle mantenha-se sempre limpo, durando muito mais tempo.
Poderá encontrar a partir de 1.49€ no seguinte LINK
Para obter maior aderência à superfície da sua impressora 3D recomendamos a aplicar 3DLAC na base da plataforma.
Poderá encontrar no seguinte LINK
Este material é altamente higroscópico, absorvendo rapidamente a humidade do ar passados poucos minutos após aberto, impossibilitando desta forma a correcta impressão 3D do mesmo. O resultado das impressões 3D de materiais com humidade tendem a ser frágeis e de acabamento irregular ou em certos casos, torna-se simplesmente impossíveis de imprimir.
Deverá de usar soluções de caixas fechadas com dessecante como sílica ou caixas próprias secadoras de filamento.
Poderá encontrar no seguinte LINK
Download:
Technical and Safety Data Sheet
500g- Rolo
HTPLA Tangerine Orange Metallic Gold HTPLA ( Community Inspired ) - Cor
1.75mm (+-0.05mm) - Espessura / Tolerância de diâmetro
Muito Fácil - Facilidade de Impressão
ProtoPasta é uma empresa situada nos Estados Unidos da América, de produção de filamentos para impressão 3D de alta qualidade.
Caracterizada pelos rolos feitos em cartão, esta marca é mundialmente famosa por ser especializada em materiais como PLA e ABS modificados com outros materiais, como o PLA Magnético; o PLA Condutivo; PLA de fibra de carbono; HTPLA de cobre, latão ou bronze; ou o ABS-PC.
Any good story of the sea comes with a bit of embellishment, but this material needs not embellishing.
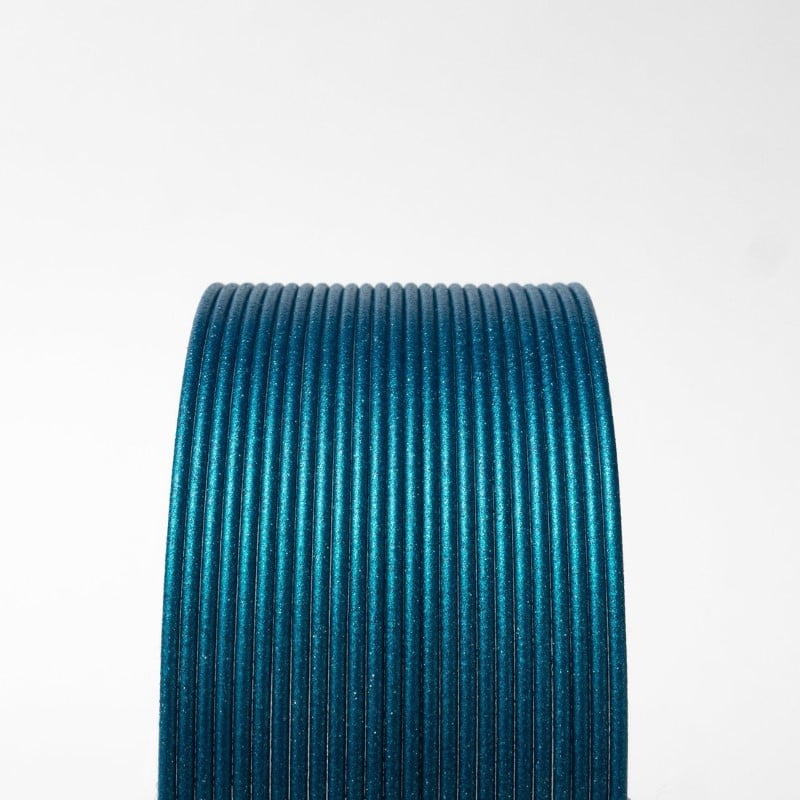
Our 2nd material, following Galactic Empire Metallic Purple, designed in collaboration with local artist, Rose "Maz" Moore of the creative duo "Maz and Attero" (etsy.com/shop/mazandattero or mazandattero.xyz) and, yet again named by the community, Mermaid's Tale Metallic Teal HTPLA captures the shimmer and shine of the sea.
It reminds me of scales on a fish, the sun-lit ocean waves, and hand airbrushed fishing lures my neighbor made growing up.
Equaled only by Cupid's Crush Metallic Pink in level of sparkle, this Metallic Teal is spectacular!

For this improved the performance, your prints should be baked in an oven until you see a change from translucent to opaque with reduced gloss. This visual change indicating the improved performance! We've seen the change take place in 5-10 minutes on thin walled parts but can take an hour or more. We've had good luck in a quality, at home convection oven at 110C (225F). Parts will get very "floppy" before becoming more firm, so please leave supports on your parts or support them and bake them on a flat, non-radiating surface (like glass, ceramic, or composite).
No abrasive fillers so expect normal wear with standard nozzles.
In our experience, good results were achieved using standard PLA parameters ranging from 195-225C nozzle with standard build surface preparation (blue tape, glue stick, or BuildTak). No heated bed required but up to 60C is okay. Beware, if the bed temperature is too high, your part base could actually heat treat while printing, increasing warping and decreasing adhesion. Some shrinkage will occur in the heat treating process, so dimension critical parts may need to be scaled appropriately (as much as 2.5% in our experience).
Looking for increased heat resistance without the need to switch to ABS? Protopasta High Temperature PLA offers heat deflection of up to 88° C (190.4° F) compared to standard PLA of 45-54° C (113-135° F). This makes it a great choice for moving parts (gears, RepRap pieces, etc) or prints that would face moderately high temperatures. Our High Temperature PLA is white, but can be painted after annealing.
We've created this page to bring you a premium PLA and HTPLA printing experience that rivals our premium material. Follow below to improve your 3D printing experience. In other words, here's your shortcut to awesomeness with pasta. If at the end of this document you have questions or need assistance, please contact us at [email protected].
Loose coils can be very tricky to manage. Going cowboy on your spool handling can quickly end up in a frustrating, tangled mess. Keep your loose coils wrangled with a spool holder like masterspool for a more trouble-free experience. Find out more about loose coil handling in Keith's blog post.
And for spooled filament, never let go of the loose end. When not in the printer extruder, tuck it away in the cardboard spool's corrugation! Also, avoid sharp bends and excessive force when loading filament into your printer.
At Proto-pasta, we make high quality filament. We aspire to make exceptional results easy, but a positive result is very much dependent on your hardware, set-up, adjustments, and process parameters. Matching hardware with process and material for a positive experience is not always straight-forward, but you can start by pairing the following settings with your printer for a good starting point, then tune or troubleshoot as required.
Volume flow rate together with temperature dictates how melted the material is. This is hardware & condition dependent based on hot end, nozzle & extruder type, material & manufacturer as well as layer fan type, position & settings. Extrusion width, layer thickness & speed changes affect volume flow which may change required/desired temperature.
Post your prints & tag us @Proto_pasta on Twitter and Instagram. Need more help? Consider typical pitfalls and fixes below.
We visited Joel and ended up with a helpful video on the subject:
Para uma correcta manutenção da sua impressora 3D, recomendamos sempre que trocar de material de filamento 3D, a efectuar uma purga com filamento especial de limpeza.
Desta forma garante que não ficam vestígios de material nas paredes do nozzle, evitando o acumular de crosta que é criado sempre que efectua trocas de material.
Com este produto evita problema como "clogs" e "jams" e fará com que o seu nozzle mantenha-se sempre limpo, durando muito mais tempo.
Poderá encontrar a partir de 1.49€ no seguinte LINK
Para obter maior aderência à superfície da sua impressora 3D recomendamos a aplicar 3DLAC na base da plataforma.
Poderá encontrar no seguinte LINK
Este material é altamente higroscópico, absorvendo rapidamente a humidade do ar passados poucos minutos após aberto, impossibilitando desta forma a correcta impressão 3D do mesmo. O resultado das impressões 3D de materiais com humidade tendem a ser frágeis e de acabamento irregular ou em certos casos, torna-se simplesmente impossíveis de imprimir.
Deverá de usar soluções de caixas fechadas com dessecante como sílica ou caixas próprias secadoras de filamento.
Poderá encontrar no seguinte LINK
Download:
Technical and Safety Data Sheet
500g- Rolo
HTPLA Mermaid's Tale Metallic Teal HTPLA ( Community Inspired ) - Cor
1.75mm (+-0.05mm) - Espessura / Tolerância de diâmetro
Muito Fácil - Facilidade de Impressão
ProtoPasta é uma empresa situada nos Estados Unidos da América, de produção de filamentos para impressão 3D de alta qualidade.
Caracterizada pelos rolos feitos em cartão, esta marca é mundialmente famosa por ser especializada em materiais como PLA e ABS modificados com outros materiais, como o PLA Magnético; o PLA Condutivo; PLA de fibra de carbono; HTPLA de cobre, latão ou bronze; ou o ABS-PC.
Designed in collaboration with local artist, Rose "Maz" Moore of the creative duo "Maz and Attero" (etsy.com/shop/mazandattero or mazandattero.xyz) and named by the community, Galactic Empire Metallic Purple HTPLA has presence and prestige!
Purple is the color of royalty after all.
So park your star destroyer and roll out the red carpet because this rich, dark purple is complimented with some big, silver fleck for just the right metallic pop!!!
No abrasive fillers so expect normal wear with standard nozzles.
In our experience, good results were achieved using standard PLA parameters ranging from 195-225C nozzle with standard build surface preparation (blue tape, glue stick, or BuildTak). No heated bed required but up to 60C is okay. Beware, if the bed temperature is too high, your part base could actually heat treat while printing, increasing warping and decreasing adhesion. Some shrinkage will occur in the heat treating process, so dimension critical parts may need to be scaled appropriately (as much as 2.5% in our experience).
HTPLA prints well at 205-225 C, however it's important to match temp to your hardware & volume flow rate. With a typical hotend, you should be able to print at 205 C without jamming at a low flow rate. In machines with hardware that tends towards jamming, consider this video with Joel Telling.
Lower volume flows require lower temps, while higher volume flows require higher temps. In the previously-mentioned video, one way to overcome jamming is to set your temp to a higher-than-typical 240 C. This should then be matched with a high flow rate for a quality printing result.
For direct drives with a short distance between drive gears & nozzle, volume flows can approach 7-8 cubic mm/s or more if printing hot to overcome jamming. For bowden tubes where the distance between drive gear & nozzle are great or less powerful hotends, as little as 2 and as much as 4 cubic mm/s may be the limit. Beware of unintended speed changes from faster infills & slowing down for outlines or short layers. Consider our Ultimaker-specific blog for more on this topic.
A constant speed throughout the part is ideal from an extrusion perspective. Knowing your extrusion width, layer thickness & speed you can calculate your volume flow rate with the calculator like found in the previously-mentioned Ultimaker blog. Alternatively, if you know your volume flow rate limit, extrusion width & layer thickness, you can calculate your speed limit.
PLA & HTPLA are amorphous in structure as printed (no heat treating) & though both are adequate performers in an office environment, they have poor temperature stability, loosing significant stiffness at temps nearing 60 C. Different than standard PLA, HTPLA is designed to survive heat treating for higher temp stability in a no/minimal load condition to near onset of melting (155 C). That's an astonishing improvement in thermal stability compared to standard PLA after a quick bake in the oven after printing.
In as little as 5-10 minutes for small, thin parts, HTPLA quickly crystallizes in an oven at 95-115 C (200-240 F) to become more stiff & hold form above glass transition (60 C). Depending on part geometry, setup & technique, parts can deform and shrink. Best results are with flat and/or supported parts with 100% infill. In this instance we experienced x/y shrinkage of about 2% & growth of about 1% in z.
Be sure to avoid hot spots (non-radiating surfaces & no glowing coils) in the oven used for baking & experiment before baking a prized part. Un-printed filament works great for experimentation & translucent makes the transformation most visible! Heat treating is an art, but the resulting improved thermal performance, if needed, is well-worth exploring. You'll be shocked by the improved thermal stability of your HTPLA parts!!!
Looking for increased heat resistance without the need to switch to ABS? Protopasta High Temperature PLA offers heat deflection of up to 88° C (190.4° F) compared to standard PLA of 45-54° C (113-135° F). This makes it a great choice for moving parts (gears, RepRap pieces, etc) or prints that would face moderately high temperatures. Our High Temperature PLA is white, but can be painted after annealing.
We've created this page to bring you a premium PLA and HTPLA printing experience that rivals our premium material. Follow below to improve your 3D printing experience. In other words, here's your shortcut to awesomeness with pasta. If at the end of this document you have questions or need assistance, please contact us at [email protected].
Loose coils can be very tricky to manage. Going cowboy on your spool handling can quickly end up in a frustrating, tangled mess. Keep your loose coils wrangled with a spool holder like masterspool for a more trouble-free experience. Find out more about loose coil handling in Keith's blog post.
And for spooled filament, never let go of the loose end. When not in the printer extruder, tuck it away in the cardboard spool's corrugation! Also, avoid sharp bends and excessive force when loading filament into your printer.
At Proto-pasta, we make high quality filament. We aspire to make exceptional results easy, but a positive result is very much dependent on your hardware, set-up, adjustments, and process parameters. Matching hardware with process and material for a positive experience is not always straight-forward, but you can start by pairing the following settings with your printer for a good starting point, then tune or troubleshoot as required.
Volume flow rate together with temperature dictates how melted the material is. This is hardware & condition dependent based on hot end, nozzle & extruder type, material & manufacturer as well as layer fan type, position & settings. Extrusion width, layer thickness & speed changes affect volume flow which may change required/desired temperature.
Post your prints & tag us @Proto_pasta on Twitter and Instagram. Need more help? Consider typical pitfalls and fixes below.
We visited Joel and ended up with a helpful video on the subject:
Para uma correcta manutenção da sua impressora 3D, recomendamos sempre que trocar de material de filamento 3D, a efectuar uma purga com filamento especial de limpeza.
Desta forma garante que não ficam vestígios de material nas paredes do nozzle, evitando o acumular de crosta que é criado sempre que efectua trocas de material.
Com este produto evita problema como "clogs" e "jams" e fará com que o seu nozzle mantenha-se sempre limpo, durando muito mais tempo.
Poderá encontrar a partir de 1.49€ no seguinte LINK
Para obter maior aderência à superfície da sua impressora 3D recomendamos a aplicar 3DLAC na base da plataforma.
Poderá encontrar no seguinte LINK
Este material é altamente higroscópico, absorvendo rapidamente a humidade do ar passados poucos minutos após aberto, impossibilitando desta forma a correcta impressão 3D do mesmo. O resultado das impressões 3D de materiais com humidade tendem a ser frágeis e de acabamento irregular ou em certos casos, torna-se simplesmente impossíveis de imprimir.
Deverá de usar soluções de caixas fechadas com dessecante como sílica ou caixas próprias secadoras de filamento.
Poderá encontrar no seguinte LINK
Download:
Technical and Safety Data Sheet
500g- Rolo
HTPLA Galactic Empire Metallic Purple HTPLA ( Community Inspired ) - Cor
1.75mm (+-0.05mm) - Espessura / Tolerância de diâmetro
Muito Fácil - Facilidade de Impressão
ProtoPasta é uma empresa situada nos Estados Unidos da América, de produção de filamentos para impressão 3D de alta qualidade.
Caracterizada pelos rolos feitos em cartão, esta marca é mundialmente famosa por ser especializada em materiais como PLA e ABS modificados com outros materiais, como o PLA Magnético; o PLA Condutivo; PLA de fibra de carbono; HTPLA de cobre, latão ou bronze; ou o ABS-PC.
It seemed untouchable, always turning pink, but we finally have a formulation good enough to share!
Think hot rods and ruby slippers, this red is going to knock your socks off!!!! Words can't describe...

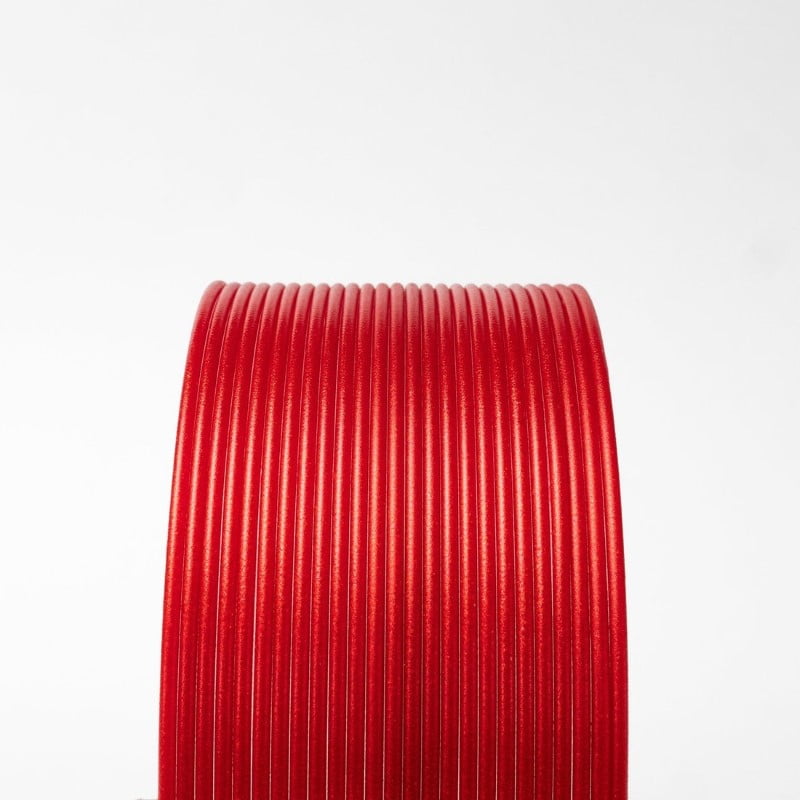
Candy Apple Red Metallic PLA prints with the ease of standard PLA with standard hardware and temperatures, but make fun, mesmerizing prints that stand out. Celebrate good times by 3d printing metallic red PLA ornaments, toys, and treasures. If you want to make a print more fun, just add glitter. Glitter Flake Red PLA has little risk of clogging or wearing your nozzle, and it won't make a glittery mess, but beware, printing with metallic glitter PLA is sure to be addictive! Glitter particles are relatively small but have some orientation effects, giving top/bottom surfaces more shine than sidewall, so have some fun playing with orientation to see how the result changes!
Like our other HTPLAs, Glitter Flake Metallic Red PLA filament can be "Heat Treated" to increase crystallinity for "Higher Temperature" resistance compared to amorphous PLA, ABS, and co-polyesters like PETG! Glitter Flake HTPLA prints translucent, but turns opaque when heat treated (or crystallized). With a more crystalline structure, heat treated HTPLA parts can hold form to near melting, though temperatures where the material is practically useful vary greatly depending on geometry and load conditions!
For this improved performance, your prints should be baked in an oven until you see a change from translucent pink to opaque pink with reduced gloss. This visual change indicates the improved performance! We've seen the change take place in 5-10 minutes on thin walled parts but can take an hour or more. We've had good luck in a quality, at home convection oven at 110C (225F). Parts will get very "floppy" before becoming more firm, so please leave supports on your parts or support them and bake them on a flat, non-radiating surface (like glass, ceramic, or composite).
In our experience, good results were achieved using standard PLA parameters ranging from 195-225C nozzle with standard build surface preparation (blue tape, glue stick, or BuildTak). No heated bed required but up to 60C is okay. Beware, if the bed temperature is too high, your part base could actually heat treat while printing, increasing warping and decreasing adhesion. Some shrinkage will occur in the heat treating process, so dimension critical parts may need to be scaled appropriately (as much as 2.5% in our experience).
Looking for increased heat resistance without the need to switch to ABS? Protopasta High Temperature PLA offers heat deflection of up to 88° C (190.4° F) compared to standard PLA of 45-54° C (113-135° F). This makes it a great choice for moving parts (gears, RepRap pieces, etc) or prints that would face moderately high temperatures. Our High Temperature PLA is white, but can be painted after annealing.
We've created this page to bring you a premium PLA and HTPLA printing experience that rivals our premium material. Follow below to improve your 3D printing experience. In other words, here's your shortcut to awesomeness with pasta. If at the end of this document you have questions or need assistance, please contact us at [email protected].
Loose coils can be very tricky to manage. Going cowboy on your spool handling can quickly end up in a frustrating, tangled mess. Keep your loose coils wrangled with a spool holder like masterspool for a more trouble-free experience. Find out more about loose coil handling in Keith's blog post.
And for spooled filament, never let go of the loose end. When not in the printer extruder, tuck it away in the cardboard spool's corrugation! Also, avoid sharp bends and excessive force when loading filament into your printer.
At Proto-pasta, we make high quality filament. We aspire to make exceptional results easy, but a positive result is very much dependent on your hardware, set-up, adjustments, and process parameters. Matching hardware with process and material for a positive experience is not always straight-forward, but you can start by pairing the following settings with your printer for a good starting point, then tune or troubleshoot as required.
Volume flow rate together with temperature dictates how melted the material is. This is hardware & condition dependent based on hot end, nozzle & extruder type, material & manufacturer as well as layer fan type, position & settings. Extrusion width, layer thickness & speed changes affect volume flow which may change required/desired temperature.
Post your prints & tag us @Proto_pasta on Twitter and Instagram. Need more help? Consider typical pitfalls and fixes below.
We visited Joel and ended up with a helpful video on the subject:
Para uma correcta manutenção da sua impressora 3D, recomendamos sempre que trocar de material de filamento 3D, a efectuar uma purga com filamento especial de limpeza.
Desta forma garante que não ficam vestígios de material nas paredes do nozzle, evitando o acumular de crosta que é criado sempre que efectua trocas de material.
Com este produto evita problema como "clogs" e "jams" e fará com que o seu nozzle mantenha-se sempre limpo, durando muito mais tempo.
Poderá encontrar a partir de 1.49€ no seguinte LINK
Para obter maior aderência à superfície da sua impressora 3D recomendamos a aplicar 3DLAC na base da plataforma.
Poderá encontrar no seguinte LINK
Este material é altamente higroscópico, absorvendo rapidamente a humidade do ar passados poucos minutos após aberto, impossibilitando desta forma a correcta impressão 3D do mesmo. O resultado das impressões 3D de materiais com humidade tendem a ser frágeis e de acabamento irregular ou em certos casos, torna-se simplesmente impossíveis de imprimir.
Deverá de usar soluções de caixas fechadas com dessecante como sílica ou caixas próprias secadoras de filamento.
Poderá encontrar no seguinte LINK
Download:
Technical and Safety Data Sheet
500g- Rolo
HTPLA Candy Apple Metallic Red HTPLA ( Community Inspired )- Cor
1.75mm (+-0.05mm) - Espessura / Tolerância de diâmetro
Muito Fácil - Facilidade de Impressão
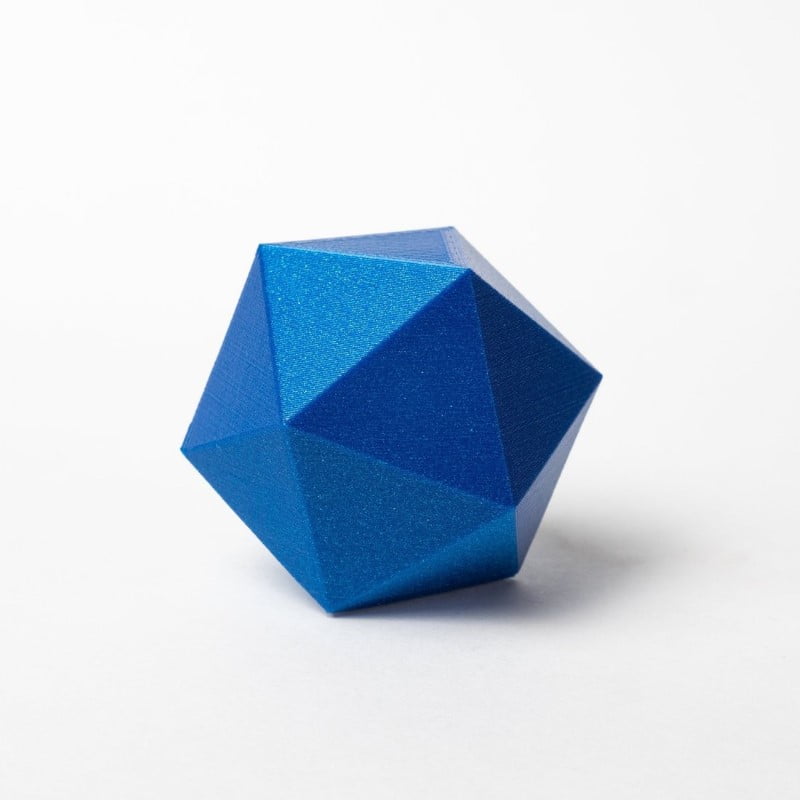
ProtoPasta é uma empresa situada nos Estados Unidos da América, de produção de filamentos para impressão 3D de alta qualidade.
Caracterizada pelos rolos feitos em cartão, esta marca é mundialmente famosa por ser especializada em materiais como PLA e ABS modificados com outros materiais, como o PLA Magnético; o PLA Condutivo; PLA de fibra de carbono; HTPLA de cobre, latão ou bronze; ou o ABS-PC.
Fellow 3D Printing Nerds, we are fans of Joel Telling just like you!
We'd all love to capture a bit of his energy, right?
Rather than bottle it, seems more appropriate in filament form, don't you agree?
We left out the caffeine for safety sake, but the metallic finish is indeed energetic, and it's Joel's favorite color, blue!
Yes, Highfive Blue HTPLA is awesome.
Is it really awesome?
It's awesome. Awesome

Semi crystalline, heat treatable PLA for high temp use
Density: 1.24 g/cc
Length: 346 m/kg (1.75) 130 m/kg (2.85)
Typical Printing Temp: 205-225 C
Glass Transition (Tg)*: 60 C
Peak Crystallization (Tc)**: 95-115 C
Onset to Melt (Tm)***: 155 C
Typical change when heat treated: -2% x/y +1% z
Link to Safety Data Page
*max use with no heat treat & max platform temp
**heat treating @ temp 10+ min depending on size/mass
***max use when heat treated (annealed or crystallized)
HTPLA prints well at 205-225 C, however it's important to match temp to your hardware & volume flow rate. With a typical hotend, you should be able to print at 205 C without jamming at a low flow rate. In machines with hardware that tends towards jamming, consider this video with Joel Telling.
Lower volume flows require lower temps, while higher volume flows require higher temps. In the previously-mentioned video, one way to overcome jamming is to set your temp to a higher-than-typical 240 C. This should then be matched with a high flow rate for a quality printing result.
For direct drives with a short distance between drive gears & nozzle, volume flows can approach 7-8 cubic mm/s or more if printing hot to overcome jamming. For bowden tubes where the distance between drive gear & nozzle are great or less powerful hotends, as little as 2 and as much as 4 cubic mm/s may be the limit. Beware of unintended speed changes from faster infills & slowing down for outlines or short layers. Consider our Ultimaker-specific blog for more on this topic.
A constant speed throughout the part is ideal from an extrusion perspective. Knowing your extrusion width, layer thickness & speed you can calculate your volume flow rate with the calculator like found in the previously-mentioned Ultimaker blog. Alternatively, if you know your volume flow rate limit, extrusion width & layer thickness, you can calculate your speed limit.
PLA & HTPLA are amorphous in structure as printed (no heat treating) & though both are adequate performers in an office environment, they have poor temperature stability, loosing significant stiffness at temps nearing 60 C. Different than standard PLA, HTPLA is designed to survive heat treating for higher temp stability in a no/minimal load condition to near onset of melting (155 C). That's an astonishing improvement in thermal stability compared to standard PLA after a quick bake in the oven after printing.
In as little as 5-10 minutes for small, thin parts, HTPLA quickly crystallizes in an oven at 95-115 C (200-240 F) to become more stiff & hold form above glass transition (60 C). Depending on part geometry, setup & technique, parts can deform and shrink. Best results are with flat and/or supported parts with 100% infill. In this instance we experienced x/y shrinkage of about 2% & growth of about 1% in z.
Be sure to avoid hot spots (non-radiating surfaces & no glowing coils) in the oven used for baking & experiment before baking a prized part. Un-printed filament works great for experimentation & translucent makes the transformation most visible! Heat treating is an art, but the resulting improved thermal performance, if needed, is well-worth exploring. You'll be shocked by the improved thermal stability of your HTPLA parts!!!
Looking for increased heat resistance without the need to switch to ABS? Protopasta High Temperature PLA offers heat deflection of up to 88° C (190.4° F) compared to standard PLA of 45-54° C (113-135° F). This makes it a great choice for moving parts (gears, RepRap pieces, etc) or prints that would face moderately high temperatures. Our High Temperature PLA is white, but can be painted after annealing.
We've created this page to bring you a premium PLA and HTPLA printing experience that rivals our premium material. Follow below to improve your 3D printing experience. In other words, here's your shortcut to awesomeness with pasta. If at the end of this document you have questions or need assistance, please contact us at [email protected].
Loose coils can be very tricky to manage. Going cowboy on your spool handling can quickly end up in a frustrating, tangled mess. Keep your loose coils wrangled with a spool holder like masterspool for a more trouble-free experience. Find out more about loose coil handling in Keith's blog post.
And for spooled filament, never let go of the loose end. When not in the printer extruder, tuck it away in the cardboard spool's corrugation! Also, avoid sharp bends and excessive force when loading filament into your printer.
At Proto-pasta, we make high quality filament. We aspire to make exceptional results easy, but a positive result is very much dependent on your hardware, set-up, adjustments, and process parameters. Matching hardware with process and material for a positive experience is not always straight-forward, but you can start by pairing the following settings with your printer for a good starting point, then tune or troubleshoot as required.
Volume flow rate together with temperature dictates how melted the material is. This is hardware & condition dependent based on hot end, nozzle & extruder type, material & manufacturer as well as layer fan type, position & settings. Extrusion width, layer thickness & speed changes affect volume flow which may change required/desired temperature.
Post your prints & tag us @Proto_pasta on Twitter and Instagram. Need more help? Consider typical pitfalls and fixes below.
We visited Joel and ended up with a helpful video on the subject:
Para uma correcta manutenção da sua impressora 3D, recomendamos sempre que trocar de material de filamento 3D, a efectuar uma purga com filamento especial de limpeza.
Desta forma garante que não ficam vestígios de material nas paredes do nozzle, evitando o acumular de crosta que é criado sempre que efectua trocas de material.
Com este produto evita problema como "clogs" e "jams" e fará com que o seu nozzle mantenha-se sempre limpo, durando muito mais tempo.
Poderá encontrar a partir de 1.49€ no seguinte LINK
Para obter maior aderência à superfície da sua impressora 3D recomendamos a aplicar 3DLAC na base da plataforma.
Poderá encontrar no seguinte LINK
Este material é altamente higroscópico, absorvendo rapidamente a humidade do ar passados poucos minutos após aberto, impossibilitando desta forma a correcta impressão 3D do mesmo. O resultado das impressões 3D de materiais com humidade tendem a ser frágeis e de acabamento irregular ou em certos casos, torna-se simplesmente impossíveis de imprimir.
Deverá de usar soluções de caixas fechadas com dessecante como sílica ou caixas próprias secadoras de filamento.
Poderá encontrar no seguinte LINK
Download:
Technical and Safety Data Sheet
500g- Rolo
HTPLA Joel's Highfive Blue HTPLA ( Community Inspired ) - Cor
1.75mm (+-0.05mm) - Espessura / Tolerância de diâmetro
Muito Fácil - Facilidade de Impressão
ProtoPasta é uma empresa situada nos Estados Unidos da América, de produção de filamentos para impressão 3D de alta qualidade.
Caracterizada pelos rolos feitos em cartão, esta marca é mundialmente famosa por ser especializada em materiais como PLA e ABS modificados com outros materiais, como o PLA Magnético; o PLA Condutivo; PLA de fibra de carbono; HTPLA de cobre, latão ou bronze; ou o ABS-PC.

🔹 Semelhante ao Carbon Fiber PLA, mas com proteção ESD
🔹Maior Ω do que o PLA Condutivo
🔹Resistência à superfície 10^4-10^6 Ω
🔹Impressão fácil, baixo empeno e desgaste
🔹A partir de Novembro de 2024 Endless Exploration
🔹Fabricado nos EUA, exclusivo Protopasta
📄 Fichas Técnicas
As fichas técnicas estão disponíveis para download aqui.
Se precisares de mais informações ou suporte técnico, entra em contacto connosco!
📄 Fichas de Segurança
As fichas de segurança estão disponíveis para download aqui.
Criámos esta página para te proporcionar uma experiência de impressão premium com PLA e HTPLA que rivaliza com os nossos materiais topo de gama. Segue as dicas abaixo para melhorar a tua experiência de impressão 3D. Em outras palavras, aqui está o teu atalho para a excelência com pasta!
Se no final deste documento ainda tiveres dúvidas ou precisares de assistência, contacta-nos através de [email protected].
Bobinas soltas podem ser um verdadeiro pesadelo para gerir. Se lidares com elas sem cuidado, podes acabar rapidamente com um emaranhado frustrante. Mantém as tuas bobinas soltas bem organizadas com um suporte adequado, como o Masterspool, para uma experiência de impressão sem dores de cabeça. Descobre mais sobre isto no blog do Keith.
Para filamento enrolado na bobina, nunca largues a ponta solta! Quando não estiver na impressora, prende-a na ondulação da bobina de cartão. Evita também dobras acentuadas e força excessiva ao carregar o filamento na tua impressora.
Na Proto-pasta, produzimos filamento de alta qualidade e queremos tornar os melhores resultados fáceis de obter. No entanto, um bom resultado depende muito do teu hardware, configuração e parâmetros de impressão. Para começares bem, recomendamos estas definições básicas para depois afinares conforme necessário:
✅ Diâmetro do bico: 0.4 mm (Padrão na maioria das impressoras; equilibra detalhe e produtividade.)
✅ Largura de extrusão: 0.45 mm (Geralmente um pouco maior que o diâmetro do bico. Se usares um bico maior, ajusta a largura de extrusão proporcionalmente.)
✅ Altura da camada: 0.15 mm (Equilibra velocidade, qualidade e fiabilidade.)
✅ Velocidade de impressão: 15-45 mm/s (Mantém-te dentro deste intervalo, aplicando velocidades mais baixas nas paredes e mais altas no preenchimento.)
✅ Taxa de fluxo de volume: 1-3 mm³/s (Depende da velocidade, largura de extrusão e altura da camada. Ajusta conforme o hardware e a geometria da peça.)
✅ Temperatura recomendada: 215°C ± 10°C (Depende do material, do hardware e da taxa de fluxo de volume.)
🔹 Nota: A taxa de fluxo de volume e a temperatura determinam o quão bem derretido o material fica. Isto depende do hotend, bico, extrusora, fabricante do material e das definições da ventoinha.
✔️ Preenchimento: Tipo "Grid" entre 20-30% (Desativa a opção "connect infill lines").
✔️ Paredes e camadas: Mínimo de 3 paredes e 4 camadas superiores/inferiores para uma boa qualidade de superfície.
✔️ Ventoinha da camada: Suficientemente alta para arrefecer a peça, mas não ao ponto de arrefecer demasiado o hotend.
Para afinares a tua impressão, usa:
🔹 Single Wall Box – Para ajustar temperatura e configurações de extrusão.
🔹 Protognome – Para validar resultados.
💡 Partilha as tuas impressões! Marca-nos no Twitter e Instagram @Proto_pasta 📸🎨
❌ Problemas frequentes:
✅ Soluções recomendadas:
✔️ Substituir o heat break por um modelo OEM com furo reto e acabamento limpo.
✔️ Assegurar uma montagem correta, sem espaços onde o plástico possa vazar.
✔️ Aplicar uma pequena quantidade de óleo ao filamento (com moderação).
✔️ Reduzir a velocidade da ventoinha da camada ou isolá-la do bloco do aquecimento e do bico.
✔️ Instalar uma capa protetora no heater block para minimizar o arrefecimento indesejado.
✔️ Aumentar a temperatura para melhorar o fluxo e evitar bloqueios internos.
✔️ Reduzir a velocidade de impressão ou manter uma velocidade uniforme.
✔️ Ajustar a tensão da engrenagem do extrusor, verificar o acoplamento/reposição do tubo Bowden e melhorar a montagem da bobina.
🎥 Visitámos o Joel e criámos um vídeo útil sobre este assunto!
Agora estás pronto para imprimir com Proto-pasta!
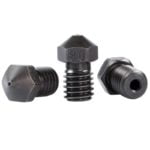
Este material é altamente abrasivo. Recomendamos a utilização de Nozzles de aço endurecido.
Poderá encontrar no seguinte LINK
1kg- Rolo
ESD PLA ( Carbon Fiber Composite ) - Cor
1.75mm (+-0.05mm) - Espessura / Tolerância de diâmetro
Fácil - Facilidade de Impressão
ProtoPasta é uma empresa situada nos Estados Unidos da América, de produção de filamentos para impressão 3D de alta qualidade.
Caracterizada pelos rolos feitos em cartão, esta marca é mundialmente famosa por ser especializada em materiais como PLA e ABS modificados com outros materiais, como o PLA Magnético; o PLA Condutivo; PLA de fibra de carbono; HTPLA de cobre, latão ou bronze; ou o ABS-PC.
O original continua a ser o melhor! O primeiro filamento de PLA com fibra de carbono do mundo foi lançado pela ProtoPlant há quase 5 anos.
Outros tentam, mas não conseguem igualar a qualidade e a facilidade de impressão deste produto.
Disponível a um preço acessível para o dia a dia, experimenta uma bobina gigante de 3 kg para impressões em grande formato!
As bobinas de 3 kg de 1,75 mm de diâmetro contêm mais de 1 km de filamento! Que incrível, não achas?!

O Protopasta Carbon Fiber PLA é baseado no nosso PLA de alta qualidade e impressão fácil. Produzido com os melhores ingredientes secos e extrudido com todo o cuidado na nossa fábrica em Washington, utilizando sistemas de extrusão desenvolvidos por nós.
As impressões em CFPLA são mais rígidas e fáceis de processar (geralmente com as mesmas definições do PLA padrão), além de permitirem uma remoção simples de suportes. Graças à excelente adesão entre camadas e à mínima deformação, mesmo sem mesa aquecida, este é um exótico perfeito para o dia a dia e para peças precisas. As linhas das camadas praticamente desaparecem com o belo acabamento preto mate, que ainda tem um ligeiro brilho devido à fibra de carbono, tornando-o super fotogénico! 📸✨
⚠️ Atenção: Este filamento é ligeiramente mais abrasivo do que o PLA normal. Prepara-te para substituir o bico e ajustar a primeira camada após um uso prolongado ou faz um upgrade para um bico resistente ao desgaste para menos manutenção.
🔹 Disponível nos diâmetros 1.75 mm e 2.85 mm (3 mm)
🔹 Bobinas de 500g com 8" de diâmetro e 3kg com 12" de diâmetro
🔹 Compatível com a maioria das impressoras PLA-friendly: Lulzbot, Makerbot, FlashForge, Dremel, Ultimaker, Printrbot, entre outras.
⚠️ Nota: Em forma de filamento, o CFPLA é ligeiramente mais frágil do que o PLA normal, por isso requer um pouco mais de cuidado ao manusear.
A impressão é semelhante à do PLA padrão e não requer mesa aquecida. O processo pode ser menos consistente em bicos menores ou em máquinas Bowden.
🔹Para a melhor experiência, recomendamos:
🔹Bicos de 0.6 mm
🔹 Temperatura entre 210-230°C
🔹 Apesar de podermos imprimir até 240°C com bicos de 0.4 mm, o ideal é seguir as recomendações acima!
Pronto para dar um boost nas tuas impressões com um toque de fibra de carbono?
🔹 Semelhante ao Carbon Fiber PLA, mas com proteção ESD
🔹 Resistência de superfície: 10⁴ - 10⁶ Ω
🔹 Baixa deformação + rigidez da fibra de carbono
🔹 Recomenda-se um bico resistente ao desgaste
🚀 Disponível a partir de novembro de 2024 – Endless Exploration
🇺🇸 Produzido nos EUA, exclusivo da Protopasta!
📩 Subscreve o programa "Endless Exploration" e recebe novos materiais com novas funções a cada 2 meses!
🔔 Junta-te à nossa newsletter para novidades, suporte e descontos exclusivos!
📄 Fichas Técnicas
As fichas técnicas estão disponíveis para download aqui.
Se precisares de mais informações ou suporte técnico, entra em contacto connosco!
📄 Fichas de Segurança
As fichas de segurança estão disponíveis para download aqui.
Se precisares de mais informações sobre manuseamento seguro e especificações do material, estamos à disposição para ajudar! 🚀
Criámos esta página para te proporcionar uma experiência de impressão premium com PLA e HTPLA que rivaliza com os nossos materiais topo de gama. Segue as dicas abaixo para melhorar a tua experiência de impressão 3D. Em outras palavras, aqui está o teu atalho para a excelência com pasta!
Se no final deste documento ainda tiveres dúvidas ou precisares de assistência, contacta-nos através de [email protected].
Bobinas soltas podem ser um verdadeiro pesadelo para gerir. Se lidares com elas sem cuidado, podes acabar rapidamente com um emaranhado frustrante. Mantém as tuas bobinas soltas bem organizadas com um suporte adequado, como o Masterspool, para uma experiência de impressão sem dores de cabeça. Descobre mais sobre isto no blog do Keith.
Para filamento enrolado na bobina, nunca largues a ponta solta! Quando não estiver na impressora, prende-a na ondulação da bobina de cartão. Evita também dobras acentuadas e força excessiva ao carregar o filamento na tua impressora.
Na Proto-pasta, produzimos filamento de alta qualidade e queremos tornar os melhores resultados fáceis de obter. No entanto, um bom resultado depende muito do teu hardware, configuração e parâmetros de impressão. Para começares bem, recomendamos estas definições básicas para depois afinares conforme necessário:
✅ Diâmetro do bico: 0.4 mm (Padrão na maioria das impressoras; equilibra detalhe e produtividade.)
✅ Largura de extrusão: 0.45 mm (Geralmente um pouco maior que o diâmetro do bico. Se usares um bico maior, ajusta a largura de extrusão proporcionalmente.)
✅ Altura da camada: 0.15 mm (Equilibra velocidade, qualidade e fiabilidade.)
✅ Velocidade de impressão: 15-45 mm/s (Mantém-te dentro deste intervalo, aplicando velocidades mais baixas nas paredes e mais altas no preenchimento.)
✅ Taxa de fluxo de volume: 1-3 mm³/s (Depende da velocidade, largura de extrusão e altura da camada. Ajusta conforme o hardware e a geometria da peça.)
✅ Temperatura recomendada: 215°C ± 10°C (Depende do material, do hardware e da taxa de fluxo de volume.)
🔹 Nota: A taxa de fluxo de volume e a temperatura determinam o quão bem derretido o material fica. Isto depende do hotend, bico, extrusora, fabricante do material e das definições da ventoinha.
✔️ Preenchimento: Tipo "Grid" entre 20-30% (Desativa a opção "connect infill lines").
✔️ Paredes e camadas: Mínimo de 3 paredes e 4 camadas superiores/inferiores para uma boa qualidade de superfície.
✔️ Ventoinha da camada: Suficientemente alta para arrefecer a peça, mas não ao ponto de arrefecer demasiado o hotend.
Para afinares a tua impressão, usa:
🔹 Single Wall Box – Para ajustar temperatura e configurações de extrusão.
🔹 Protognome – Para validar resultados.
💡 Partilha as tuas impressões! Marca-nos no Twitter e Instagram @Proto_pasta 📸🎨
❌ Problemas frequentes:
✅ Soluções recomendadas:
✔️ Substituir o heat break por um modelo OEM com furo reto e acabamento limpo.
✔️ Assegurar uma montagem correta, sem espaços onde o plástico possa vazar.
✔️ Aplicar uma pequena quantidade de óleo ao filamento (com moderação).
✔️ Reduzir a velocidade da ventoinha da camada ou isolá-la do bloco do aquecimento e do bico.
✔️ Instalar uma capa protetora no heater block para minimizar o arrefecimento indesejado.
✔️ Aumentar a temperatura para melhorar o fluxo e evitar bloqueios internos.
✔️ Reduzir a velocidade de impressão ou manter uma velocidade uniforme.
✔️ Ajustar a tensão da engrenagem do extrusor, verificar o acoplamento/reposição do tubo Bowden e melhorar a montagem da bobina.
🎥 Visitámos o Joel e criámos um vídeo útil sobre este assunto!
Agora estás pronto para imprimir com Proto-pasta!
O nosso material exótico mais popular! Impressões feitas com Carbon Fiber PLA são visivelmente mais rígidas, oferecendo excelente resistência estrutural e adesão entre camadas, com mínima deformação. O acabamento preto mate com um leve brilho proporcionado pela fibra de carbono incorporada dá um toque premium às tuas peças.
O Protopasta Carbon Fiber PLA é produzido a partir de resina PLA NatureWorks 4043D, combinada com 15% de fibra de carbono picada (em peso).
⚠️ Nota: Este filamento é mais frágil do que o PLA normal no estado de filamento, por isso manuseia-o com cuidado para evitar quebras.
💡 Não se trata de um material "mais forte", mas sim mais rígido.
🔹 A rigidez aumentada devido à fibra de carbono proporciona maior suporte estrutural, mas reduz a flexibilidade.
🔹 Ideal para estruturas, suportes, carcaças, hélices, ferramentas – qualquer peça que não deva (ou não se queira) dobrar.
🔹 Muito apreciado por construtores de drones e entusiastas de RC!
Devido à fibra de carbono picada, este filamento pode ter dificuldades em passar por bicos menores.
✅ Bico recomendado: 0.5 mm ou maior
✅ Extrusora: Direct-drive com sistema de rolos com mola
✅ Temperatura do hotend: 195-220°C
✅ Temperatura da mesa: 50°C (se disponível, mas não é obrigatória)
✅ Densidade: 1.3 g/cm³ (1300 kg/m³)
⚠️ Alguns utilizadores imprimem este material como PLA normal (~195-210°C), enquanto outros têm melhores resultados em temperaturas mais altas (~220°C). Experimenta e vê o que funciona melhor para ti!
A fibra de carbono no filamento é processada para um tamanho ótimo:
✔️ Pequena o suficiente para não entupir o bico
✔️ Longa o suficiente para aumentar a rigidez
No entanto, esta adição torna o filamento mais abrasivo do que o PLA comum.
⚠️ Uso prolongado pode causar desgaste no bico da impressora, especialmente em bicos de latão padrão. Para maior durabilidade, considera um bico resistente ao desgaste (ex.: bicos de aço endurecido ou rubi).
Este material é altamente abrasivo. Recomendamos a utilização de Nozzles de aço endurecido.
Poderá encontrar no seguinte LINK
1000g- Rolo
ESD PLA ( Carbon Fiber Composite ) - Cor
1.75mm (+-0.05mm) - Espessura / Tolerância de diâmetro
Fácil - Facilidade de Impressão
ProtoPasta é uma empresa situada nos Estados Unidos da América, de produção de filamentos para impressão 3D de alta qualidade.
Caracterizada pelos rolos feitos em cartão, esta marca é mundialmente famosa por ser especializada em materiais como PLA e ABS modificados com outros materiais, como o PLA Magnético; o PLA Condutivo; PLA de fibra de carbono; HTPLA de cobre, latão ou bronze; ou o ABS-PC.
🔹 Semelhante ao Carbon Fiber PLA, mas com proteção ESD
🔹Maior Ω do que o PLA Condutivo
🔹Resistência à superfície 10^4-10^6 Ω
🔹Impressão fácil, baixo empeno e desgaste
🔹A partir de Novembro de 2024 Endless Exploration
🔹Fabricado nos EUA, exclusivo Protopasta
📄 Fichas Técnicas
As fichas técnicas estão disponíveis para download aqui.
Se precisares de mais informações ou suporte técnico, entra em contacto connosco!
📄 Fichas de Segurança
As fichas de segurança estão disponíveis para download aqui.
Criámos esta página para te proporcionar uma experiência de impressão premium com PLA e HTPLA que rivaliza com os nossos materiais topo de gama. Segue as dicas abaixo para melhorar a tua experiência de impressão 3D. Em outras palavras, aqui está o teu atalho para a excelência com pasta!
Se no final deste documento ainda tiveres dúvidas ou precisares de assistência, contacta-nos através de [email protected].
Bobinas soltas podem ser um verdadeiro pesadelo para gerir. Se lidares com elas sem cuidado, podes acabar rapidamente com um emaranhado frustrante. Mantém as tuas bobinas soltas bem organizadas com um suporte adequado, como o Masterspool, para uma experiência de impressão sem dores de cabeça. Descobre mais sobre isto no blog do Keith.
Para filamento enrolado na bobina, nunca largues a ponta solta! Quando não estiver na impressora, prende-a na ondulação da bobina de cartão. Evita também dobras acentuadas e força excessiva ao carregar o filamento na tua impressora.
Na Proto-pasta, produzimos filamento de alta qualidade e queremos tornar os melhores resultados fáceis de obter. No entanto, um bom resultado depende muito do teu hardware, configuração e parâmetros de impressão. Para começares bem, recomendamos estas definições básicas para depois afinares conforme necessário:
✅ Diâmetro do bico: 0.4 mm (Padrão na maioria das impressoras; equilibra detalhe e produtividade.)
✅ Largura de extrusão: 0.45 mm (Geralmente um pouco maior que o diâmetro do bico. Se usares um bico maior, ajusta a largura de extrusão proporcionalmente.)
✅ Altura da camada: 0.15 mm (Equilibra velocidade, qualidade e fiabilidade.)
✅ Velocidade de impressão: 15-45 mm/s (Mantém-te dentro deste intervalo, aplicando velocidades mais baixas nas paredes e mais altas no preenchimento.)
✅ Taxa de fluxo de volume: 1-3 mm³/s (Depende da velocidade, largura de extrusão e altura da camada. Ajusta conforme o hardware e a geometria da peça.)
✅ Temperatura recomendada: 215°C ± 10°C (Depende do material, do hardware e da taxa de fluxo de volume.)
🔹 Nota: A taxa de fluxo de volume e a temperatura determinam o quão bem derretido o material fica. Isto depende do hotend, bico, extrusora, fabricante do material e das definições da ventoinha.
✔️ Preenchimento: Tipo "Grid" entre 20-30% (Desativa a opção "connect infill lines").
✔️ Paredes e camadas: Mínimo de 3 paredes e 4 camadas superiores/inferiores para uma boa qualidade de superfície.
✔️ Ventoinha da camada: Suficientemente alta para arrefecer a peça, mas não ao ponto de arrefecer demasiado o hotend.
Para afinares a tua impressão, usa:
🔹 Single Wall Box – Para ajustar temperatura e configurações de extrusão.
🔹 Protognome – Para validar resultados.
💡 Partilha as tuas impressões! Marca-nos no Twitter e Instagram @Proto_pasta 📸🎨
❌ Problemas frequentes:
✅ Soluções recomendadas:
✔️ Substituir o heat break por um modelo OEM com furo reto e acabamento limpo.
✔️ Assegurar uma montagem correta, sem espaços onde o plástico possa vazar.
✔️ Aplicar uma pequena quantidade de óleo ao filamento (com moderação).
✔️ Reduzir a velocidade da ventoinha da camada ou isolá-la do bloco do aquecimento e do bico.
✔️ Instalar uma capa protetora no heater block para minimizar o arrefecimento indesejado.
✔️ Aumentar a temperatura para melhorar o fluxo e evitar bloqueios internos.
✔️ Reduzir a velocidade de impressão ou manter uma velocidade uniforme.
✔️ Ajustar a tensão da engrenagem do extrusor, verificar o acoplamento/reposição do tubo Bowden e melhorar a montagem da bobina.
🎥 Visitámos o Joel e criámos um vídeo útil sobre este assunto!
Agora estás pronto para imprimir com Proto-pasta!
Este material é altamente abrasivo. Recomendamos a utilização de Nozzles de aço endurecido.
Poderá encontrar no seguinte LINK
500g- Rolo
ESD PLA ( Carbon Fiber Composite ) - Cor
1.75mm (+-0.05mm) - Espessura / Tolerância de diâmetro
Fácil - Facilidade de Impressão