![]()
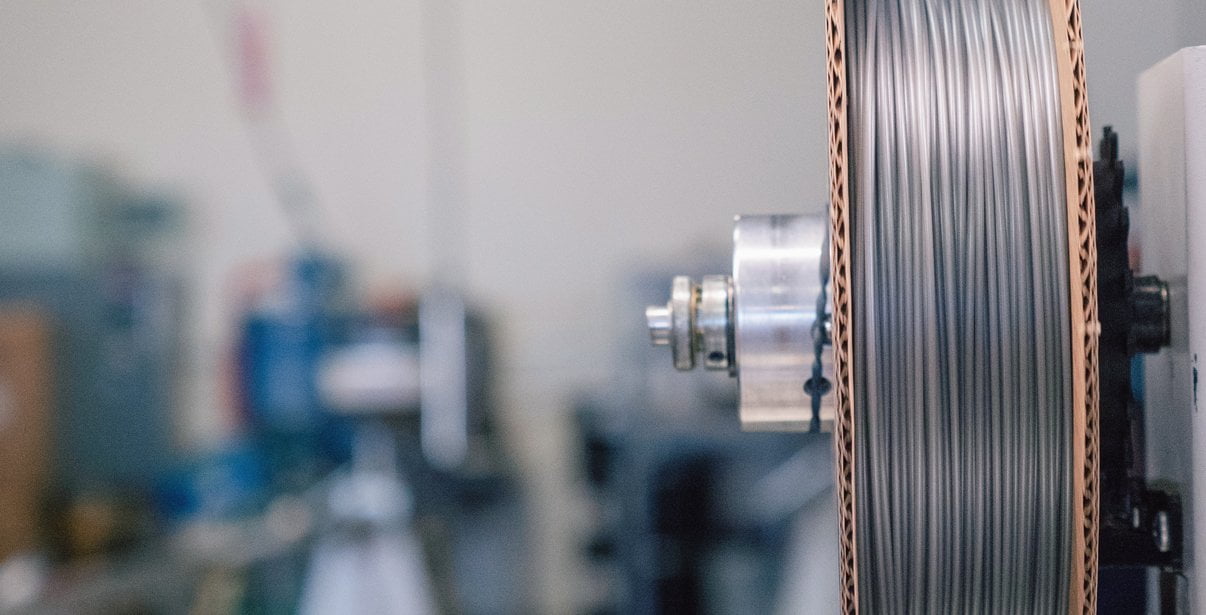
A FormFutura foi fundada em 2012, em Amesterdão, Holanda., de produção de filamentos para impressão 3D de alta qualidade.
Tornou-se rapidamente numa marca inconfundível com clientes em todo o mundo.
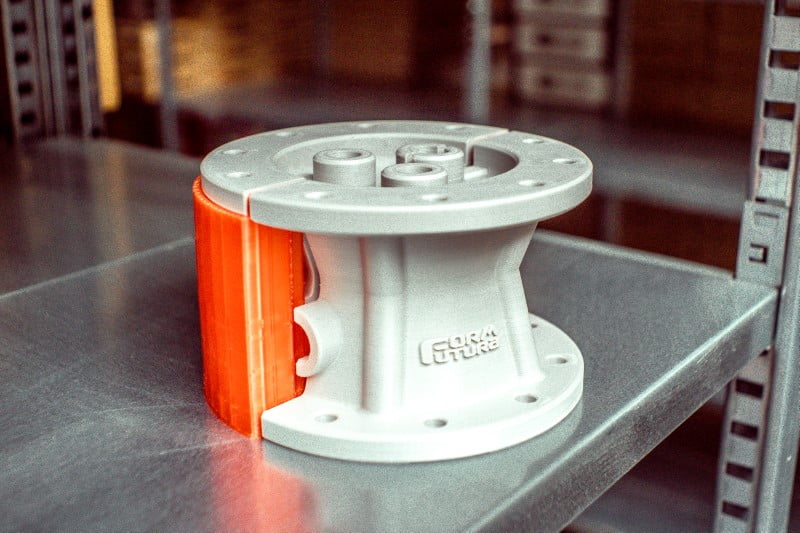
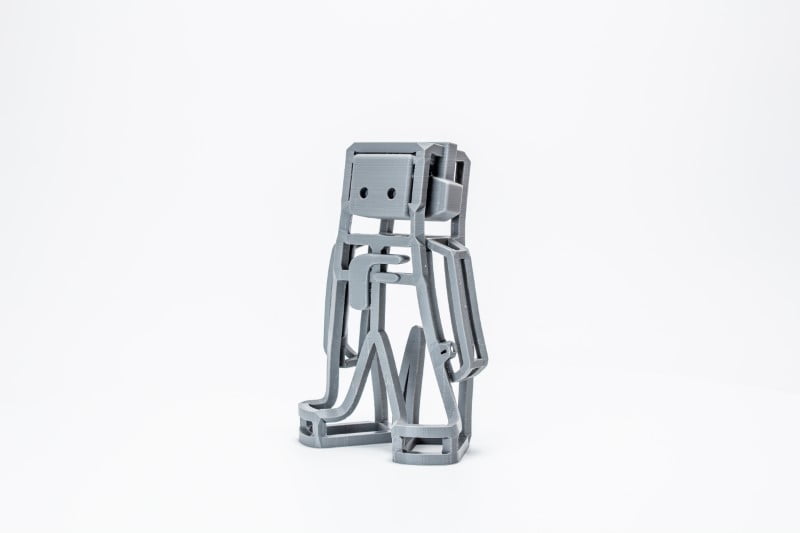
Atlas Support is a water-soluble PVA (polyvinyl alcohol) support material for complex multi-extrusion 3D printing with PETG based materials. Atlas Support is a 3D printer filament with improved thermal stability and can be 3D printed at slightly higher temperatures compared to regular PVA. This makes Atlas Support an ideal PVA support material for PETG-based materials with good thermal and chemical adherence.
Key features
Applications
General printing guidelines *
| Nozzle size: ≥ 0.15mm | Layer height: ≥ 0.1mm | Experience level: Expert |
| Print temp: ± 180 - 210° C * | Fan speed: 0 - 30% | |
| Heat bed: ± 0 - 60° C | Enclosure needed: No |
*) Above displayed settings are meant as guidance to find your optimal print settings. These ranges in settings should work for most printers, but please do feel free to experiment outside these ranges if you think it is suitable for your printer. There are a lot of different type of printers, hot-ends, and printer offset that it is extremely difficult to give an overall one-size-fits-all setting.
*) Do not exceed a printing temperature of 225˚C, because AquaSolve PVA will then crystallize to quickly and it will no longer flow and/or dissolve in water. Printing with PVA materials does require a certain level of 3D printing expertise as PVA cannot stay too long in the hot secondary/support nozzle and needs to flow and by that needs expert tweaking to find the optimal “waiting temperature” for the material not to deteriorate/crystalizing in the hot secondary/support nozzle when not being 3D printed.
Filament length
| ρ: 1.23 g/cc | 50 gr coil | 0.3 Kg spool | |||
| Ø 1.75mm | ± 17m | ± 102m | |||
| Ø 2.85mm | ± 6.4m | ± 39m |
PVA compatibility overview *
| AquaSolve PVA | Atlas Support | Helios Support | |
| ABSpro | - | - | + |
| ABSpro Flame Retardant | - | - | + |
| ApolloX | - | - | ++ |
| CarbonFil | - | ++ | - |
| Centaur PP | No data | No data | No data |
| ClearScent ABS | - | - | ++ |
| Crystal Flex | - | - | + |
| EasyCork | + | +/- | - |
Para uma correcta manutenção da sua impressora 3D, recomendamos sempre que trocar de material de filamento 3D, a efectuar uma purga com filamento especial de limpeza.
Desta forma garante que não ficam vestígios de material nas paredes do nozzle, evitando o acumular de crosta que é criado sempre que efectua trocas de material.
Com este produto evita problema como "clogs" e "jams" e fará com que o seu nozzle mantenha-se sempre limpo, durando muito mais tempo.
Poderá encontrar a partir de 1.49€ no seguinte LINK

Para obter maior aderência à superfície da sua impressora 3D recomendamos a aplicar 3DLAC na base da plataforma.
Poderá encontrar no seguinte LINK
Este material é altamente higroscópico, absorvendo rapidamente a humidade do ar passados poucos minutos após aberto, impossibilitando desta forma a correcta impressão 3D do mesmo. O resultado das impressões 3D de materiais com humidade tendem a ser frágeis e de acabamento irregular ou em certos casos, torna-se simplesmente impossíveis de imprimir.
Deverá de usar soluções de caixas fechadas com dessecante como sílica ou caixas próprias secadoras de filamento.
Poderá encontrar no seguinte LINK
Download:
Technical and Safety Data Sheet
300g - Rolo
PVA Atlas Support - Cor
1.75mm (+-0.05mm) - Espessura / Tolerância de diâmetro
180º a 210º - Temp. recomendada do Hotend
0º a 60º - Temp. recomendada da Heated bed
Moderado - Facilidade de Impressão
![]()
A FormFutura foi fundada em 2012, em Amesterdão, Holanda., de produção de filamentos para impressão 3D de alta qualidade.
Tornou-se rapidamente numa marca inconfundível com clientes em todo o mundo.
AquaSolve PVA (polyvinyl alcohol) is a water-soluble support material for complex multi-extrusion 3D printing. AquaSolve PVA is a 3D printer filament with good thermal stability and can be 3D printed at relatively low temperatures. This makes AquaSolve PVA an ideal support material for PLA-based materials with good thermal and chemical adherence.
Key features
Applications
General printing guidelines *
| Nozzle size: ≥ 0.15mm | Layer height: ≥ 0.1mm | Experience level: Expert |
| Print temp: ± 190 - 210° C * | Fan speed: 0 - 30% | |
| Heat bed: ± 0 - 60° C | Enclosure needed: No |
*) Above displayed settings are meant as guidance to find your optimal print settings. These ranges in settings should work for most printers, but please do feel free to experiment outside these ranges if you think it is suitable for your printer. There are a lot of different type of printers, hot-ends, and printer offset that it is extremely difficult to give an overall one-size-fits-all setting.
*) Do not exceed a printing temperature of 225˚C, because AquaSolve PVA will then crystallize to quickly and it will no longer flow and/or dissolve in water. Printing with PVA materials does require a certain level of 3D printing expertise as PVA cannot stay too long in the hot secondary/support nozzle and needs to flow and by that needs expert tweaking to find the optimal “waiting temperature” for the material not to deteriorate/crystalizing in the hot secondary/support nozzle when not being 3D printed.
Filament length
| ρ: 1.23 g/cc | 50 gr coil | 0.3 Kg spool | |||
| Ø 1.75mm | ± 16.9m | ± 101m | |||
| Ø 2.85mm | ± 6.4m | ± 38m |
PVA compatibility overview *
| AquaSolve PVA | Atlas Support | Helios Support | |
| ABSpro | - | - | + |
| ABSpro Flame Retardant | - | - | + |
| ApolloX | - | - | ++ |
| CarbonFil | - | ++ | - |
| Centaur PP | No data | No data | No data |
| ClearScent ABS | - | - | ++ |
| Crystal Flex | - | - | + |
| EasyCork | + | +/- | - |
Para uma correcta manutenção da sua impressora 3D, recomendamos sempre que trocar de material de filamento 3D, a efectuar uma purga com filamento especial de limpeza.
Desta forma garante que não ficam vestígios de material nas paredes do nozzle, evitando o acumular de crosta que é criado sempre que efectua trocas de material.
Com este produto evita problema como "clogs" e "jams" e fará com que o seu nozzle mantenha-se sempre limpo, durando muito mais tempo.
Poderá encontrar a partir de 1.49€ no seguinte LINK
Para obter maior aderência à superfície da sua impressora 3D recomendamos a aplicar 3DLAC na base da plataforma.
Poderá encontrar no seguinte LINK
Este material é altamente higroscópico, absorvendo rapidamente a humidade do ar passados poucos minutos após aberto, impossibilitando desta forma a correcta impressão 3D do mesmo. O resultado das impressões 3D de materiais com humidade tendem a ser frágeis e de acabamento irregular ou em certos casos, torna-se simplesmente impossíveis de imprimir.
Deverá de usar soluções de caixas fechadas com dessecante como sílica ou caixas próprias secadoras de filamento.
Poderá encontrar no seguinte LINK
Download:
Technical and Safety Data Sheet
300g - Rolo
PVA AquaSolve - Cor
1.75mm (+-0.05mm) - Espessura / Tolerância de diâmetro
190º a 210º - Temp. recomendada do Hotend
0º a 60º - Temp. recomendada da Heated bed
Moderado - Facilidade de Impressão
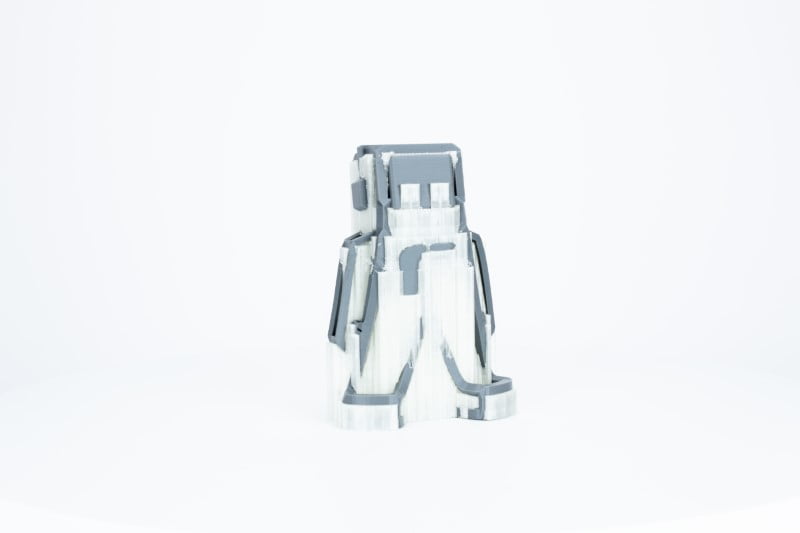
PEIJet 1010 Ultem (polietherimide)
- é um material à base de Ultem, normalmente utilizado em vários domínios, desde a indústria automóvel e electrónica até à produção energética ou médica
- adequado para fabricantes avançados e qualificados
- extremamente resistente ao calor (mais de 200°C)
- estável térmico
- classificações retardador de chama UL94 e 5VA
- extremamente forte, resistente e durável
- módulo flexural elevado
Siga as definições e recomendações abaixo (consulte também a ficha técnica ou as especificações do produto) para evitar danos (no próprio material, na sua impressora ou nos seus componentes).
PEIJet 1010 é um material para fabricantes avançados e qualificados e impressoras bastante industriais com opções de impressão específicas.
A polieterimida (PEI) é um tipo de polímero de alto desempenho que possuí alta temperatura de transição vítrea, ótimo retardamento de chama, baixa geração de fumaça e boas propriedades mecânicas. O PEI é um polímero termoplástico de alto desempenho, com boas propriedades térmicas, mecânicas e elétricas (isolante) com a vantagem adicional de possuir fácil processamento. A característica mais marcante do PEI é a sua estabilidade dimensional tanto no curto como no longo prazo. Isso graças a sua estrutura rígida e altamente emaranhada. Aplicações As principais aplicações de PEI são nos setores aeronáuticos, automotivos e de equipamentos médicos. A utilização do PEI no setor aeronáutico se justifica por este ser um retardante a chama com baixa emissão de gases tóxicos e por apresentar alta resistência química. Desta maneira, utiliza-se para a confecção de válvulas de ar e combustível, por exemplo. Já no setor automotivo o destaque do PEI se dá pelo bom desempenho térmico e mecânico, baixa densidade, bom custo benefício, alta estabilidade dimensional e boa possessibilidade. Neste setor o polímero é utilizado em componentes de transmissão, acelerador e ignição, além de sensores e caixas de termostato. Por fim, no setor médico, utiliza-se a polieterimida em bandejas, válvulas, aparelhos odontológicos e pipetas. Tendo em vista que este é capaz de suportar a maioria dos processos de esterilização, ter alta resistência química e por ser translúcido.
Para uma correcta manutenção da sua impressora 3D, recomendamos sempre que trocar de material de filamento 3D, a efectuar uma purga com filamento especial de limpeza.
Desta forma garante que não ficam vestígios de material nas paredes do nozzle, evitando o acumular de crosta que é criado sempre que efectua trocas de material.
Com este produto evita problema como "clogs" e "jams" e fará com que o seu nozzle mantenha-se sempre limpo, durando muito mais tempo.
Poderá encontrar a partir de 1.49€ no seguinte LINK

Este material é considerado de difícil aderência à superfície da plataforma de impressão 3D de vidro ou PEI. Para evitar problemas de warpping e de aderência das peças, recomendamos a aplicar potenciador de aderência especial para materiais de alta temperatura HT.
Poderá encontrar no seguinte LINK
Este material é altamente higroscópico, absorvendo rapidamente a humidade do ar passados poucos minutos após aberto, impossibilitando desta forma a correcta impressão 3D do mesmo. O resultado das impressões 3D de materiais com humidade tendem a ser frágeis e de acabamento irregular ou em certos casos, torna-se simplesmente impossíveis de imprimir.
Deverá de usar soluções de caixas fechadas com dessecante como sílica ou caixas próprias secadoras de filamento.
Poderá encontrar no seguinte LINK
PRINTING SETUP
Nozzle: 360 °C
Heatbed: 120 - 150 °C
▪ Ultem is extremely susceptible to moisture and it can easily absorb water even from the air which can affect the strength of the final print. It is necessary to dry the material preferably at 120 ° C before each use (in case of doubts - the spool is able to handle the heat as well). If you dry it properly, the resulting object may be equivalent in strength to, for example, an aluminum part.
▪ For printing, it is necessary to apply special glue (e.g. MAGIGOO HT) to the mat, for a perfect first layer we recommend to apply the glue in three layers.
▪ It is also necessary to use a printer with a closed chamber heated to at least 70° C.
▪ After it's printed, the material shrinks as the chamber gradually cools and, due to its strength, is able to damage the pad, so be sure to move the printout away as quickly as possible.
ADVANTAGES:
✅ extremely heat-resistant (more than 200°C)
✅ strong, tough, durable and self-extinguishing
NEVÝHODY:
❌ very difficult to print
❌ for industrial printers
❌ after it's printed, the print shrinks - is able to damage the pad
Documentos para Download:
Technical Data Sheet
Safety Data Sheet
Rohs
10m (Amostra) - Rolo
PEIJet 1010 Ultem Natur - Cor
1.75mm (+-0.05mm) - Espessura
360º - Temp. recomendada do Hotend
120º a 150º - Temp. recomendada da Heated bed (mediante aplicação de Magigoo HT)
Muito Difícil - Facilidade de Impressão

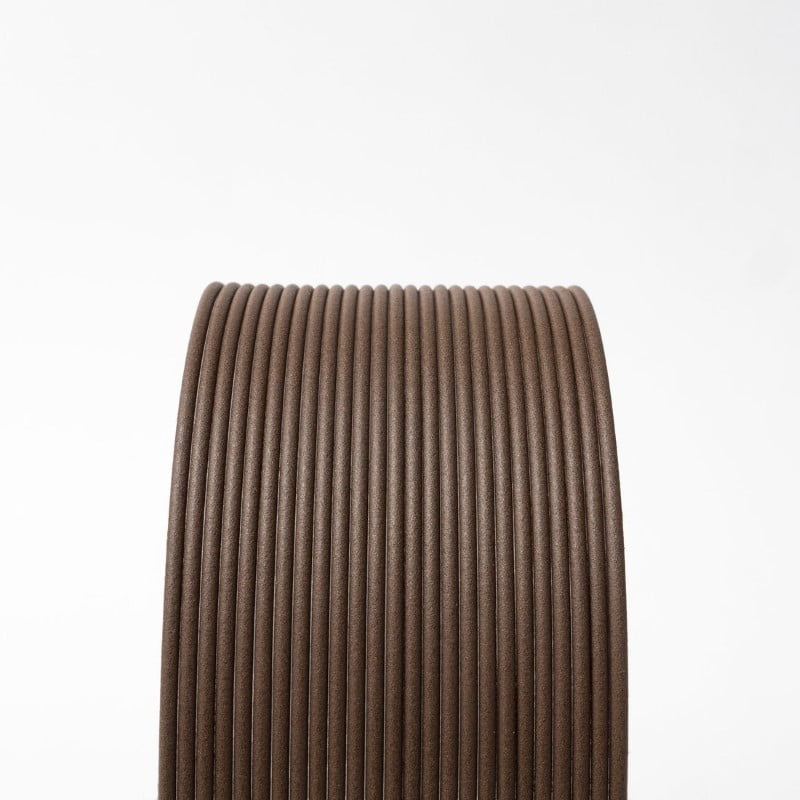
ProtoPasta é uma empresa situada nos Estados Unidos da América, de produção de filamentos para impressão 3D de alta qualidade.
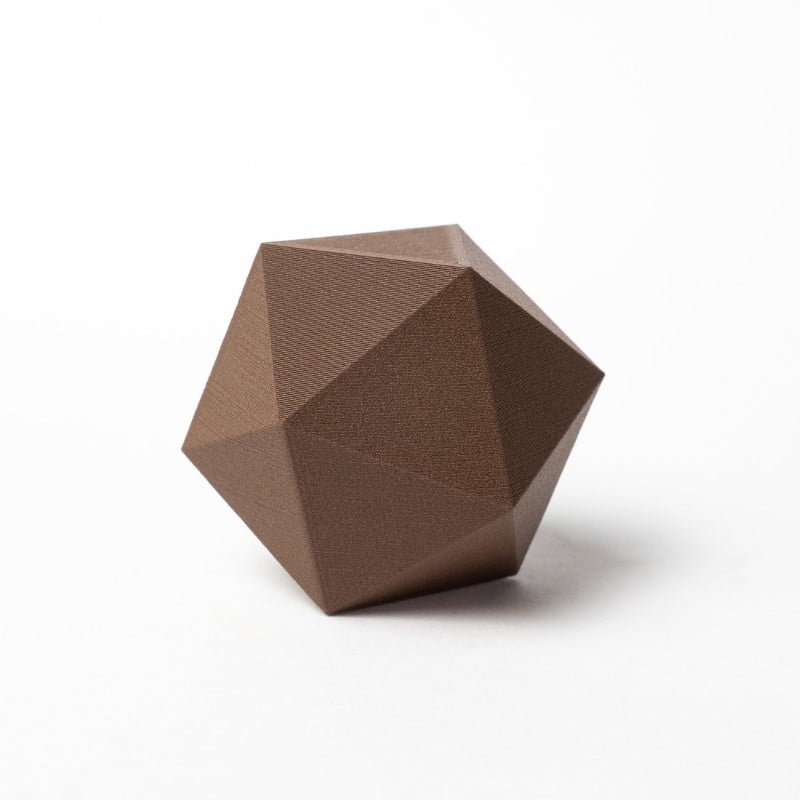
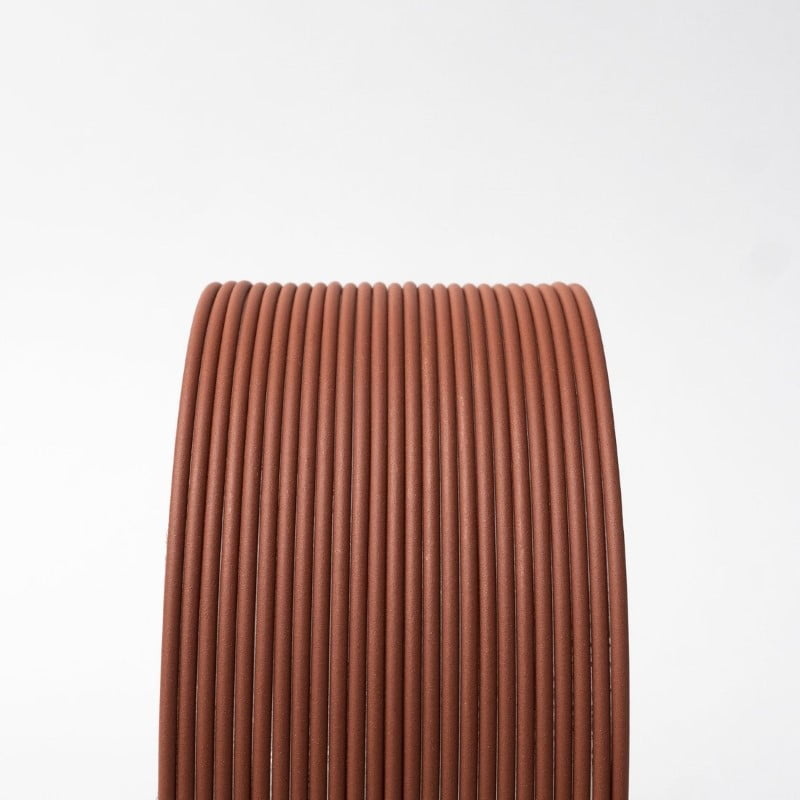
Caracterizada pelos rolos feitos em cartão, esta marca é mundialmente famosa por ser especializada em materiais como PLA e ABS modificados com outros materiais, como o PLA Magnético; o PLA Condutivo; PLA de fibra de carbono; HTPLA de cobre, latão ou bronze; ou o ABS-PC.
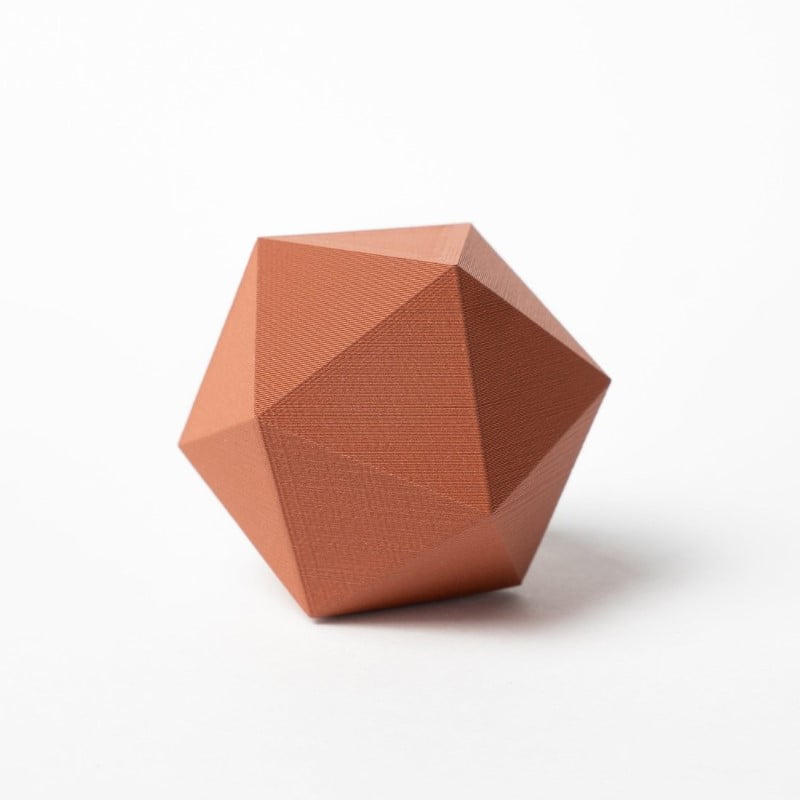
Introducing Bronze-Filled Metal Composite HTPLA .
Using real bronze powder, we've created a premium heat treatable metal PLA filament for 3D prints that finish just like real metal!
Our bronze composite filament is as versatile as it is beautiful, printing like plastic, but finishing like real metal for beautiful, durable parts from most standard 3D printers.
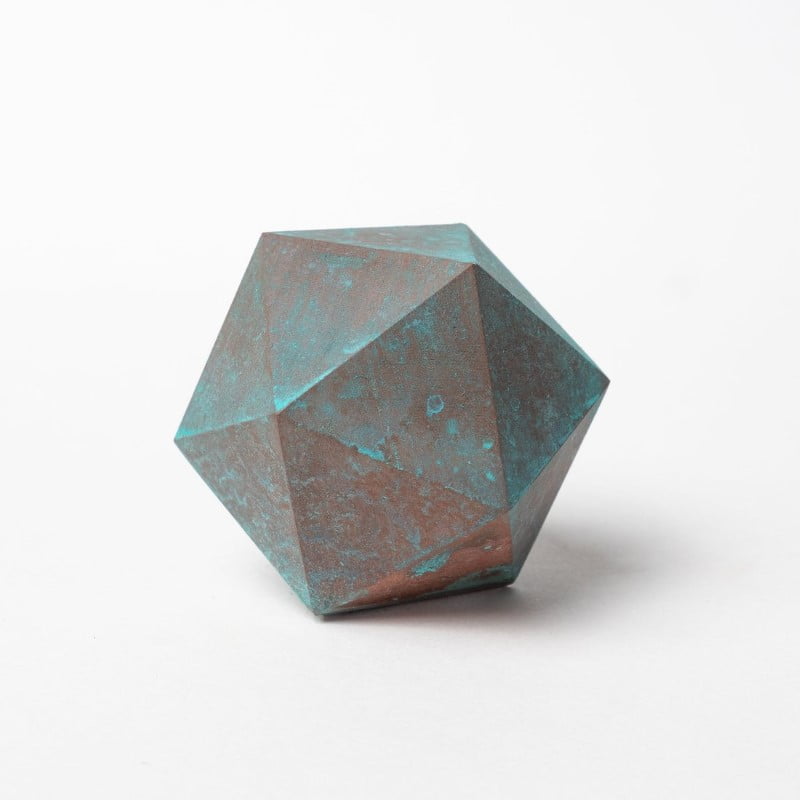
Whether you want your prints to be polished with the same bright mirror finish of shiny bronze coins or a naturally rustic finish with an acquired patina reminiscent of an aged bronze sculpture, the possibilities are endless with this specialty metal PLA filament.
With so many finishing options, the sky is the limit!
Scroll down or click the link below for more product specific details, finishing options, and application ideas for Bronze-Filled Metal Composite HTPLA.
Try these techniques separately or combine! Change the order or try something new. If you discover a new technique, make something beautiful, or discover something unexpected, share it! When you've got that perfect, WOW finish, consider preserving it with a clear coat or brush applicable water-based, food-safe, and dishwasher safe coating like Modge Podge. Practice your finishing a on a test piece like Protognome (download here).
This material has been flow optimized and has less moisture uptake than standard PLAs, however composites are still sometimes more tricky to print depending on hardware and software settings. The main challenge is to keep mass flow up (larger nozzle + fast speed) and in a single direction (minimal retraction) to avoid heat soak. More on that topic here.
We've created this page to bring you a premium PLA and HTPLA printing experience that rivals our premium material. Follow below to improve your 3D printing experience. In other words, here's your shortcut to awesomeness with pasta. If at the end of this document you have questions or need assistance, please contact us at [email protected].
Loose coils can be very tricky to manage. Going cowboy on your spool handling can quickly end up in a frustrating, tangled mess. Keep your loose coils wrangled with a spool holder like masterspool for a more trouble-free experience. Find out more about loose coil handling in Keith's blog post.
And for spooled filament, never let go of the loose end. When not in the printer extruder, tuck it away in the cardboard spool's corrugation! Also, avoid sharp bends and excessive force when loading filament into your printer.
At Proto-pasta, we make high quality filament. We aspire to make exceptional results easy, but a positive result is very much dependent on your hardware, set-up, adjustments, and process parameters. Matching hardware with process and material for a positive experience is not always straight-forward, but you can start by pairing the following settings with your printer for a good starting point, then tune or troubleshoot as required.
Volume flow rate together with temperature dictates how melted the material is. This is hardware & condition dependent based on hot end, nozzle & extruder type, material & manufacturer as well as layer fan type, position & settings. Extrusion width, layer thickness & speed changes affect volume flow which may change required/desired temperature.
Post your prints & tag us @Proto_pasta on Twitter and Instagram. Need more help? Consider typical pitfalls and fixes below.
We visited Joel and ended up with a helpful video on the subject:
Para uma correcta manutenção da sua impressora 3D, recomendamos sempre que trocar de material de filamento 3D, a efectuar uma purga com filamento especial de limpeza.
Desta forma garante que não ficam vestígios de material nas paredes do nozzle, evitando o acumular de crosta que é criado sempre que efectua trocas de material.
Com este produto evita problema como "clogs" e "jams" e fará com que o seu nozzle mantenha-se sempre limpo, durando muito mais tempo.
Poderá encontrar a partir de 1.49€ no seguinte LINK
Este material é altamente abrasivo. Recomendamos a utilização de Nozzles de aço endurecido.
Poderá encontrar no seguinte LINK
Para obter maior aderência à superfície da sua impressora 3D recomendamos a aplicar 3DLAC na base da plataforma.
Poderá encontrar no seguinte LINK
Este material é altamente higroscópico, absorvendo rapidamente a humidade do ar passados poucos minutos após aberto, impossibilitando desta forma a correcta impressão 3D do mesmo. O resultado das impressões 3D de materiais com humidade tendem a ser frágeis e de acabamento irregular ou em certos casos, torna-se simplesmente impossíveis de imprimir.
Deverá de usar soluções de caixas fechadas com dessecante como sílica ou caixas próprias secadoras de filamento.
Poderá encontrar no seguinte LINK
Download:
Technical and Safety Data Sheet
50g- Rolo
PLA Bronze-filled ( Metal Composite ) - Cor
1.75mm (+-0.05mm) - Espessura / Tolerância de diâmetro
Fácil - Facilidade de Impressão
ProtoPasta é uma empresa situada nos Estados Unidos da América, de produção de filamentos para impressão 3D de alta qualidade.
Caracterizada pelos rolos feitos em cartão, esta marca é mundialmente famosa por ser especializada em materiais como PLA e ABS modificados com outros materiais, como o PLA Magnético; o PLA Condutivo; PLA de fibra de carbono; HTPLA de cobre, latão ou bronze; ou o ABS-PC.
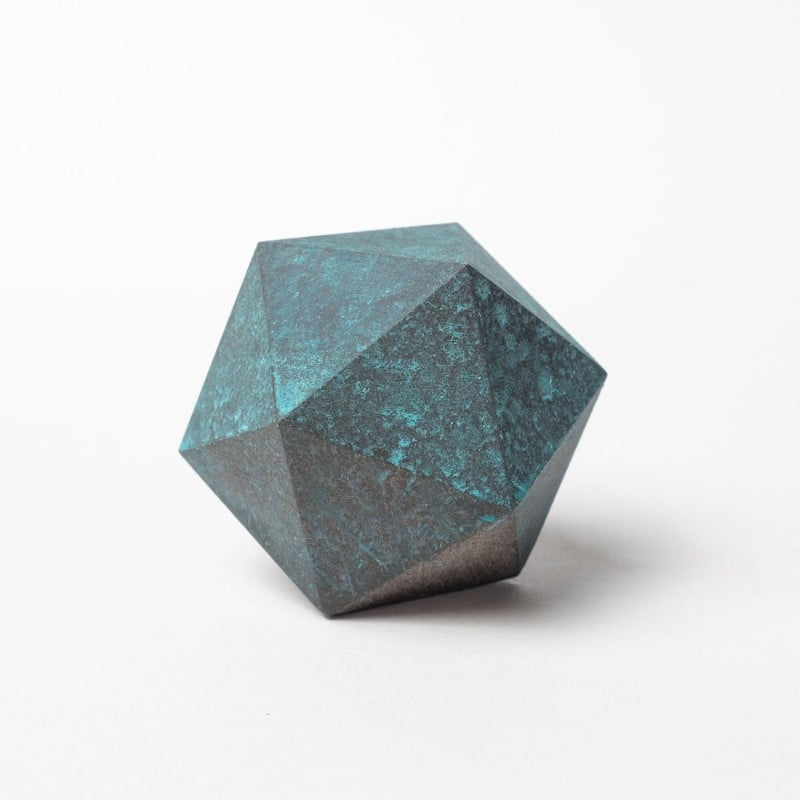
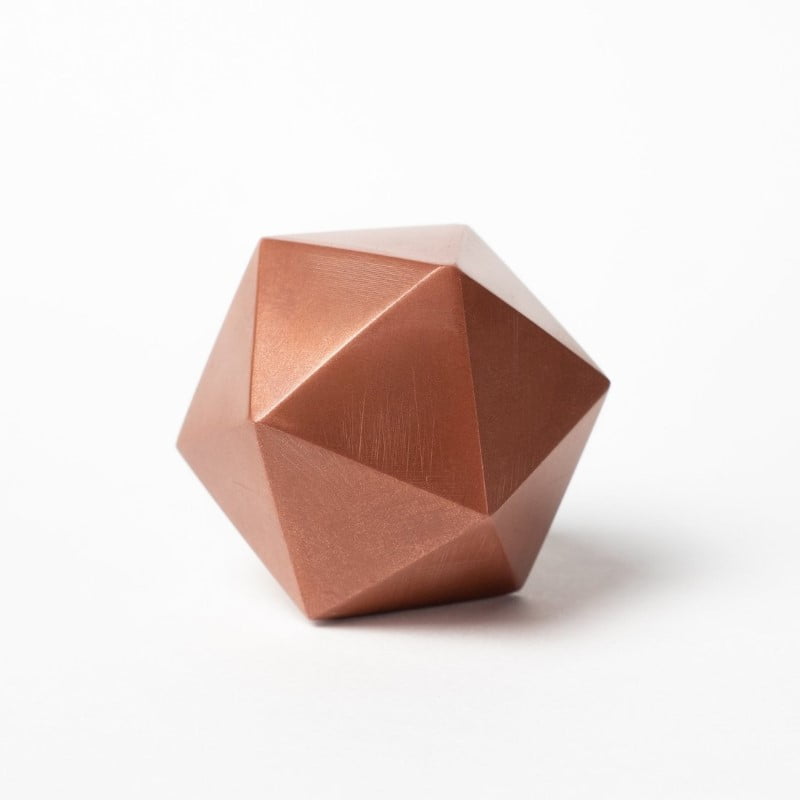
Introducing Copper-Filled Metal Composite HTPLA .
Using real copper powder, we've created a premium heat treatable metal PLA filament for 3D prints that finish just like real metal!
Our copper composite filament is as versatile as it is beautiful, printing like plastic, but finishing like real metal for beautiful, durable parts from most standard 3D printers.
Whether you want your prints to be polished with the same bright mirror finish of shiny copper coins or a naturally rustic finish with an acquired patina reminiscent of an aged copper sculpture, the possibilities are endless with this specialty metal PLA filament.
With so many finishing options, the sky is the limit!
Try these techniques separately or combine! Change the order or try something new. If you discover a new technique, make something beautiful, or discover something unexpected, share it! When you've got that perfect, WOW finish, consider preserving it with a clear coat or brush applicable water-based, food-safe, and dishwasher safe coating like Modge Podge. Practice your finishing a on a test piece like Protognome (download here).
This material has been flow optimized and has less moisture uptake than standard PLAs, however composites are still sometimes more tricky to print depending on hardware and software settings. The main challenge is to keep mass flow up (larger nozzle + fast speed) and in a single direction (minimal retraction) to avoid heat soak. More on that topic here.
We've created this page to bring you a premium PLA and HTPLA printing experience that rivals our premium material. Follow below to improve your 3D printing experience. In other words, here's your shortcut to awesomeness with pasta. If at the end of this document you have questions or need assistance, please contact us at [email protected].
Loose coils can be very tricky to manage. Going cowboy on your spool handling can quickly end up in a frustrating, tangled mess. Keep your loose coils wrangled with a spool holder like masterspool for a more trouble-free experience. Find out more about loose coil handling in Keith's blog post.
And for spooled filament, never let go of the loose end. When not in the printer extruder, tuck it away in the cardboard spool's corrugation! Also, avoid sharp bends and excessive force when loading filament into your printer.
At Proto-pasta, we make high quality filament. We aspire to make exceptional results easy, but a positive result is very much dependent on your hardware, set-up, adjustments, and process parameters. Matching hardware with process and material for a positive experience is not always straight-forward, but you can start by pairing the following settings with your printer for a good starting point, then tune or troubleshoot as required.
Volume flow rate together with temperature dictates how melted the material is. This is hardware & condition dependent based on hot end, nozzle & extruder type, material & manufacturer as well as layer fan type, position & settings. Extrusion width, layer thickness & speed changes affect volume flow which may change required/desired temperature.
Post your prints & tag us @Proto_pasta on Twitter and Instagram. Need more help? Consider typical pitfalls and fixes below.
We visited Joel and ended up with a helpful video on the subject:
Para uma correcta manutenção da sua impressora 3D, recomendamos sempre que trocar de material de filamento 3D, a efectuar uma purga com filamento especial de limpeza.
Desta forma garante que não ficam vestígios de material nas paredes do nozzle, evitando o acumular de crosta que é criado sempre que efectua trocas de material.
Com este produto evita problema como "clogs" e "jams" e fará com que o seu nozzle mantenha-se sempre limpo, durando muito mais tempo.
Poderá encontrar a partir de 1.49€ no seguinte LINK
Este material é altamente abrasivo. Recomendamos a utilização de Nozzles de aço endurecido.
Poderá encontrar no seguinte LINK
Para obter maior aderência à superfície da sua impressora 3D recomendamos a aplicar 3DLAC na base da plataforma.
Poderá encontrar no seguinte LINK
Este material é altamente higroscópico, absorvendo rapidamente a humidade do ar passados poucos minutos após aberto, impossibilitando desta forma a correcta impressão 3D do mesmo. O resultado das impressões 3D de materiais com humidade tendem a ser frágeis e de acabamento irregular ou em certos casos, torna-se simplesmente impossíveis de imprimir.
Deverá de usar soluções de caixas fechadas com dessecante como sílica ou caixas próprias secadoras de filamento.
Poderá encontrar no seguinte LINK
Download:
Technical and Safety Data Sheet
50g- Rolo
PLA Copper-filled ( Metal Composite ) - Cor
1.75mm (+-0.05mm) - Espessura / Tolerância de diâmetro
Fácil - Facilidade de Impressão
ProtoPasta é uma empresa situada nos Estados Unidos da América, de produção de filamentos para impressão 3D de alta qualidade.
Caracterizada pelos rolos feitos em cartão, esta marca é mundialmente famosa por ser especializada em materiais como PLA e ABS modificados com outros materiais, como o PLA Magnético; o PLA Condutivo; PLA de fibra de carbono; HTPLA de cobre, latão ou bronze; ou o ABS-PC.
Introducing Copper-Filled Metal Composite HTPLA .
Using real copper powder, we've created a premium heat treatable metal PLA filament for 3D prints that finish just like real metal!
Our copper composite filament is as versatile as it is beautiful, printing like plastic, but finishing like real metal for beautiful, durable parts from most standard 3D printers.
Whether you want your prints to be polished with the same bright mirror finish of shiny copper coins or a naturally rustic finish with an acquired patina reminiscent of an aged copper sculpture, the possibilities are endless with this specialty metal PLA filament.
With so many finishing options, the sky is the limit!
Try these techniques separately or combine! Change the order or try something new. If you discover a new technique, make something beautiful, or discover something unexpected, share it! When you've got that perfect, WOW finish, consider preserving it with a clear coat or brush applicable water-based, food-safe, and dishwasher safe coating like Modge Podge. Practice your finishing a on a test piece like Protognome (download here).
This material has been flow optimized and has less moisture uptake than standard PLAs, however composites are still sometimes more tricky to print depending on hardware and software settings. The main challenge is to keep mass flow up (larger nozzle + fast speed) and in a single direction (minimal retraction) to avoid heat soak. More on that topic here.
We've created this page to bring you a premium PLA and HTPLA printing experience that rivals our premium material. Follow below to improve your 3D printing experience. In other words, here's your shortcut to awesomeness with pasta. If at the end of this document you have questions or need assistance, please contact us at [email protected].
Loose coils can be very tricky to manage. Going cowboy on your spool handling can quickly end up in a frustrating, tangled mess. Keep your loose coils wrangled with a spool holder like masterspool for a more trouble-free experience. Find out more about loose coil handling in Keith's blog post.
And for spooled filament, never let go of the loose end. When not in the printer extruder, tuck it away in the cardboard spool's corrugation! Also, avoid sharp bends and excessive force when loading filament into your printer.
At Proto-pasta, we make high quality filament. We aspire to make exceptional results easy, but a positive result is very much dependent on your hardware, set-up, adjustments, and process parameters. Matching hardware with process and material for a positive experience is not always straight-forward, but you can start by pairing the following settings with your printer for a good starting point, then tune or troubleshoot as required.
Volume flow rate together with temperature dictates how melted the material is. This is hardware & condition dependent based on hot end, nozzle & extruder type, material & manufacturer as well as layer fan type, position & settings. Extrusion width, layer thickness & speed changes affect volume flow which may change required/desired temperature.
Post your prints & tag us @Proto_pasta on Twitter and Instagram. Need more help? Consider typical pitfalls and fixes below.
We visited Joel and ended up with a helpful video on the subject:
Para uma correcta manutenção da sua impressora 3D, recomendamos sempre que trocar de material de filamento 3D, a efectuar uma purga com filamento especial de limpeza.
Desta forma garante que não ficam vestígios de material nas paredes do nozzle, evitando o acumular de crosta que é criado sempre que efectua trocas de material.
Com este produto evita problema como "clogs" e "jams" e fará com que o seu nozzle mantenha-se sempre limpo, durando muito mais tempo.
Poderá encontrar a partir de 1.49€ no seguinte LINK
Este material é altamente abrasivo. Recomendamos a utilização de Nozzles de aço endurecido.
Poderá encontrar no seguinte LINK
Para obter maior aderência à superfície da sua impressora 3D recomendamos a aplicar 3DLAC na base da plataforma.
Poderá encontrar no seguinte LINK
Este material é altamente higroscópico, absorvendo rapidamente a humidade do ar passados poucos minutos após aberto, impossibilitando desta forma a correcta impressão 3D do mesmo. O resultado das impressões 3D de materiais com humidade tendem a ser frágeis e de acabamento irregular ou em certos casos, torna-se simplesmente impossíveis de imprimir.
Deverá de usar soluções de caixas fechadas com dessecante como sílica ou caixas próprias secadoras de filamento.
Poderá encontrar no seguinte LINK
Download:
Technical and Safety Data Sheet
500g- Rolo
PLA Copper-filled ( Metal Composite ) - Cor
1.75mm (+-0.05mm) - Espessura / Tolerância de diâmetro
Fácil - Facilidade de Impressão
ProtoPasta é uma empresa situada nos Estados Unidos da América, de produção de filamentos para impressão 3D de alta qualidade.
Caracterizada pelos rolos feitos em cartão, esta marca é mundialmente famosa por ser especializada em materiais como PLA e ABS modificados com outros materiais, como o PLA Magnético; o PLA Condutivo; PLA de fibra de carbono; HTPLA de cobre, latão ou bronze; ou o ABS-PC.
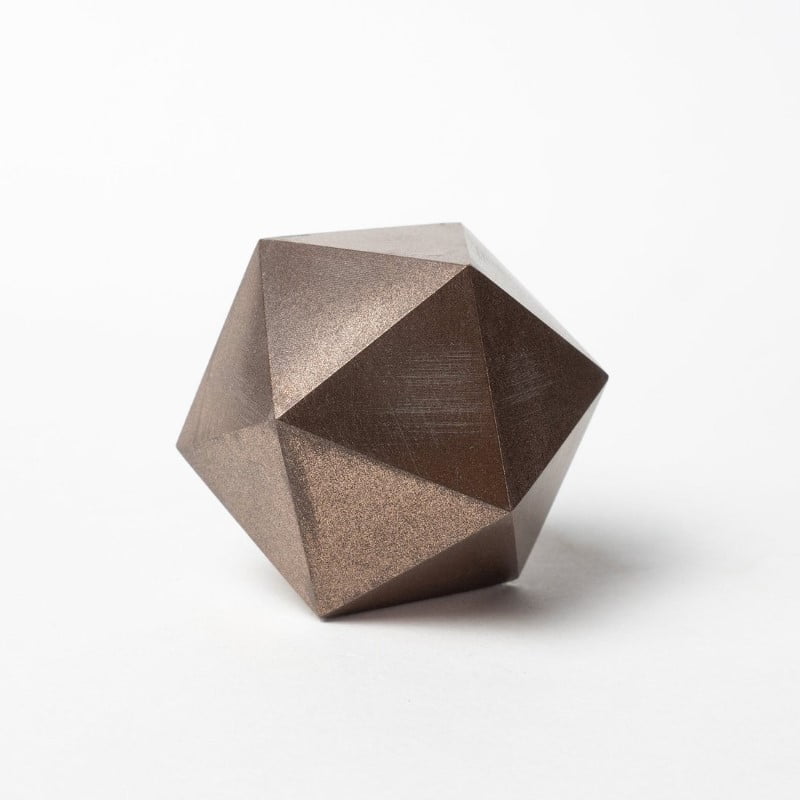
Introducing Bronze-Filled Metal Composite HTPLA .
Using real bronze powder, we've created a premium heat treatable metal PLA filament for 3D prints that finish just like real metal!
Our bronze composite filament is as versatile as it is beautiful, printing like plastic, but finishing like real metal for beautiful, durable parts from most standard 3D printers.
Whether you want your prints to be polished with the same bright mirror finish of shiny bronze coins or a naturally rustic finish with an acquired patina reminiscent of an aged bronze sculpture, the possibilities are endless with this specialty metal PLA filament.
With so many finishing options, the sky is the limit!
Scroll down or click the link below for more product specific details, finishing options, and application ideas for Bronze-Filled Metal Composite HTPLA.
Try these techniques separately or combine! Change the order or try something new. If you discover a new technique, make something beautiful, or discover something unexpected, share it! When you've got that perfect, WOW finish, consider preserving it with a clear coat or brush applicable water-based, food-safe, and dishwasher safe coating like Modge Podge. Practice your finishing a on a test piece like Protognome (download here).
This material has been flow optimized and has less moisture uptake than standard PLAs, however composites are still sometimes more tricky to print depending on hardware and software settings. The main challenge is to keep mass flow up (larger nozzle + fast speed) and in a single direction (minimal retraction) to avoid heat soak. More on that topic here.
We've created this page to bring you a premium PLA and HTPLA printing experience that rivals our premium material. Follow below to improve your 3D printing experience. In other words, here's your shortcut to awesomeness with pasta. If at the end of this document you have questions or need assistance, please contact us at [email protected].
Loose coils can be very tricky to manage. Going cowboy on your spool handling can quickly end up in a frustrating, tangled mess. Keep your loose coils wrangled with a spool holder like masterspool for a more trouble-free experience. Find out more about loose coil handling in Keith's blog post.
And for spooled filament, never let go of the loose end. When not in the printer extruder, tuck it away in the cardboard spool's corrugation! Also, avoid sharp bends and excessive force when loading filament into your printer.
At Proto-pasta, we make high quality filament. We aspire to make exceptional results easy, but a positive result is very much dependent on your hardware, set-up, adjustments, and process parameters. Matching hardware with process and material for a positive experience is not always straight-forward, but you can start by pairing the following settings with your printer for a good starting point, then tune or troubleshoot as required.
Volume flow rate together with temperature dictates how melted the material is. This is hardware & condition dependent based on hot end, nozzle & extruder type, material & manufacturer as well as layer fan type, position & settings. Extrusion width, layer thickness & speed changes affect volume flow which may change required/desired temperature.
Post your prints & tag us @Proto_pasta on Twitter and Instagram. Need more help? Consider typical pitfalls and fixes below.
We visited Joel and ended up with a helpful video on the subject:
Para uma correcta manutenção da sua impressora 3D, recomendamos sempre que trocar de material de filamento 3D, a efectuar uma purga com filamento especial de limpeza.
Desta forma garante que não ficam vestígios de material nas paredes do nozzle, evitando o acumular de crosta que é criado sempre que efectua trocas de material.
Com este produto evita problema como "clogs" e "jams" e fará com que o seu nozzle mantenha-se sempre limpo, durando muito mais tempo.
Poderá encontrar a partir de 1.49€ no seguinte LINK
Este material é altamente abrasivo. Recomendamos a utilização de Nozzles de aço endurecido.
Poderá encontrar no seguinte LINK
Para obter maior aderência à superfície da sua impressora 3D recomendamos a aplicar 3DLAC na base da plataforma.
Poderá encontrar no seguinte LINK
Este material é altamente higroscópico, absorvendo rapidamente a humidade do ar passados poucos minutos após aberto, impossibilitando desta forma a correcta impressão 3D do mesmo. O resultado das impressões 3D de materiais com humidade tendem a ser frágeis e de acabamento irregular ou em certos casos, torna-se simplesmente impossíveis de imprimir.
Deverá de usar soluções de caixas fechadas com dessecante como sílica ou caixas próprias secadoras de filamento.
Poderá encontrar no seguinte LINK
Download:
Technical and Safety Data Sheet
500g- Rolo
PLA Bronze-filled ( Metal Composite ) - Cor
1.75mm (+-0.05mm) - Espessura / Tolerância de diâmetro
Fácil - Facilidade de Impressão
ProtoPasta é uma empresa situada nos Estados Unidos da América, de produção de filamentos para impressão 3D de alta qualidade.
Caracterizada pelos rolos feitos em cartão, esta marca é mundialmente famosa por ser especializada em materiais como PLA e ABS modificados com outros materiais, como o PLA Magnético; o PLA Condutivo; PLA de fibra de carbono; HTPLA de cobre, latão ou bronze; ou o ABS-PC.
Protopasta Stainless Steel PLA filament is a dense material that prints as easily as standard PLA but results in heavy cast metal looking prints that can be brushed, sanded, or polished post-print to achieve amazing results.
Using real steel powder, this premium, metal-filled steel PLA filament is perfect for jewelry, costumes, props, figurines, crafting, robots, or any other 3D prints needing a truly stainless steel finish.
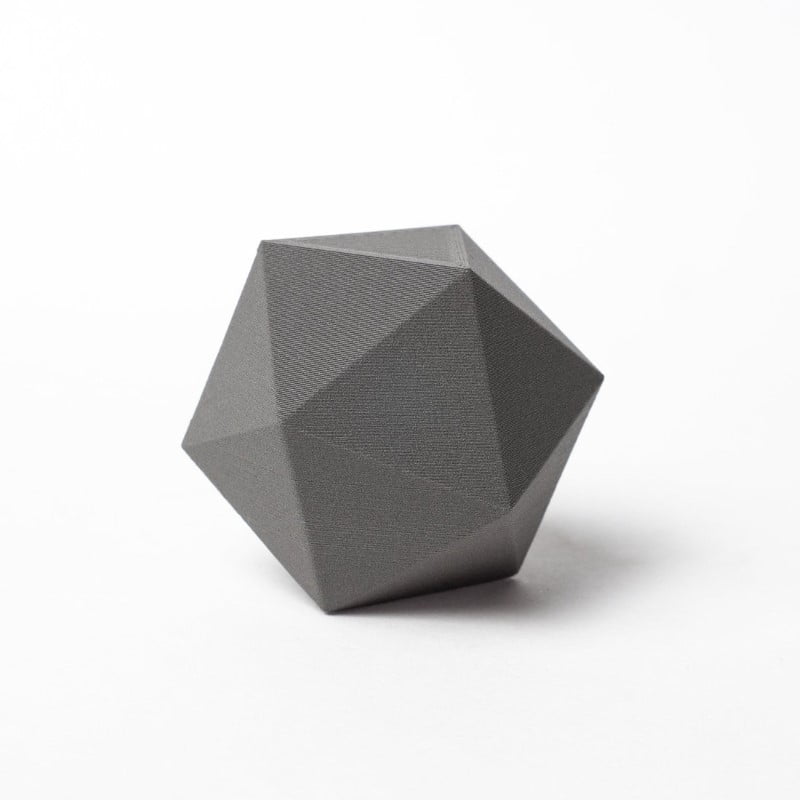


Introducing Stainless Steel-Filled Metal Composite PLA. Using real steel powder, we've created a premium metal PLA filament for 3D prints that finish just like real stainless steel! Our steel composite filament is as versatile as it is beautiful, printing like plastic, but finishing like real metal for beautiful, durable parts from most standard 3D printers.
We suggest experimenting with polishing using this starter kit (includes instructional videos).
**This filament is more abrasive than standard PLA. Be prepared to replace your nozzle and do 1st layer adjustment. Try a wear resistant and/or larger diameter nozzle for increased service intervals.
Try these techniques separately or combine! Change the order or try something new. If you discover a new technique, make something beautiful, or discover something unexpected, share it! When you've got that perfect, WOW finish, consider preserving it with a clear coat or brush applicable water-based, food-safe, and dishwasher safe coating like Modge Podge. Practice your finishing a on a test piece like Protognome (download here).
This material has been flow optimized and has less moisture uptake than standard PLAs, however composites are still sometimes more tricky to print depending on hardware and software settings. The main challenge is to keep mass flow up (larger nozzle + fast speed) and in a single direction (minimal retraction) to avoid heat soak. More on that topic here.
We've created this page to bring you a premium PLA and HTPLA printing experience that rivals our premium material. Follow below to improve your 3D printing experience. In other words, here's your shortcut to awesomeness with pasta. If at the end of this document you have questions or need assistance, please contact us at [email protected].
Loose coils can be very tricky to manage. Going cowboy on your spool handling can quickly end up in a frustrating, tangled mess. Keep your loose coils wrangled with a spool holder like masterspool for a more trouble-free experience. Find out more about loose coil handling in Keith's blog post.
And for spooled filament, never let go of the loose end. When not in the printer extruder, tuck it away in the cardboard spool's corrugation! Also, avoid sharp bends and excessive force when loading filament into your printer.
At Proto-pasta, we make high quality filament. We aspire to make exceptional results easy, but a positive result is very much dependent on your hardware, set-up, adjustments, and process parameters. Matching hardware with process and material for a positive experience is not always straight-forward, but you can start by pairing the following settings with your printer for a good starting point, then tune or troubleshoot as required.
Volume flow rate together with temperature dictates how melted the material is. This is hardware & condition dependent based on hot end, nozzle & extruder type, material & manufacturer as well as layer fan type, position & settings. Extrusion width, layer thickness & speed changes affect volume flow which may change required/desired temperature.
Post your prints & tag us @Proto_pasta on Twitter and Instagram. Need more help? Consider typical pitfalls and fixes below.
We visited Joel and ended up with a helpful video on the subject:
Protopasta Stainless Steel PLA is a dense material that prints as easily as standard PLA but results in heavy prints that can be finished post-print to achieve amazing results. Perfect for jewelry, costumes, props, figurines, crafting, robots, and more!
What is it made out of?
Protopasta Stainless Steel PLA is a compound of Natureworks 4043D PLA and finely ground, powderized stainless steel. In filament form, it is rather brittle, and should be handled with care to avoid breakage.
Is it stronger?
No. Protopasta Stainless Steel offers the aesthetic and density of metal, but because the stainless steel is finely powderized and encased in PLA, it is not stronger than standard PLA.
Is it conductive?
No. The stainless steel is too small and separated by the PLA to offer any noticeable amount of conductivity. You should try our Conductive PLA!
Finishing Techniques
In an unfinished form, prints look like cast metal. They can be left that way, or finished through a variety of methods to achieve different results. Here are some of the methods we have tried so far:
Spool Amount: Density vs. Length
3D printer filament is sold in grams /kg, even in the case of exotic materials with greater density. Our Stainless Steel PLA is quite dense compared to standard PLA. As a result, a 500 g spool of Stainless Steel PLA contains about 90 meters of filament, vs. nearly 200 meters on a 500 g spool of standard PLA.
Printer Settings
Protopasta Stainless Steel PLA prints well using standard PLA settings, however, it may have trouble getitng through smaller nozzles. We have had good success printing at 215° C using a .5mm nozzle and direct-drive spring loaded pinch-roll style extrusion head.
Density:
2.4 g/cm3 (2400 kg/m3)
Parameters:
Bed Temp (if available, is not required): 50° C
Hot End Temp: 195 – 220° C
Para uma correcta manutenção da sua impressora 3D, recomendamos sempre que trocar de material de filamento 3D, a efectuar uma purga com filamento especial de limpeza.
Desta forma garante que não ficam vestígios de material nas paredes do nozzle, evitando o acumular de crosta que é criado sempre que efectua trocas de material.
Com este produto evita problema como "clogs" e "jams" e fará com que o seu nozzle mantenha-se sempre limpo, durando muito mais tempo.
Poderá encontrar a partir de 1.49€ no seguinte LINK
Este material é altamente abrasivo. Recomendamos a utilização de Nozzles de aço endurecido.
Poderá encontrar no seguinte LINK
Para obter maior aderência à superfície da sua impressora 3D recomendamos a aplicar 3DLAC na base da plataforma.
Poderá encontrar no seguinte LINK
Este material é altamente higroscópico, absorvendo rapidamente a humidade do ar passados poucos minutos após aberto, impossibilitando desta forma a correcta impressão 3D do mesmo. O resultado das impressões 3D de materiais com humidade tendem a ser frágeis e de acabamento irregular ou em certos casos, torna-se simplesmente impossíveis de imprimir.
Deverá de usar soluções de caixas fechadas com dessecante como sílica ou caixas próprias secadoras de filamento.
Poderá encontrar no seguinte LINK
Download:
Technical and Safety Data Sheet
500g- Rolo
PLA Steel-filled ( Metal Composite ) - Cor
1.75mm (+-0.05mm) - Espessura / Tolerância de diâmetro
Fácil - Facilidade de Impressão
![]()
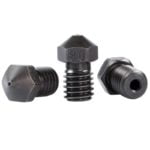
Nozzle produzido pela marca E3D V6.
Compatível com a maioria dos hotends:
Mosquito and Mosquito Magnum
Copperhead
E3D V4, V5 and V6 blocks
E3D Chimera and Kraken
RepRap M6
e Impressoras 3D:
MK3s
MK2.5/S
MK2/S
MINI
E3D é famosa no mundo da impressão 3D pela sua nozzle v6 nas suas diferentes variantes: latão, aço endurecido e aço inoxidável.

Devido ao crescente uso de materiais avançados, com altas temperaturas de extrusão e ligas com fibras de carbono ou vidro, E3D-On-line desenvolveu um nozzle capaz de suportar qualquer material do mercado: o Nozzle X.
O Nozzle X é um nozzle que interiormente apresenta a famosa forma de cone dos nozzles v6 de E3D-On-line, desenhado para obter um fluxo constante.
O Nozzle X está otimizado graças aos seus materiais de fabricação, um aço para ferramentas destinado à fabricação de utensílios que estão expostos constantemente desgaste e a golpes.
Para complementar a dureza do aço para ferramentas, agregou-se um niquelado a todas as paredes do nozzle, que além de aumentar a dureza superficial, consegue um acabamento totalmente liso que permite um acabamento superficial totalmente suave nas peças realizadas pela impressora 3D.
Por outro lado, para combater os problemas de desgaste provocado pelos materiais que contém fibras de carbono ou vidro, o Nozzle X conta com um nano-recubrimiento no seu interior.
A soma de todas estas propriedades, tecnicamente excelentes, permitem imprimir materiais avançados (450ºC ) com fibra, como por exemplo PEKK-Fibra de Carbono ou PEI-Fibra de Carbono, sem problemas de desgaste .
Escolher o material certo:
Nozzle X
O Nozzle X é o último nozzle de que a sua impressora 3D alguma vez precisará. Fabricados a partir de uma base de aço-ferramenta endurecido, são depois niquelados para manter a dureza a temperaturas elevadas, e têm um revestimento WS2 aplicado para proporcionar ao bico propriedades de aderência reduzidas. Classificado a uma temperatura máxima de 500°C, Nozzle X imprime todos os materiais imprimíveis*, desde PLA até PEEK cheio de fibra de carbono sem desgaste.
Latão
Os bicos de latão, com a geometria interna da assinatura E3D, têm propriedades térmicas óptimas para a impressão diária, proporcionando camadas suaves para aplicações padrão não abrasivas. Classificados a uma temperatura máxima de 300°C.
Aço Inoxidável
Os bicos de aço inoxidável são adequados para impressão de qualidade alimentar, ou aplicações em que o conteúdo de chumbo dos bicos de latão é inadequado. Classificados a uma temperatura máxima de 500°C.
Cobre laminado
Os nossos bicos de cobre chapeados únicos são adequados para aplicações a altas temperaturas e não-abrasivas. A niquelagem proporciona uma superfície de aderência reduzida, ideal para situações em que as temperaturas são demasiado quentes para uma meia de silicone. Classificado a uma temperatura máxima de 500°C.
Aço temperado
Os bicos de aço endurecido são bons bicos utilitários, adequados para filamentos abrasivos tais como enchimentos de madeira, enchimentos de brilho e enchimentos de metal. Até mesmo os filamentos brilhantes no escuro irão abrasar latão, pelo que os nossos bicos de aço endurecido são uma óptima opção, de baixo custo, quando não se pode esticar para um Nozzle X. Classificados a uma temperatura máxima de 500°C. Note que este nozzle não é adequado para imprimir filamentos abrasivos a temperaturas superiores a 350°C.
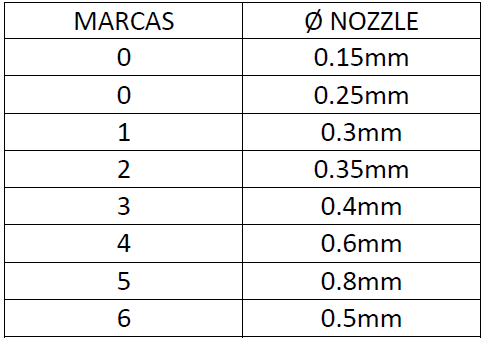
Os nozzle E3D são identificáveis com marcações nos planos da cabeça hexagonal, consulte a tabela abaixo para identificação:
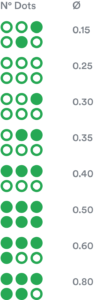
Os nozzles de latão são ideais para a maioria dos utilizadores de materiais tradicionais como o PLA, PETG, ABS, mas eles não aguentam o uso de filamentos compostos como por exemplo: madeira, brilha no escuro, fibras de carbono , metal, etc.
Se trabalha com esses materiais diferentes, já deve ter ouvido falar sobre os outros tipos de nozzle mais adaptados para esse serviço, como por exemplo os nozzles de inox.
No entanto, os nozzles de inox apresentam alguns problemas de aquecimento/ transferência térmica para o material, o que dá origem a que muitos utilizadores não se adaptem bem com os mesmos.
É ai que entra o nozzle de aço endurecido.
Este, tem algumas vantagens interessantes sobre os outros nozzles:
O nozzle V6 é um modelo de nozzle para impressora 3D criado pela empresa europeia E3D.
Ele possui uma geometria interna otimizada para reduzir a contrapressão, garantindo um fluxo de filamento suave e fácil, ao mesmo tempo em que melhora a eficácia da retração.
Todos os nozzles disponíveis na EVOLT são identificáveis com a respectiva numeração nas faces da cabeça sextavada.
A medida 1,75mm é referente à espessura do filamento compatível com este nozzle para impressora 3D.
A grande maioria dos filamentos do mercado de hoje em dia são de 1,75mm, dessa forma este nozzle irá funcionar com a grande maioria dos filamentos.
Em resumo, quanto menor o nozzle, maior a resolução, porém o tempo de impressão pode aumentar bastante. Já um nozzle de maior diâmetro, possui uma resolução menor e pode ser muito mais rápido.
A maioria dos usuários optam pelo uso de nozzle de 0,4mm, pois o mesmo dispõe de um diâmetro "meio termo", sendo ideal para peças de elevada resolução e ao mesmo tempo de contrução de peças rápidas.
Recomendamos a leitura deste artigo com informação à cerca do diâmetro dos nozzles: LINK
A instalação do nozzle de aço endurecido é mesma de todos os nozzles, dependendo do sistema usado.
Como regra geral, deve pré-aquecer o nozzle a 280ºc e o mesmo deve ficar em contato com a garganta interna, para que não haja vazamento entre eles.
Antes de trocar o nozzle, recomendamos a efectuar uma limpeza ao canal com filamento 3D de NYLON e proceder a um processo de limpeza por cold-pull.

Para apertar correctamente o seu nozzle, recomendamos a utilizar a seguinte chave nanométrica: LINK
Para correcta manutenção da sua impressora 3D, recomendamos sempre que trocar de material de filamento 3D, a efectuar uma purga com filamento especial de limpeza.
Desta forma garante que não ficam vestígios de material nas paredes do nozzle, evitando o acumular de crosta que é criado sempre que efectua trocas de material.
Com este produto evita problema como "clogs" e "jams" e fará com que o seu nozzle mantenha-se sempre limpo, durando muito mais tempo.
Poderá encontrar a partir de 1.49€ no seguinte LINK
Caracteristicas:
0.6mm - Diâmetro
Recomendamos a leitura do artigo com informação à cerca do diâmetro dos nozzles
Para trocar este componente, recomendamos a leitura do manual.
![]()
Nozzle produzido pela marca E3D V6.
Compatível com a maioria dos hotends:
Mosquito and Mosquito Magnum
Copperhead
E3D V4, V5 and V6 blocks
E3D Chimera and Kraken
RepRap M6
e Impressoras 3D:
MK3s
MK2.5/S
MK2/S
MINI
E3D é famosa no mundo da impressão 3D pela sua nozzle v6 nas suas diferentes variantes: latão, aço endurecido e aço inoxidável.
Devido ao crescente uso de materiais avançados, com altas temperaturas de extrusão e ligas com fibras de carbono ou vidro, E3D-On-line desenvolveu um nozzle capaz de suportar qualquer material do mercado: o Nozzle X.
O Nozzle X é um nozzle que interiormente apresenta a famosa forma de cone dos nozzles v6 de E3D-On-line, desenhado para obter um fluxo constante.
O Nozzle X está otimizado graças aos seus materiais de fabricação, um aço para ferramentas destinado à fabricação de utensílios que estão expostos constantemente desgaste e a golpes.
Para complementar a dureza do aço para ferramentas, agregou-se um niquelado a todas as paredes do nozzle, que além de aumentar a dureza superficial, consegue um acabamento totalmente liso que permite um acabamento superficial totalmente suave nas peças realizadas pela impressora 3D.
Por outro lado, para combater os problemas de desgaste provocado pelos materiais que contém fibras de carbono ou vidro, o Nozzle X conta com um nano-recubrimiento no seu interior.
A soma de todas estas propriedades, tecnicamente excelentes, permitem imprimir materiais avançados (450ºC ) com fibra, como por exemplo PEKK-Fibra de Carbono ou PEI-Fibra de Carbono, sem problemas de desgaste .
Escolher o material certo:
Nozzle X
O Nozzle X é o último nozzle de que a sua impressora 3D alguma vez precisará. Fabricados a partir de uma base de aço-ferramenta endurecido, são depois niquelados para manter a dureza a temperaturas elevadas, e têm um revestimento WS2 aplicado para proporcionar ao bico propriedades de aderência reduzidas. Classificado a uma temperatura máxima de 500°C, Nozzle X imprime todos os materiais imprimíveis*, desde PLA até PEEK cheio de fibra de carbono sem desgaste.
Latão
Os bicos de latão, com a geometria interna da assinatura E3D, têm propriedades térmicas óptimas para a impressão diária, proporcionando camadas suaves para aplicações padrão não abrasivas. Classificados a uma temperatura máxima de 300°C.
Aço Inoxidável
Os bicos de aço inoxidável são adequados para impressão de qualidade alimentar, ou aplicações em que o conteúdo de chumbo dos bicos de latão é inadequado. Classificados a uma temperatura máxima de 500°C.
Cobre laminado
Os nossos bicos de cobre chapeados únicos são adequados para aplicações a altas temperaturas e não-abrasivas. A niquelagem proporciona uma superfície de aderência reduzida, ideal para situações em que as temperaturas são demasiado quentes para uma meia de silicone. Classificado a uma temperatura máxima de 500°C.
Aço temperado
Os bicos de aço endurecido são bons bicos utilitários, adequados para filamentos abrasivos tais como enchimentos de madeira, enchimentos de brilho e enchimentos de metal. Até mesmo os filamentos brilhantes no escuro irão abrasar latão, pelo que os nossos bicos de aço endurecido são uma óptima opção, de baixo custo, quando não se pode esticar para um Nozzle X. Classificados a uma temperatura máxima de 500°C. Note que este nozzle não é adequado para imprimir filamentos abrasivos a temperaturas superiores a 350°C.
Os nozzle E3D são identificáveis com marcações nos planos da cabeça hexagonal, consulte a tabela abaixo para identificação:
Os nozzles de latão são ideais para a maioria dos utilizadores de materiais tradicionais como o PLA, PETG, ABS, mas eles não aguentam o uso de filamentos compostos como por exemplo: madeira, brilha no escuro, fibras de carbono , metal, etc.
Se trabalha com esses materiais diferentes, já deve ter ouvido falar sobre os outros tipos de nozzle mais adaptados para esse serviço, como por exemplo os nozzles de inox.
No entanto, os nozzles de inox apresentam alguns problemas de aquecimento/ transferência térmica para o material, o que dá origem a que muitos utilizadores não se adaptem bem com os mesmos.
É ai que entra o nozzle de aço endurecido.
Este, tem algumas vantagens interessantes sobre os outros nozzles:
O nozzle V6 é um modelo de nozzle para impressora 3D criado pela empresa europeia E3D.
Ele possui uma geometria interna otimizada para reduzir a contrapressão, garantindo um fluxo de filamento suave e fácil, ao mesmo tempo em que melhora a eficácia da retração.
Todos os nozzles disponíveis na EVOLT são identificáveis com a respectiva numeração nas faces da cabeça sextavada.
A medida 1,75mm é referente à espessura do filamento compatível com este nozzle para impressora 3D.
A grande maioria dos filamentos do mercado de hoje em dia são de 1,75mm, dessa forma este nozzle irá funcionar com a grande maioria dos filamentos.
Em resumo, quanto menor o nozzle, maior a resolução, porém o tempo de impressão pode aumentar bastante. Já um nozzle de maior diâmetro, possui uma resolução menor e pode ser muito mais rápido.
A maioria dos usuários optam pelo uso de nozzle de 0,4mm, pois o mesmo dispõe de um diâmetro "meio termo", sendo ideal para peças de elevada resolução e ao mesmo tempo de contrução de peças rápidas.
Recomendamos a leitura deste artigo com informação à cerca do diâmetro dos nozzles: LINK
A instalação do nozzle de aço endurecido é mesma de todos os nozzles, dependendo do sistema usado.
Como regra geral, deve pré-aquecer o nozzle a 280ºc e o mesmo deve ficar em contato com a garganta interna, para que não haja vazamento entre eles.
Antes de trocar o nozzle, recomendamos a efectuar uma limpeza ao canal com filamento 3D de NYLON e proceder a um processo de limpeza por cold-pull.
Para apertar correctamente o seu nozzle, recomendamos a utilizar a seguinte chave nanométrica: LINK
Para correcta manutenção da sua impressora 3D, recomendamos sempre que trocar de material de filamento 3D, a efectuar uma purga com filamento especial de limpeza.
Desta forma garante que não ficam vestígios de material nas paredes do nozzle, evitando o acumular de crosta que é criado sempre que efectua trocas de material.
Com este produto evita problema como "clogs" e "jams" e fará com que o seu nozzle mantenha-se sempre limpo, durando muito mais tempo.
Poderá encontrar a partir de 1.49€ no seguinte LINK
Caracteristicas:
0.4mm - Diâmetro
Recomendamos a leitura do artigo com informação à cerca do diâmetro dos nozzles
Para trocar este componente, recomendamos a leitura do manual.