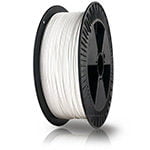
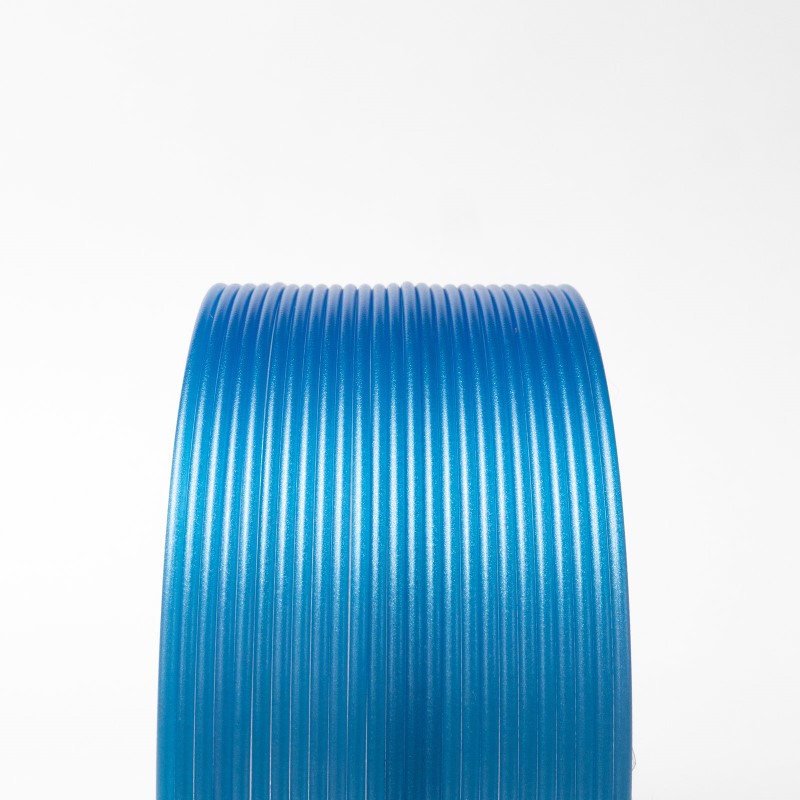
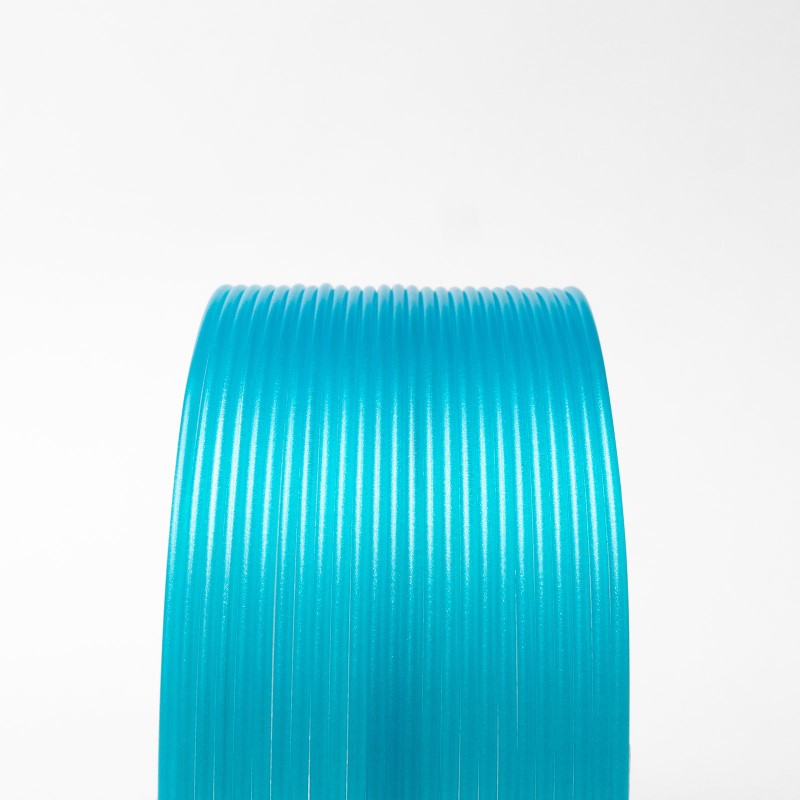
HTPLA Fantasy Island Blue Translucent, uma cor de filamento original e única de Protopasta
Um azul translúcido com textura de pérola subtil para apenas um toque de cintilação
Uma criação anterior de workshop & filamento de Endless Pastabilities
Concebido e produzido pela Protoplant exclusivamente para si

ProtoPasta é uma empresa situada nos Estados Unidos da América, de produção de filamentos para impressão 3D de alta qualidade.
Caracterizada pelos rolos feitos em cartão, esta marca é mundialmente famosa por ser especializada em materiais como PLA e ABS modificados com outros materiais, como o PLA Magnético; o PLA Condutivo; PLA de fibra de carbono; HTPLA de cobre, latão ou bronze; ou o ABS-PC.
Semi crystalline, heat treatable PLA for high temp use
Density: 1.24 g/cc
Length: 346 m/kg (1.75) 130 m/kg (2.85)
Typical Printing Temp: 205-225 C
Glass Transition (Tg)*: 60 C
Peak Crystallization (Tc)**: 95-115 C
Onset to Melt (Tm)***: 155 C
Typical change when heat treated: -2% x/y +1% z
Link to Safety Data Page
*max use with no heat treat & max platform temp
**heat treating @ temp 10+ min depending on size/mass
***max use when heat treated (annealed or crystallized)
HTPLA prints well at 205-225 C, however it's important to match temp to your hardware & volume flow rate. With a typical hotend, you should be able to print at 205 C without jamming at a low flow rate. In machines with hardware that tends towards jamming, consider this video with Joel Telling.
Lower volume flows require lower temps, while higher volume flows require higher temps. In the previously-mentioned video, one way to overcome jamming is to set your temp to a higher-than-typical 240 C. This should then be matched with a high flow rate for a quality printing result.
For direct drives with a short distance between drive gears & nozzle, volume flows can approach 7-8 cubic mm/s or more if printing hot to overcome jamming. For bowden tubes where the distance between drive gear & nozzle are great or less powerful hotends, as little as 2 and as much as 4 cubic mm/s may be the limit. Beware of unintended speed changes from faster infills & slowing down for outlines or short layers. Consider our Ultimaker-specific blog for more on this topic.
A constant speed throughout the part is ideal from an extrusion perspective. Knowing your extrusion width, layer thickness & speed you can calculate your volume flow rate with the calculator like found in the previously-mentioned Ultimaker blog. Alternatively, if you know your volume flow rate limit, extrusion width & layer thickness, you can calculate your speed limit.
PLA & HTPLA are amorphous in structure as printed (no heat treating) & though both are adequate performers in an office environment, they have poor temperature stability, loosing significant stiffness at temps nearing 60 C. Different than standard PLA, HTPLA is designed to survive heat treating for higher temp stability in a no/minimal load condition to near onset of melting (155 C). That's an astonishing improvement in thermal stability compared to standard PLA after a quick bake in the oven after printing.
In as little as 5-10 minutes for small, thin parts, HTPLA quickly crystallizes in an oven at 95-115 C (200-240 F) to become more stiff & hold form above glass transition (60 C). Depending on part geometry, setup & technique, parts can deform and shrink. Best results are with flat and/or supported parts with 100% infill. In this instance we experienced x/y shrinkage of about 2% & growth of about 1% in z.
Be sure to avoid hot spots (non-radiating surfaces & no glowing coils) in the oven used for baking & experiment before baking a prized part. Un-printed filament works great for experimentation & translucent makes the transformation most visible! Heat treating is an art, but the resulting improved thermal performance, if needed, is well-worth exploring. You'll be shocked by the improved thermal stability of your HTPLA parts!!!
Looking for increased heat resistance without the need to switch to ABS? Protopasta High Temperature PLA offers heat deflection of up to 88° C (190.4° F) compared to standard PLA of 45-54° C (113-135° F). This makes it a great choice for moving parts (gears, RepRap pieces, etc) or prints that would face moderately high temperatures. Our High Temperature PLA is white, but can be painted after annealing.
We've created this page to bring you a premium PLA and HTPLA printing experience that rivals our premium material. Follow below to improve your 3D printing experience. In other words, here's your shortcut to awesomeness with pasta. If at the end of this document you have questions or need assistance, please contact us at [email protected].
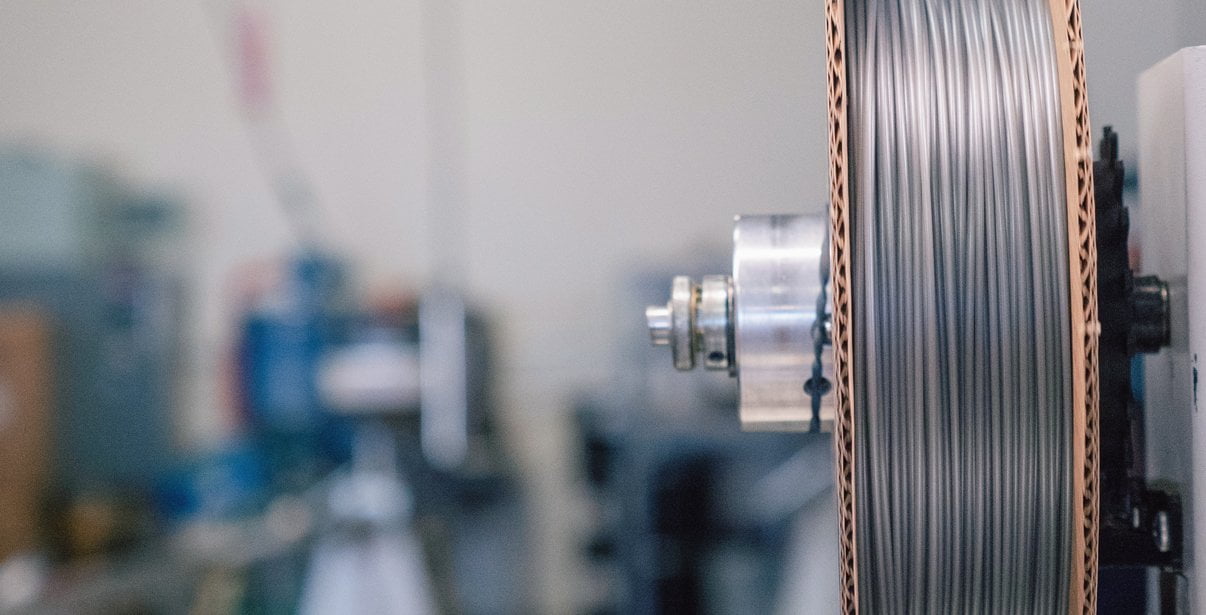
Loose coils can be very tricky to manage. Going cowboy on your spool handling can quickly end up in a frustrating, tangled mess. Keep your loose coils wrangled with a spool holder like masterspool for a more trouble-free experience. Find out more about loose coil handling in Keith's blog post.
And for spooled filament, never let go of the loose end. When not in the printer extruder, tuck it away in the cardboard spool's corrugation! Also, avoid sharp bends and excessive force when loading filament into your printer.
At Proto-pasta, we make high quality filament. We aspire to make exceptional results easy, but a positive result is very much dependent on your hardware, set-up, adjustments, and process parameters. Matching hardware with process and material for a positive experience is not always straight-forward, but you can start by pairing the following settings with your printer for a good starting point, then tune or troubleshoot as required.
Volume flow rate together with temperature dictates how melted the material is. This is hardware & condition dependent based on hot end, nozzle & extruder type, material & manufacturer as well as layer fan type, position & settings. Extrusion width, layer thickness & speed changes affect volume flow which may change required/desired temperature.
Post your prints & tag us @Proto_pasta on Twitter and Instagram. Need more help? Consider typical pitfalls and fixes below.
We visited Joel and ended up with a helpful video on the subject:
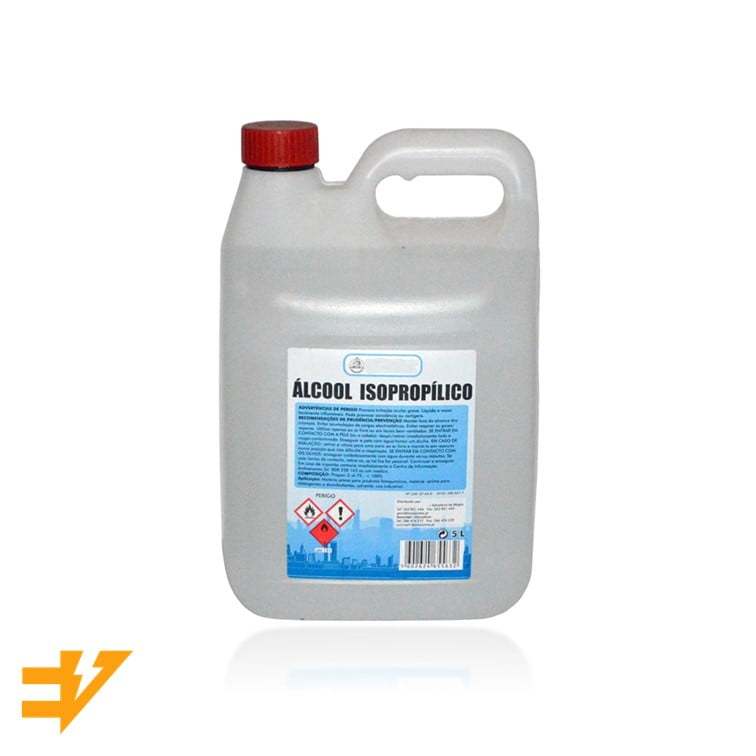
Para uma correcta manutenção da sua impressora 3D, recomendamos sempre que trocar de material de filamento 3D, a efectuar uma purga com filamento especial de limpeza.
Desta forma garante que não ficam vestígios de material nas paredes do nozzle, evitando o acumular de crosta que é criado sempre que efectua trocas de material.
Com este produto evita problema como "clogs" e "jams" e fará com que o seu nozzle mantenha-se sempre limpo, durando muito mais tempo.
Poderá encontrar a partir de 1.49€ no seguinte LINK

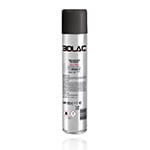
Para obter maior aderência à superfície da sua impressora 3D recomendamos a aplicar 3DLAC na base da plataforma.
Poderá encontrar no seguinte LINK
Este material é altamente higroscópico, absorvendo rapidamente a humidade do ar passados poucos minutos após aberto, impossibilitando desta forma a correcta impressão 3D do mesmo. O resultado das impressões 3D de materiais com humidade tendem a ser frágeis e de acabamento irregular ou em certos casos, torna-se simplesmente impossíveis de imprimir.
Deverá de usar soluções de caixas fechadas com dessecante como sílica ou caixas próprias secadoras de filamento.
Poderá encontrar no seguinte LINK
Download:
Technical and Safety Data Sheet
50g- Rolo
HTPLA Fantasy Island Blue Translucent HTPLA - Cor
1.75mm (+-0.05mm) - Espessura / Tolerância de diâmetro
Muito Fácil - Facilidade de Impressão
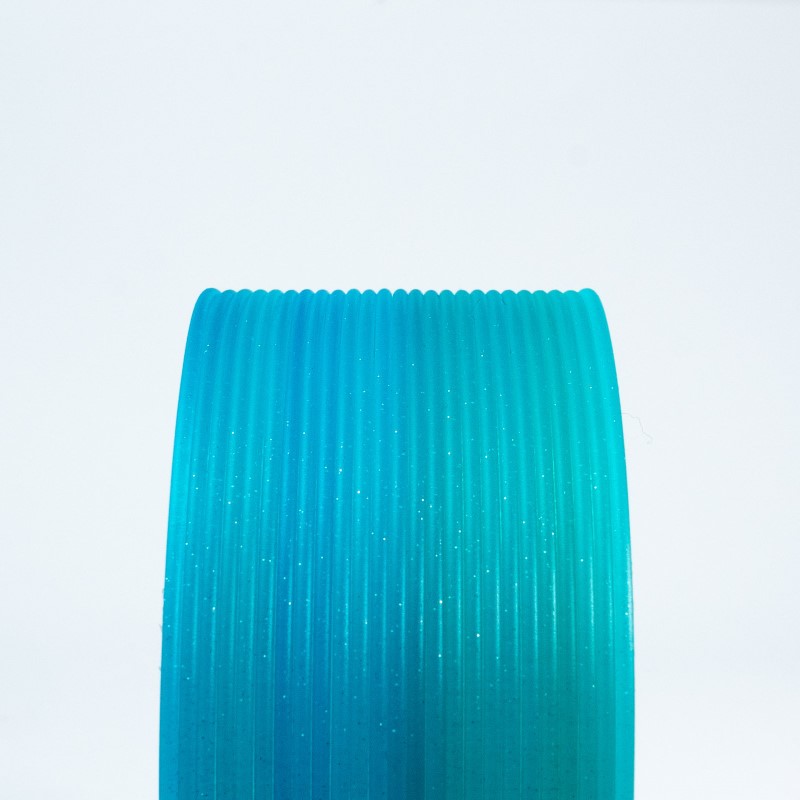
Uma cor de filamento original e única de Protopasta HTPLA Sheyb Designs Glitter's Mane Teal Translucent
Um marreco translúcido com textura de pérola subtil para apenas um toque de brilho
Uma criação anterior de workshop & filamento de Endless Pastabilities
Concebido e produzido por Protoplant for Sheyb Designs
ProtoPasta é uma empresa situada nos Estados Unidos da América, de produção de filamentos para impressão 3D de alta qualidade.
Caracterizada pelos rolos feitos em cartão, esta marca é mundialmente famosa por ser especializada em materiais como PLA e ABS modificados com outros materiais, como o PLA Magnético; o PLA Condutivo; PLA de fibra de carbono; HTPLA de cobre, latão ou bronze; ou o ABS-PC.
Semi crystalline, heat treatable PLA for high temp use
Density: 1.24 g/cc
Length: 346 m/kg (1.75) 130 m/kg (2.85)
Typical Printing Temp: 205-225 C
Glass Transition (Tg)*: 60 C
Peak Crystallization (Tc)**: 95-115 C
Onset to Melt (Tm)***: 155 C
Typical change when heat treated: -2% x/y +1% z
Link to Safety Data Page
*max use with no heat treat & max platform temp
**heat treating @ temp 10+ min depending on size/mass
***max use when heat treated (annealed or crystallized)
HTPLA prints well at 205-225 C, however it's important to match temp to your hardware & volume flow rate. With a typical hotend, you should be able to print at 205 C without jamming at a low flow rate. In machines with hardware that tends towards jamming, consider this video with Joel Telling.
Lower volume flows require lower temps, while higher volume flows require higher temps. In the previously-mentioned video, one way to overcome jamming is to set your temp to a higher-than-typical 240 C. This should then be matched with a high flow rate for a quality printing result.
For direct drives with a short distance between drive gears & nozzle, volume flows can approach 7-8 cubic mm/s or more if printing hot to overcome jamming. For bowden tubes where the distance between drive gear & nozzle are great or less powerful hotends, as little as 2 and as much as 4 cubic mm/s may be the limit. Beware of unintended speed changes from faster infills & slowing down for outlines or short layers. Consider our Ultimaker-specific blog for more on this topic.
A constant speed throughout the part is ideal from an extrusion perspective. Knowing your extrusion width, layer thickness & speed you can calculate your volume flow rate with the calculator like found in the previously-mentioned Ultimaker blog. Alternatively, if you know your volume flow rate limit, extrusion width & layer thickness, you can calculate your speed limit.
PLA & HTPLA are amorphous in structure as printed (no heat treating) & though both are adequate performers in an office environment, they have poor temperature stability, loosing significant stiffness at temps nearing 60 C. Different than standard PLA, HTPLA is designed to survive heat treating for higher temp stability in a no/minimal load condition to near onset of melting (155 C). That's an astonishing improvement in thermal stability compared to standard PLA after a quick bake in the oven after printing.
In as little as 5-10 minutes for small, thin parts, HTPLA quickly crystallizes in an oven at 95-115 C (200-240 F) to become more stiff & hold form above glass transition (60 C). Depending on part geometry, setup & technique, parts can deform and shrink. Best results are with flat and/or supported parts with 100% infill. In this instance we experienced x/y shrinkage of about 2% & growth of about 1% in z.
Be sure to avoid hot spots (non-radiating surfaces & no glowing coils) in the oven used for baking & experiment before baking a prized part. Un-printed filament works great for experimentation & translucent makes the transformation most visible! Heat treating is an art, but the resulting improved thermal performance, if needed, is well-worth exploring. You'll be shocked by the improved thermal stability of your HTPLA parts!!!
Looking for increased heat resistance without the need to switch to ABS? Protopasta High Temperature PLA offers heat deflection of up to 88° C (190.4° F) compared to standard PLA of 45-54° C (113-135° F). This makes it a great choice for moving parts (gears, RepRap pieces, etc) or prints that would face moderately high temperatures. Our High Temperature PLA is white, but can be painted after annealing.
We've created this page to bring you a premium PLA and HTPLA printing experience that rivals our premium material. Follow below to improve your 3D printing experience. In other words, here's your shortcut to awesomeness with pasta. If at the end of this document you have questions or need assistance, please contact us at [email protected].
Loose coils can be very tricky to manage. Going cowboy on your spool handling can quickly end up in a frustrating, tangled mess. Keep your loose coils wrangled with a spool holder like masterspool for a more trouble-free experience. Find out more about loose coil handling in Keith's blog post.
And for spooled filament, never let go of the loose end. When not in the printer extruder, tuck it away in the cardboard spool's corrugation! Also, avoid sharp bends and excessive force when loading filament into your printer.
At Proto-pasta, we make high quality filament. We aspire to make exceptional results easy, but a positive result is very much dependent on your hardware, set-up, adjustments, and process parameters. Matching hardware with process and material for a positive experience is not always straight-forward, but you can start by pairing the following settings with your printer for a good starting point, then tune or troubleshoot as required.
Volume flow rate together with temperature dictates how melted the material is. This is hardware & condition dependent based on hot end, nozzle & extruder type, material & manufacturer as well as layer fan type, position & settings. Extrusion width, layer thickness & speed changes affect volume flow which may change required/desired temperature.
Post your prints & tag us @Proto_pasta on Twitter and Instagram. Need more help? Consider typical pitfalls and fixes below.
We visited Joel and ended up with a helpful video on the subject:
Para uma correcta manutenção da sua impressora 3D, recomendamos sempre que trocar de material de filamento 3D, a efectuar uma purga com filamento especial de limpeza.
Desta forma garante que não ficam vestígios de material nas paredes do nozzle, evitando o acumular de crosta que é criado sempre que efectua trocas de material.
Com este produto evita problema como "clogs" e "jams" e fará com que o seu nozzle mantenha-se sempre limpo, durando muito mais tempo.
Poderá encontrar a partir de 1.49€ no seguinte LINK
Para obter maior aderência à superfície da sua impressora 3D recomendamos a aplicar 3DLAC na base da plataforma.
Poderá encontrar no seguinte LINK
Este material é altamente higroscópico, absorvendo rapidamente a humidade do ar passados poucos minutos após aberto, impossibilitando desta forma a correcta impressão 3D do mesmo. O resultado das impressões 3D de materiais com humidade tendem a ser frágeis e de acabamento irregular ou em certos casos, torna-se simplesmente impossíveis de imprimir.
Deverá de usar soluções de caixas fechadas com dessecante como sílica ou caixas próprias secadoras de filamento.
Poderá encontrar no seguinte LINK
Download:
Technical and Safety Data Sheet
50g- Rolo
HTPLA Sheyb Designs Glitter's Mane Teal Translucent HTPLA - Cor
1.75mm (+-0.05mm) - Espessura / Tolerância de diâmetro
Muito Fácil - Facilidade de Impressão
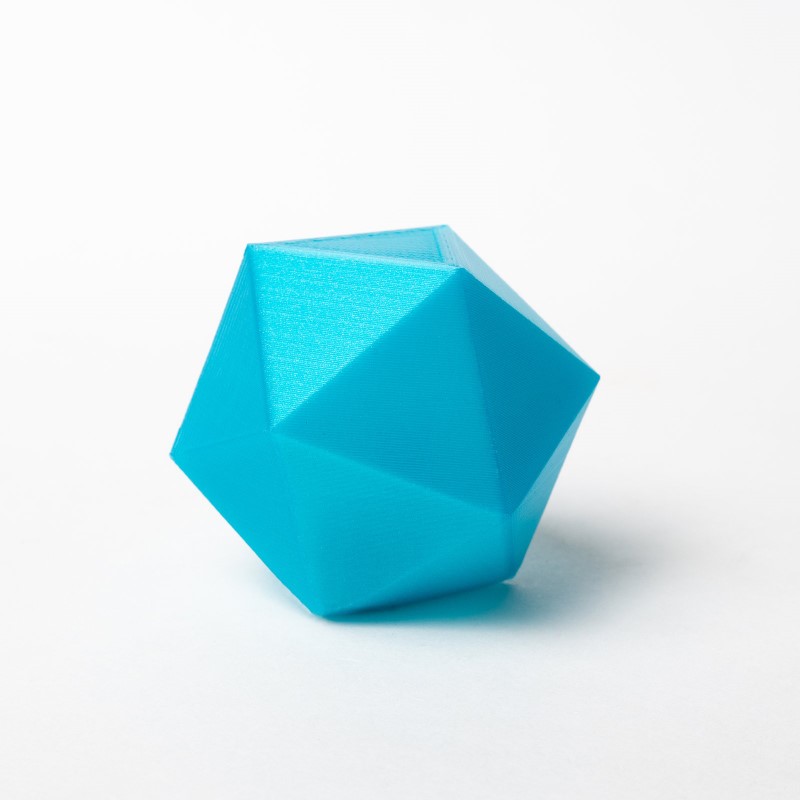
O HTPLA Silver Smoke Grey Translucent é um filamento PLA cinzento de fumo único com uma base translúcida.
As impressões resultantes são tratáveis por calor e terminam com um cinzento transparente que lembra os vidros fumados de um carro ou as lentes de um par de óculos de sol.
ProtoPasta é uma empresa situada nos Estados Unidos da América, de produção de filamentos para impressão 3D de alta qualidade.
Caracterizada pelos rolos feitos em cartão, esta marca é mundialmente famosa por ser especializada em materiais como PLA e ABS modificados com outros materiais, como o PLA Magnético; o PLA Condutivo; PLA de fibra de carbono; HTPLA de cobre, latão ou bronze; ou o ABS-PC.
Semi crystalline, heat treatable PLA for high temp use
Density: 1.24 g/cc
Length: 346 m/kg (1.75) 130 m/kg (2.85)
Typical Printing Temp: 205-225 C
Glass Transition (Tg)*: 60 C
Peak Crystallization (Tc)**: 95-115 C
Onset to Melt (Tm)***: 155 C
Typical change when heat treated: -2% x/y +1% z
Link to Safety Data Page
*max use with no heat treat & max platform temp
**heat treating @ temp 10+ min depending on size/mass
***max use when heat treated (annealed or crystallized)
HTPLA prints well at 205-225 C, however it's important to match temp to your hardware & volume flow rate. With a typical hotend, you should be able to print at 205 C without jamming at a low flow rate. In machines with hardware that tends towards jamming, consider this video with Joel Telling.
Lower volume flows require lower temps, while higher volume flows require higher temps. In the previously-mentioned video, one way to overcome jamming is to set your temp to a higher-than-typical 240 C. This should then be matched with a high flow rate for a quality printing result.
For direct drives with a short distance between drive gears & nozzle, volume flows can approach 7-8 cubic mm/s or more if printing hot to overcome jamming. For bowden tubes where the distance between drive gear & nozzle are great or less powerful hotends, as little as 2 and as much as 4 cubic mm/s may be the limit. Beware of unintended speed changes from faster infills & slowing down for outlines or short layers. Consider our Ultimaker-specific blog for more on this topic.
A constant speed throughout the part is ideal from an extrusion perspective. Knowing your extrusion width, layer thickness & speed you can calculate your volume flow rate with the calculator like found in the previously-mentioned Ultimaker blog. Alternatively, if you know your volume flow rate limit, extrusion width & layer thickness, you can calculate your speed limit.
PLA & HTPLA are amorphous in structure as printed (no heat treating) & though both are adequate performers in an office environment, they have poor temperature stability, loosing significant stiffness at temps nearing 60 C. Different than standard PLA, HTPLA is designed to survive heat treating for higher temp stability in a no/minimal load condition to near onset of melting (155 C). That's an astonishing improvement in thermal stability compared to standard PLA after a quick bake in the oven after printing.
In as little as 5-10 minutes for small, thin parts, HTPLA quickly crystallizes in an oven at 95-115 C (200-240 F) to become more stiff & hold form above glass transition (60 C). Depending on part geometry, setup & technique, parts can deform and shrink. Best results are with flat and/or supported parts with 100% infill. In this instance we experienced x/y shrinkage of about 2% & growth of about 1% in z.
Be sure to avoid hot spots (non-radiating surfaces & no glowing coils) in the oven used for baking & experiment before baking a prized part. Un-printed filament works great for experimentation & translucent makes the transformation most visible! Heat treating is an art, but the resulting improved thermal performance, if needed, is well-worth exploring. You'll be shocked by the improved thermal stability of your HTPLA parts!!!
Looking for increased heat resistance without the need to switch to ABS? Protopasta High Temperature PLA offers heat deflection of up to 88° C (190.4° F) compared to standard PLA of 45-54° C (113-135° F). This makes it a great choice for moving parts (gears, RepRap pieces, etc) or prints that would face moderately high temperatures. Our High Temperature PLA is white, but can be painted after annealing.
We've created this page to bring you a premium PLA and HTPLA printing experience that rivals our premium material. Follow below to improve your 3D printing experience. In other words, here's your shortcut to awesomeness with pasta. If at the end of this document you have questions or need assistance, please contact us at [email protected].
Loose coils can be very tricky to manage. Going cowboy on your spool handling can quickly end up in a frustrating, tangled mess. Keep your loose coils wrangled with a spool holder like masterspool for a more trouble-free experience. Find out more about loose coil handling in Keith's blog post.
And for spooled filament, never let go of the loose end. When not in the printer extruder, tuck it away in the cardboard spool's corrugation! Also, avoid sharp bends and excessive force when loading filament into your printer.
At Proto-pasta, we make high quality filament. We aspire to make exceptional results easy, but a positive result is very much dependent on your hardware, set-up, adjustments, and process parameters. Matching hardware with process and material for a positive experience is not always straight-forward, but you can start by pairing the following settings with your printer for a good starting point, then tune or troubleshoot as required.
Volume flow rate together with temperature dictates how melted the material is. This is hardware & condition dependent based on hot end, nozzle & extruder type, material & manufacturer as well as layer fan type, position & settings. Extrusion width, layer thickness & speed changes affect volume flow which may change required/desired temperature.
Post your prints & tag us @Proto_pasta on Twitter and Instagram. Need more help? Consider typical pitfalls and fixes below.
We visited Joel and ended up with a helpful video on the subject:
Para uma correcta manutenção da sua impressora 3D, recomendamos sempre que trocar de material de filamento 3D, a efectuar uma purga com filamento especial de limpeza.
Desta forma garante que não ficam vestígios de material nas paredes do nozzle, evitando o acumular de crosta que é criado sempre que efectua trocas de material.
Com este produto evita problema como "clogs" e "jams" e fará com que o seu nozzle mantenha-se sempre limpo, durando muito mais tempo.
Poderá encontrar a partir de 1.49€ no seguinte LINK
Para obter maior aderência à superfície da sua impressora 3D recomendamos a aplicar 3DLAC na base da plataforma.
Poderá encontrar no seguinte LINK
Este material é altamente higroscópico, absorvendo rapidamente a humidade do ar passados poucos minutos após aberto, impossibilitando desta forma a correcta impressão 3D do mesmo. O resultado das impressões 3D de materiais com humidade tendem a ser frágeis e de acabamento irregular ou em certos casos, torna-se simplesmente impossíveis de imprimir.
Deverá de usar soluções de caixas fechadas com dessecante como sílica ou caixas próprias secadoras de filamento.
Poderá encontrar no seguinte LINK
Download:
Technical and Safety Data Sheet
50g- Rolo
HTPLA Silver Smoke Grey Translucent HTPLA - Cor
1.75mm (+-0.05mm) - Espessura / Tolerância de diâmetro
Muito Fácil - Facilidade de Impressão
Faça ondas com o HTPLA Marine Dream Blue da Protopasta !
Um filamento único inspirado pelos nossos belos oceanos.
Azul translúcido e verde com branco e um toque de brilho prateado.
Um filamento de Endless Pastabilities em celebração do Dia da Terra 2021.
Os resultados irão variar, uma vez que cada transição de cor e bobina é única.
ProtoPasta é uma empresa situada nos Estados Unidos da América, de produção de filamentos para impressão 3D de alta qualidade.
Caracterizada pelos rolos feitos em cartão, esta marca é mundialmente famosa por ser especializada em materiais como PLA e ABS modificados com outros materiais, como o PLA Magnético; o PLA Condutivo; PLA de fibra de carbono; HTPLA de cobre, latão ou bronze; ou o ABS-PC.
Semi crystalline, heat treatable PLA for high temp use
Density: 1.24 g/cc
Length: 346 m/kg (1.75) 130 m/kg (2.85)
Typical Printing Temp: 205-225 C
Glass Transition (Tg)*: 60 C
Peak Crystallization (Tc)**: 95-115 C
Onset to Melt (Tm)***: 155 C
Typical change when heat treated: -2% x/y +1% z
Link to Safety Data Page
*max use with no heat treat & max platform temp
**heat treating @ temp 10+ min depending on size/mass
***max use when heat treated (annealed or crystallized)
HTPLA prints well at 205-225 C, however it's important to match temp to your hardware & volume flow rate. With a typical hotend, you should be able to print at 205 C without jamming at a low flow rate. In machines with hardware that tends towards jamming, consider this video with Joel Telling.
Lower volume flows require lower temps, while higher volume flows require higher temps. In the previously-mentioned video, one way to overcome jamming is to set your temp to a higher-than-typical 240 C. This should then be matched with a high flow rate for a quality printing result.
For direct drives with a short distance between drive gears & nozzle, volume flows can approach 7-8 cubic mm/s or more if printing hot to overcome jamming. For bowden tubes where the distance between drive gear & nozzle are great or less powerful hotends, as little as 2 and as much as 4 cubic mm/s may be the limit. Beware of unintended speed changes from faster infills & slowing down for outlines or short layers. Consider our Ultimaker-specific blog for more on this topic.
A constant speed throughout the part is ideal from an extrusion perspective. Knowing your extrusion width, layer thickness & speed you can calculate your volume flow rate with the calculator like found in the previously-mentioned Ultimaker blog. Alternatively, if you know your volume flow rate limit, extrusion width & layer thickness, you can calculate your speed limit.
PLA & HTPLA are amorphous in structure as printed (no heat treating) & though both are adequate performers in an office environment, they have poor temperature stability, loosing significant stiffness at temps nearing 60 C. Different than standard PLA, HTPLA is designed to survive heat treating for higher temp stability in a no/minimal load condition to near onset of melting (155 C). That's an astonishing improvement in thermal stability compared to standard PLA after a quick bake in the oven after printing.
In as little as 5-10 minutes for small, thin parts, HTPLA quickly crystallizes in an oven at 95-115 C (200-240 F) to become more stiff & hold form above glass transition (60 C). Depending on part geometry, setup & technique, parts can deform and shrink. Best results are with flat and/or supported parts with 100% infill. In this instance we experienced x/y shrinkage of about 2% & growth of about 1% in z.
Be sure to avoid hot spots (non-radiating surfaces & no glowing coils) in the oven used for baking & experiment before baking a prized part. Un-printed filament works great for experimentation & translucent makes the transformation most visible! Heat treating is an art, but the resulting improved thermal performance, if needed, is well-worth exploring. You'll be shocked by the improved thermal stability of your HTPLA parts!!!
Looking for increased heat resistance without the need to switch to ABS? Protopasta High Temperature PLA offers heat deflection of up to 88° C (190.4° F) compared to standard PLA of 45-54° C (113-135° F). This makes it a great choice for moving parts (gears, RepRap pieces, etc) or prints that would face moderately high temperatures. Our High Temperature PLA is white, but can be painted after annealing.
We've created this page to bring you a premium PLA and HTPLA printing experience that rivals our premium material. Follow below to improve your 3D printing experience. In other words, here's your shortcut to awesomeness with pasta. If at the end of this document you have questions or need assistance, please contact us at [email protected].
Loose coils can be very tricky to manage. Going cowboy on your spool handling can quickly end up in a frustrating, tangled mess. Keep your loose coils wrangled with a spool holder like masterspool for a more trouble-free experience. Find out more about loose coil handling in Keith's blog post.
And for spooled filament, never let go of the loose end. When not in the printer extruder, tuck it away in the cardboard spool's corrugation! Also, avoid sharp bends and excessive force when loading filament into your printer.
At Proto-pasta, we make high quality filament. We aspire to make exceptional results easy, but a positive result is very much dependent on your hardware, set-up, adjustments, and process parameters. Matching hardware with process and material for a positive experience is not always straight-forward, but you can start by pairing the following settings with your printer for a good starting point, then tune or troubleshoot as required.
Volume flow rate together with temperature dictates how melted the material is. This is hardware & condition dependent based on hot end, nozzle & extruder type, material & manufacturer as well as layer fan type, position & settings. Extrusion width, layer thickness & speed changes affect volume flow which may change required/desired temperature.
Post your prints & tag us @Proto_pasta on Twitter and Instagram. Need more help? Consider typical pitfalls and fixes below.
We visited Joel and ended up with a helpful video on the subject:
Para uma correcta manutenção da sua impressora 3D, recomendamos sempre que trocar de material de filamento 3D, a efectuar uma purga com filamento especial de limpeza.
Desta forma garante que não ficam vestígios de material nas paredes do nozzle, evitando o acumular de crosta que é criado sempre que efectua trocas de material.
Com este produto evita problema como "clogs" e "jams" e fará com que o seu nozzle mantenha-se sempre limpo, durando muito mais tempo.
Poderá encontrar a partir de 1.49€ no seguinte LINK
Para obter maior aderência à superfície da sua impressora 3D recomendamos a aplicar 3DLAC na base da plataforma.
Poderá encontrar no seguinte LINK
Este material é altamente higroscópico, absorvendo rapidamente a humidade do ar passados poucos minutos após aberto, impossibilitando desta forma a correcta impressão 3D do mesmo. O resultado das impressões 3D de materiais com humidade tendem a ser frágeis e de acabamento irregular ou em certos casos, torna-se simplesmente impossíveis de imprimir.
Deverá de usar soluções de caixas fechadas com dessecante como sílica ou caixas próprias secadoras de filamento.
Poderá encontrar no seguinte LINK
Download:
Technical and Safety Data Sheet
50g- Rolo
HTPLA Marine Dream Blue Multicolor HTPLA - Cor
1.75mm (+-0.05mm) - Espessura / Tolerância de diâmetro
Muito Fácil - Facilidade de Impressão
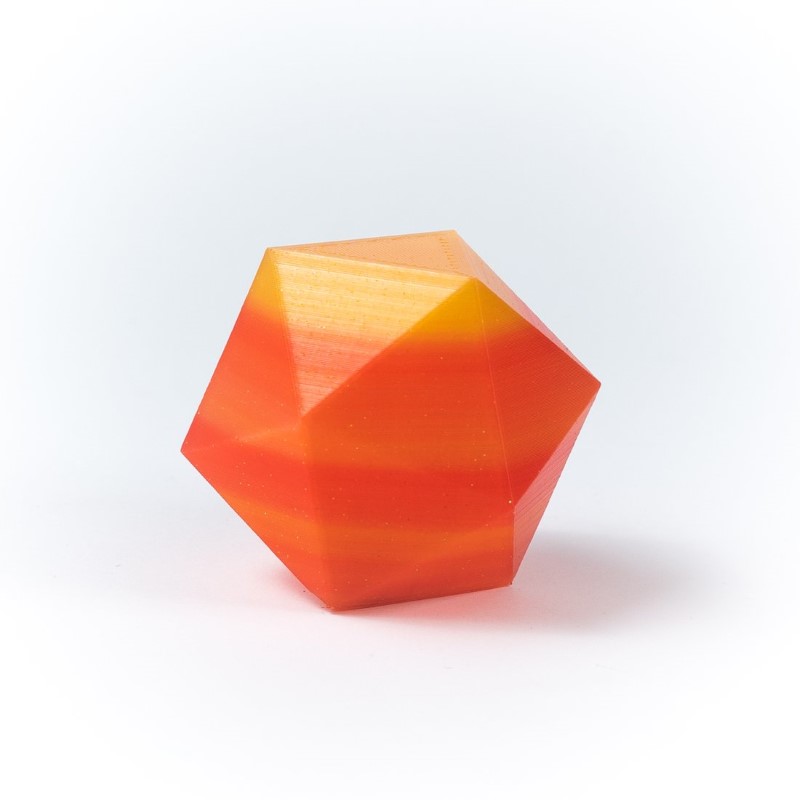
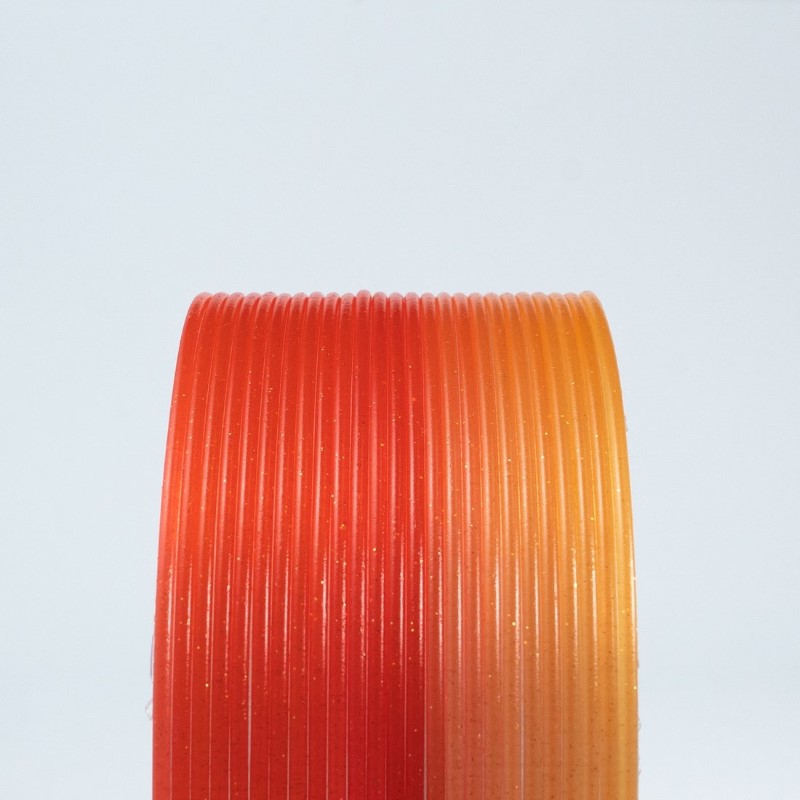
HTPLA Citrus Sunrise Orange Multicolor, um filamento variegado único inspirado pelo nosso glorioso sol
Translúcido vermelho, laranja e amarelo com um toque de brilho dourado
Um filamento de Endless Pastabilities em celebração do Dia da Terra 2021
Os resultados irão variar, uma vez que cada transição de cor e bobina é única
ProtoPasta é uma empresa situada nos Estados Unidos da América, de produção de filamentos para impressão 3D de alta qualidade.
Caracterizada pelos rolos feitos em cartão, esta marca é mundialmente famosa por ser especializada em materiais como PLA e ABS modificados com outros materiais, como o PLA Magnético; o PLA Condutivo; PLA de fibra de carbono; HTPLA de cobre, latão ou bronze; ou o ABS-PC.
Semi crystalline, heat treatable PLA for high temp use
Density: 1.24 g/cc
Length: 346 m/kg (1.75) 130 m/kg (2.85)
Typical Printing Temp: 205-225 C
Glass Transition (Tg)*: 60 C
Peak Crystallization (Tc)**: 95-115 C
Onset to Melt (Tm)***: 155 C
Typical change when heat treated: -2% x/y +1% z
Link to Safety Data Page
*max use with no heat treat & max platform temp
**heat treating @ temp 10+ min depending on size/mass
***max use when heat treated (annealed or crystallized)
HTPLA prints well at 205-225 C, however it's important to match temp to your hardware & volume flow rate. With a typical hotend, you should be able to print at 205 C without jamming at a low flow rate. In machines with hardware that tends towards jamming, consider this video with Joel Telling.
Lower volume flows require lower temps, while higher volume flows require higher temps. In the previously-mentioned video, one way to overcome jamming is to set your temp to a higher-than-typical 240 C. This should then be matched with a high flow rate for a quality printing result.
For direct drives with a short distance between drive gears & nozzle, volume flows can approach 7-8 cubic mm/s or more if printing hot to overcome jamming. For bowden tubes where the distance between drive gear & nozzle are great or less powerful hotends, as little as 2 and as much as 4 cubic mm/s may be the limit. Beware of unintended speed changes from faster infills & slowing down for outlines or short layers. Consider our Ultimaker-specific blog for more on this topic.
A constant speed throughout the part is ideal from an extrusion perspective. Knowing your extrusion width, layer thickness & speed you can calculate your volume flow rate with the calculator like found in the previously-mentioned Ultimaker blog. Alternatively, if you know your volume flow rate limit, extrusion width & layer thickness, you can calculate your speed limit.
PLA & HTPLA are amorphous in structure as printed (no heat treating) & though both are adequate performers in an office environment, they have poor temperature stability, loosing significant stiffness at temps nearing 60 C. Different than standard PLA, HTPLA is designed to survive heat treating for higher temp stability in a no/minimal load condition to near onset of melting (155 C). That's an astonishing improvement in thermal stability compared to standard PLA after a quick bake in the oven after printing.
In as little as 5-10 minutes for small, thin parts, HTPLA quickly crystallizes in an oven at 95-115 C (200-240 F) to become more stiff & hold form above glass transition (60 C). Depending on part geometry, setup & technique, parts can deform and shrink. Best results are with flat and/or supported parts with 100% infill. In this instance we experienced x/y shrinkage of about 2% & growth of about 1% in z.
Be sure to avoid hot spots (non-radiating surfaces & no glowing coils) in the oven used for baking & experiment before baking a prized part. Un-printed filament works great for experimentation & translucent makes the transformation most visible! Heat treating is an art, but the resulting improved thermal performance, if needed, is well-worth exploring. You'll be shocked by the improved thermal stability of your HTPLA parts!!!
Looking for increased heat resistance without the need to switch to ABS? Protopasta High Temperature PLA offers heat deflection of up to 88° C (190.4° F) compared to standard PLA of 45-54° C (113-135° F). This makes it a great choice for moving parts (gears, RepRap pieces, etc) or prints that would face moderately high temperatures. Our High Temperature PLA is white, but can be painted after annealing.
We've created this page to bring you a premium PLA and HTPLA printing experience that rivals our premium material. Follow below to improve your 3D printing experience. In other words, here's your shortcut to awesomeness with pasta. If at the end of this document you have questions or need assistance, please contact us at [email protected].
Loose coils can be very tricky to manage. Going cowboy on your spool handling can quickly end up in a frustrating, tangled mess. Keep your loose coils wrangled with a spool holder like masterspool for a more trouble-free experience. Find out more about loose coil handling in Keith's blog post.
And for spooled filament, never let go of the loose end. When not in the printer extruder, tuck it away in the cardboard spool's corrugation! Also, avoid sharp bends and excessive force when loading filament into your printer.
At Proto-pasta, we make high quality filament. We aspire to make exceptional results easy, but a positive result is very much dependent on your hardware, set-up, adjustments, and process parameters. Matching hardware with process and material for a positive experience is not always straight-forward, but you can start by pairing the following settings with your printer for a good starting point, then tune or troubleshoot as required.
Volume flow rate together with temperature dictates how melted the material is. This is hardware & condition dependent based on hot end, nozzle & extruder type, material & manufacturer as well as layer fan type, position & settings. Extrusion width, layer thickness & speed changes affect volume flow which may change required/desired temperature.
Post your prints & tag us @Proto_pasta on Twitter and Instagram. Need more help? Consider typical pitfalls and fixes below.
We visited Joel and ended up with a helpful video on the subject:
Para uma correcta manutenção da sua impressora 3D, recomendamos sempre que trocar de material de filamento 3D, a efectuar uma purga com filamento especial de limpeza.
Desta forma garante que não ficam vestígios de material nas paredes do nozzle, evitando o acumular de crosta que é criado sempre que efectua trocas de material.
Com este produto evita problema como "clogs" e "jams" e fará com que o seu nozzle mantenha-se sempre limpo, durando muito mais tempo.
Poderá encontrar a partir de 1.49€ no seguinte LINK
Para obter maior aderência à superfície da sua impressora 3D recomendamos a aplicar 3DLAC na base da plataforma.
Poderá encontrar no seguinte LINK
Este material é altamente higroscópico, absorvendo rapidamente a humidade do ar passados poucos minutos após aberto, impossibilitando desta forma a correcta impressão 3D do mesmo. O resultado das impressões 3D de materiais com humidade tendem a ser frágeis e de acabamento irregular ou em certos casos, torna-se simplesmente impossíveis de imprimir.
Deverá de usar soluções de caixas fechadas com dessecante como sílica ou caixas próprias secadoras de filamento.
Poderá encontrar no seguinte LINK
Download:
Technical and Safety Data Sheet
50g- Rolo
HTPLA Nebula Multicolor HTPLA - Cor
1.75mm (+-0.05mm) - Espessura / Tolerância de diâmetro
Muito Fácil - Facilidade de Impressão
Não folhegue sem Fantasia da Floresta!
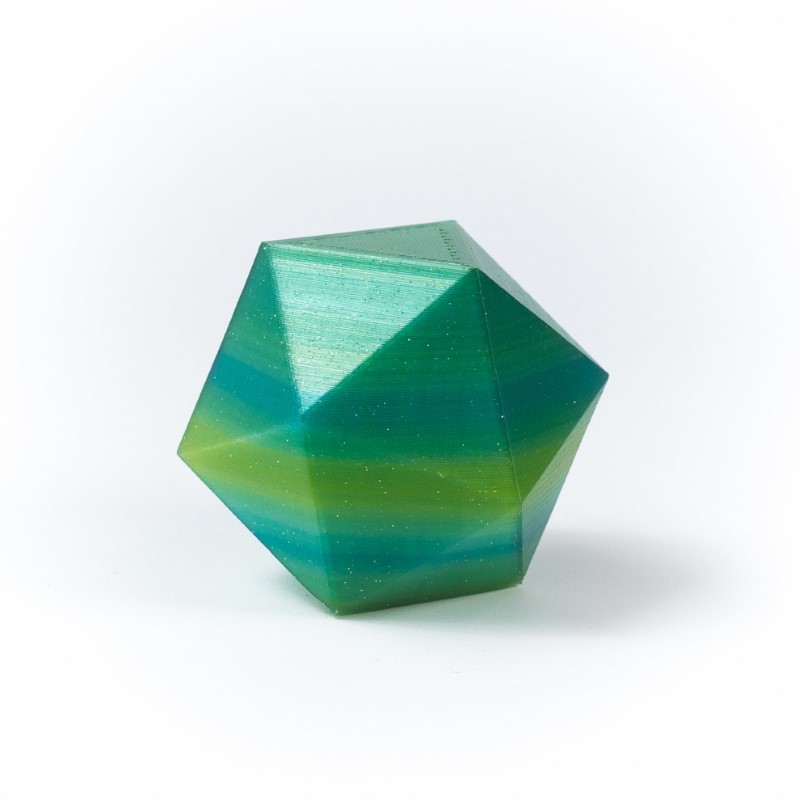
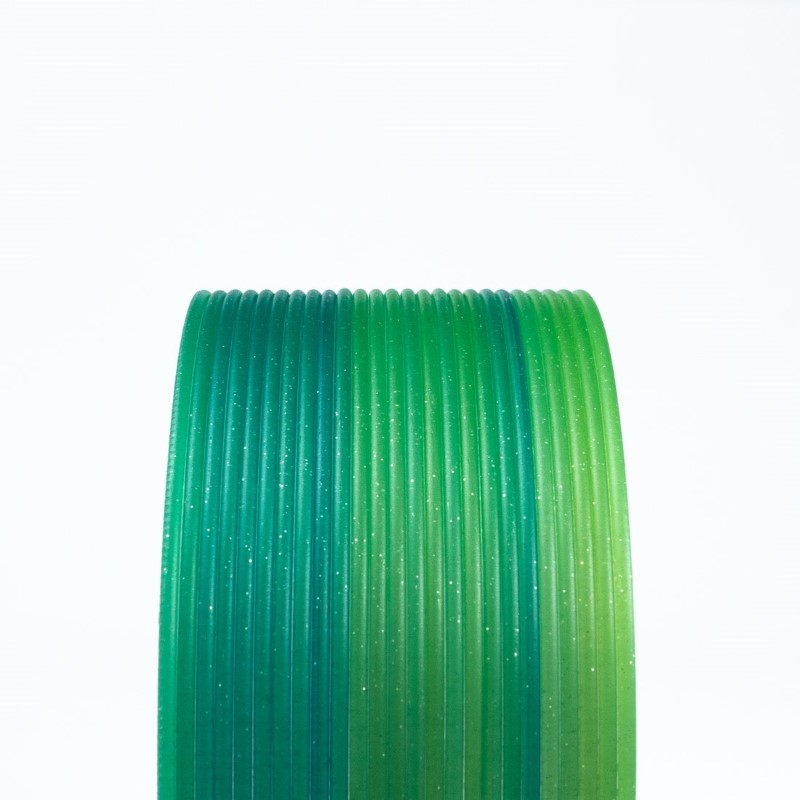
HTPLA Forest Fantasy Green Multicolor, um filamento variegado único inspirado nas nossas encantadoras florestas
Verde translúcido de azul para amarelo com um toque de brilho prateado
Um filamento de Endless Pastabilities em celebração do Dia da Terra 2021
Os resultados irão variar, uma vez que cada transição de cor e bobina é única
ProtoPasta é uma empresa situada nos Estados Unidos da América, de produção de filamentos para impressão 3D de alta qualidade.
Caracterizada pelos rolos feitos em cartão, esta marca é mundialmente famosa por ser especializada em materiais como PLA e ABS modificados com outros materiais, como o PLA Magnético; o PLA Condutivo; PLA de fibra de carbono; HTPLA de cobre, latão ou bronze; ou o ABS-PC.
Semi crystalline, heat treatable PLA for high temp use
Density: 1.24 g/cc
Length: 346 m/kg (1.75) 130 m/kg (2.85)
Typical Printing Temp: 205-225 C
Glass Transition (Tg)*: 60 C
Peak Crystallization (Tc)**: 95-115 C
Onset to Melt (Tm)***: 155 C
Typical change when heat treated: -2% x/y +1% z
Link to Safety Data Page
*max use with no heat treat & max platform temp
**heat treating @ temp 10+ min depending on size/mass
***max use when heat treated (annealed or crystallized)
HTPLA prints well at 205-225 C, however it's important to match temp to your hardware & volume flow rate. With a typical hotend, you should be able to print at 205 C without jamming at a low flow rate. In machines with hardware that tends towards jamming, consider this video with Joel Telling.
Lower volume flows require lower temps, while higher volume flows require higher temps. In the previously-mentioned video, one way to overcome jamming is to set your temp to a higher-than-typical 240 C. This should then be matched with a high flow rate for a quality printing result.
For direct drives with a short distance between drive gears & nozzle, volume flows can approach 7-8 cubic mm/s or more if printing hot to overcome jamming. For bowden tubes where the distance between drive gear & nozzle are great or less powerful hotends, as little as 2 and as much as 4 cubic mm/s may be the limit. Beware of unintended speed changes from faster infills & slowing down for outlines or short layers. Consider our Ultimaker-specific blog for more on this topic.
A constant speed throughout the part is ideal from an extrusion perspective. Knowing your extrusion width, layer thickness & speed you can calculate your volume flow rate with the calculator like found in the previously-mentioned Ultimaker blog. Alternatively, if you know your volume flow rate limit, extrusion width & layer thickness, you can calculate your speed limit.
PLA & HTPLA are amorphous in structure as printed (no heat treating) & though both are adequate performers in an office environment, they have poor temperature stability, loosing significant stiffness at temps nearing 60 C. Different than standard PLA, HTPLA is designed to survive heat treating for higher temp stability in a no/minimal load condition to near onset of melting (155 C). That's an astonishing improvement in thermal stability compared to standard PLA after a quick bake in the oven after printing.
In as little as 5-10 minutes for small, thin parts, HTPLA quickly crystallizes in an oven at 95-115 C (200-240 F) to become more stiff & hold form above glass transition (60 C). Depending on part geometry, setup & technique, parts can deform and shrink. Best results are with flat and/or supported parts with 100% infill. In this instance we experienced x/y shrinkage of about 2% & growth of about 1% in z.
Be sure to avoid hot spots (non-radiating surfaces & no glowing coils) in the oven used for baking & experiment before baking a prized part. Un-printed filament works great for experimentation & translucent makes the transformation most visible! Heat treating is an art, but the resulting improved thermal performance, if needed, is well-worth exploring. You'll be shocked by the improved thermal stability of your HTPLA parts!!!
Looking for increased heat resistance without the need to switch to ABS? Protopasta High Temperature PLA offers heat deflection of up to 88° C (190.4° F) compared to standard PLA of 45-54° C (113-135° F). This makes it a great choice for moving parts (gears, RepRap pieces, etc) or prints that would face moderately high temperatures. Our High Temperature PLA is white, but can be painted after annealing.
We've created this page to bring you a premium PLA and HTPLA printing experience that rivals our premium material. Follow below to improve your 3D printing experience. In other words, here's your shortcut to awesomeness with pasta. If at the end of this document you have questions or need assistance, please contact us at [email protected].
Loose coils can be very tricky to manage. Going cowboy on your spool handling can quickly end up in a frustrating, tangled mess. Keep your loose coils wrangled with a spool holder like masterspool for a more trouble-free experience. Find out more about loose coil handling in Keith's blog post.
And for spooled filament, never let go of the loose end. When not in the printer extruder, tuck it away in the cardboard spool's corrugation! Also, avoid sharp bends and excessive force when loading filament into your printer.
At Proto-pasta, we make high quality filament. We aspire to make exceptional results easy, but a positive result is very much dependent on your hardware, set-up, adjustments, and process parameters. Matching hardware with process and material for a positive experience is not always straight-forward, but you can start by pairing the following settings with your printer for a good starting point, then tune or troubleshoot as required.
Volume flow rate together with temperature dictates how melted the material is. This is hardware & condition dependent based on hot end, nozzle & extruder type, material & manufacturer as well as layer fan type, position & settings. Extrusion width, layer thickness & speed changes affect volume flow which may change required/desired temperature.
Post your prints & tag us @Proto_pasta on Twitter and Instagram. Need more help? Consider typical pitfalls and fixes below.
We visited Joel and ended up with a helpful video on the subject:
Para uma correcta manutenção da sua impressora 3D, recomendamos sempre que trocar de material de filamento 3D, a efectuar uma purga com filamento especial de limpeza.
Desta forma garante que não ficam vestígios de material nas paredes do nozzle, evitando o acumular de crosta que é criado sempre que efectua trocas de material.
Com este produto evita problema como "clogs" e "jams" e fará com que o seu nozzle mantenha-se sempre limpo, durando muito mais tempo.
Poderá encontrar a partir de 1.49€ no seguinte LINK
Para obter maior aderência à superfície da sua impressora 3D recomendamos a aplicar 3DLAC na base da plataforma.
Poderá encontrar no seguinte LINK
Este material é altamente higroscópico, absorvendo rapidamente a humidade do ar passados poucos minutos após aberto, impossibilitando desta forma a correcta impressão 3D do mesmo. O resultado das impressões 3D de materiais com humidade tendem a ser frágeis e de acabamento irregular ou em certos casos, torna-se simplesmente impossíveis de imprimir.
Deverá de usar soluções de caixas fechadas com dessecante como sílica ou caixas próprias secadoras de filamento.
Poderá encontrar no seguinte LINK
Download:
Technical and Safety Data Sheet
50g- Rolo
HTPLA Forest Fantasy Green Multicolor HTPLA - Cor
1.75mm (+-0.05mm) - Espessura / Tolerância de diâmetro
Muito Fácil - Facilidade de Impressão
![]()
A FormFutura foi fundada em 2012, em Amesterdão, Holanda., de produção de filamentos para impressão 3D de alta qualidade.
Tornou-se rapidamente numa marca inconfundível com clientes em todo o mundo.
Unique features
General printing guidelines *
| Nozzle size: ≥ 0.15mm | Layer height: ≥ 0.1mm | Flow rate: ± 110% |
| Print temp: ± 220 - 260° C | Print speed: High | Retraction: Yes ± 6mm |
| Heat bed: ± 60 - 80° C | Fan speed: 30-100% | Experience level: Beginner |
*) Above displayed settings are meant as guidance to find your optimal print settings. These ranges in settings should work for most printers, but please do feel free to experiment outside these ranges if you think it is suitable for your printer. There are a lot of different type of printers, hot-ends and printer offsets that it is extremely difficult to give an overall one-size-fits-all setting.
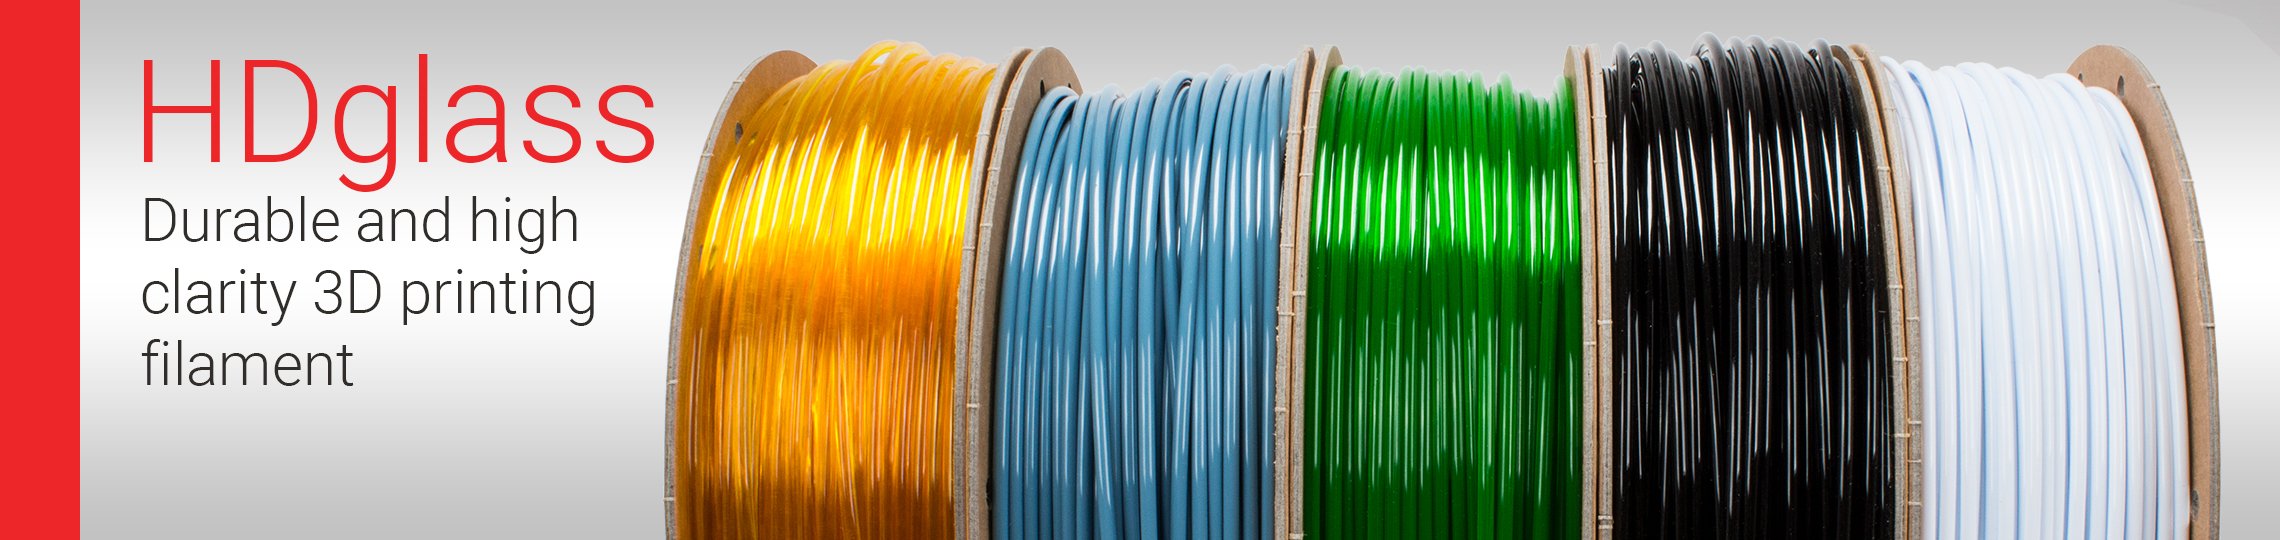
HDglass color terminology
HDglass comes in a variety of colors ranging from extremely clear to completely opaque. Please see below table with explanation about the color terminology used for our HDglass filaments.
| Transparent / Clear | Translucent colored | Slightly translucent colored | Opaque |
| Clear | See Through | Stained | Blinded |
Filament length
| ρ: 1.27 g/cc | 50 gr coil | 0.75 Kg spool | 2.3 Kg spool | 4.5 Kg spool | 8 Kg spool |
| Ø 1.75mm | ± 16.4m | ± 246m | ± 753m | ± 1473m | ± 2619m |
| Ø 2.85mm | ± 6.2m | ± 93m | ± 284m | ± 555m | ± 987m |
Product export information
| HS Code: 39169090 | Description: Monofilament | Country of origin: the Netherlands |
Compliance *
This filament is compliant to below listed directives and regulations.
*) This declaration of conformity to directives and regulations is prepared according to our present standard of knowledge and may be amended if new cognitions are available and applies only for the above described products.
Para uma correcta manutenção da sua impressora 3D, recomendamos sempre que trocar de material de filamento 3D, a efectuar uma purga com filamento especial de limpeza.
Desta forma garante que não ficam vestígios de material nas paredes do nozzle, evitando o acumular de crosta que é criado sempre que efectua trocas de material.
Com este produto evita problema como "clogs" e "jams" e fará com que o seu nozzle mantenha-se sempre limpo, durando muito mais tempo.
Poderá encontrar a partir de 1.49€ no seguinte LINK
Para obter maior aderência à superfície da sua impressora 3D recomendamos a aplicar 3DLAC na base da plataforma.
Poderá encontrar no seguinte LINK
Este material é altamente higroscópico, absorvendo rapidamente a humidade do ar passados poucos minutos após aberto, impossibilitando desta forma a correcta impressão 3D do mesmo. O resultado das impressões 3D de materiais com humidade tendem a ser frágeis e de acabamento irregular ou em certos casos, torna-se simplesmente impossíveis de imprimir.
Deverá de usar soluções de caixas fechadas com dessecante como sílica ou caixas próprias secadoras de filamento.
Poderá encontrar no seguinte LINK
Download:
Technical and Safety Data Sheet
750g- Rolo
PETG HDglass Blinded Bronze - Cor
1.75mm (+-0.05mm) - Espessura / Tolerância de diâmetro
220º a 260º - Temp. recomendada do Hotend
60º a 80º - Temp. recomendada da Heated bed
Fácil - Facilidade de Impressão
![]()
A FormFutura foi fundada em 2012, em Amesterdão, Holanda., de produção de filamentos para impressão 3D de alta qualidade.
Tornou-se rapidamente numa marca inconfundível com clientes em todo o mundo.
Unique features
General printing guidelines *
| Nozzle size: ≥ 0.15mm | Layer height: ≥ 0.1mm | Flow rate: ± 104% |
| Print temp: ± 225 - 270° C | Print speed: Medium | Retraction: Yes ± 5mm |
| Heat bed: ± 90 - 110° C | Fan speed: 0-30% | Experience level: Intermediate |
*) Above displayed settings are meant as guidance to find your optimal print settings. These ranges in settings should work for most printers, but please do feel free to experiment outside these ranges if you think it is suitable for your printer. There are a lot of different type of printers, hot-ends and printer offsets that it is extremely difficult to give an overall one-size-fits-all setting.
Filament length
| ρ: 1.03 g/cc | 50 gr coil | 0.75 Kg spool | 2.3 Kg spool | ||
| Ø 1.75mm | ± 20.2m | ± 303m | ± 928m | ||
| Ø 2.85mm | ± 7.6m | ± 114m | ± 350m |
Product export information
| HS Code: 39169090 | Description: Monofilament | Country of origin: the Netherlands |
Compliance *
This filament is compliant to below listed directives and regulations.
*) This declaration of conformity to directives and regulations is prepared according to our present standard of knowledge and may be amended if new cognitions are available and applies only for the above described products.
Para uma correcta manutenção da sua impressora 3D, recomendamos sempre que trocar de material de filamento 3D, a efectuar uma purga com filamento especial de limpeza.
Desta forma garante que não ficam vestígios de material nas paredes do nozzle, evitando o acumular de crosta que é criado sempre que efectua trocas de material.
Com este produto evita problema como "clogs" e "jams" e fará com que o seu nozzle mantenha-se sempre limpo, durando muito mais tempo.
Poderá encontrar a partir de 1.49€ no seguinte LINK
Para obter maior aderência à superfície da sua impressora 3D recomendamos a aplicar 3DLAC na base da plataforma.
Poderá encontrar no seguinte LINK
Este material é altamente higroscópico, absorvendo rapidamente a humidade do ar passados poucos minutos após aberto, impossibilitando desta forma a correcta impressão 3D do mesmo. O resultado das impressões 3D de materiais com humidade tendem a ser frágeis e de acabamento irregular ou em certos casos, torna-se simplesmente impossíveis de imprimir.
Deverá de usar soluções de caixas fechadas com dessecante como sílica ou caixas próprias secadoras de filamento.
Poderá encontrar no seguinte LINK
Download:
Technical and Safety Data Sheet
750g- Rolo
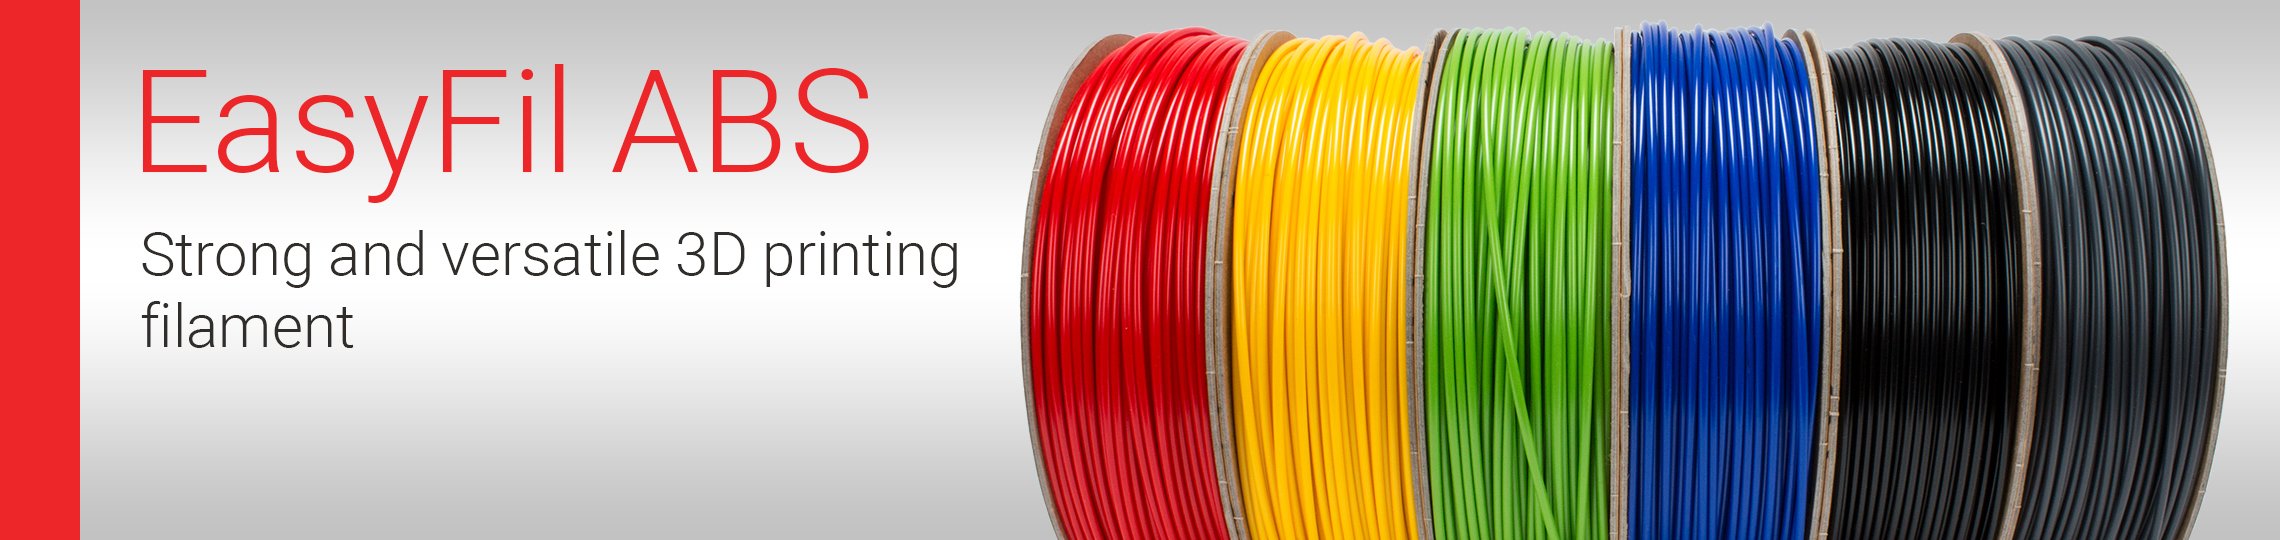
ABS EasyFil Bronze - Cor
1.75mm (+-0.05mm) - Espessura / Tolerância de diâmetro
225º a 270º - Temp. recomendada do Hotend
90º a 110º - Temp. recomendada da Heated bed
Moderado - Facilidade de Impressão
Filamento PETG para impressão 3D da marca Filament PM, de qualidade premium, com enrolamento perfeito, indicado tanto para utilizadores mais avançados e profissionais como para quem está a começar.
Este é um filamento fabricado na Europa segundo as mais rigorosas normas de qualidade.
A marca Filament PM ficou conhecida por fabricar e fornecer os filamentos para a conceituada marca de impressoras Original Prusa i3 by Josef Prusa.
O PETG é o copolímero mais famoso e utilizado no mundo da impressão 3D.
Surgiu no combinar o PET com glicol, melhorando as propriedades do PET através de um processo de glicosilação .
O PET (Polyethylene terephthalate) nasce em 1941 da mão dos cientistas britânicos Whinfield e Dickson, quem patentearam este polímero para a fabricação de fibras, que substituiriam às fibras de algodão.
Em 1976, este polímero começou a ser usado na fabricação de garrafas para bebidas como bebidas carbonatadas, cerveja e água mineral.
Dado este factor, não é de estranhar que o PET seja o plástico mais utilizado do mundo.
Um dos motivos pelo qual na impressão 3D se utiliza o PETG é este mais duradouro graças à sua maior resistência ao desgaste e a corrosão a agentes oxidantes, aspectos que estão combinados com uma alta firmeza anti-impactos.
Outras vantagens que o PETG apresenta é o facto de ser o único que não liberta qualquer tipo de gás na impressão 3D, sendo seguro para utilização dentro de espaços comuns, como escritórios.
O PETG como material utilizado na impressão 3D caracteriza-se por ter uma funcionalidade muito similar ao ABS (boa resistência à temperatura, duradouro, resistente) e a facilidade de impressão como o PLA.
Além disso amostra uma excelente adesão entre camadas, pouca deformação durante a impressão, resistência a ambientes com temperaturas baixas durante prolongados intervalos de tempo, resistência química (bases e ácidos), UV, e a ausência de cheiro durante a sua impressão.
A aplicação deste copoliéster na impressão 3D centra-se na produção de peças que precisam certa flexibilidade, boa resistência aos golpes (inclusive a baixas temperaturas), como por exemplo: peças sujeitas a pressão, peças protetoras ou recipientes para alimentos, as quais podem ser totalmente recicláveis.
Para uma correcta manutenção da sua impressora 3D, recomendamos sempre que trocar de material de filamento 3D, a efectuar uma purga com filamento especial de limpeza.
Desta forma garante que não ficam vestígios de material nas paredes do nozzle, evitando o acumular de crosta que é criado sempre que efectua trocas de material.
Com este produto evita problema como "clogs" e "jams" e fará com que o seu nozzle mantenha-se sempre limpo, durando muito mais tempo.
Poderá encontrar a partir de 1.49€ no seguinte LINK
Para obter maior aderência à superfície da sua impressora 3D recomendamos a aplicar 3DLAC na base da plataforma.
Caso aqueças a Hotbed a 70ºC para o material PETG, consegues eliminar na totalidade todos os problemas de warpping .
Poderá encontrar no seguinte LINK
Documentos para Download:
Technical Data Sheet
Safety Data Sheet
Rohs
10m (Amostra) - Rolo
PETG Metal Edition Coffee Bronze - Cor
1.75mm (+-0.05mm) - Espessura
220º a 250º - Temp. recomendada do Hotend
70º a 85º - Temp. recomendada da Heated bed
Fácil - Facilidade de Impressão
ProtoPasta é uma empresa situada nos Estados Unidos da América, de produção de filamentos para impressão 3D de alta qualidade.
Caracterizada pelos rolos feitos em cartão, esta marca é mundialmente famosa por ser especializada em materiais como PLA e ABS modificados com outros materiais, como o PLA Magnético; o PLA Condutivo; PLA de fibra de carbono; HTPLA de cobre, latão ou bronze; ou o ABS-PC.
It seemed untouchable, always turning pink, but we finally have a formulation good enough to share!
Think hot rods and ruby slippers, this red is going to knock your socks off!!!! Words can't describe...

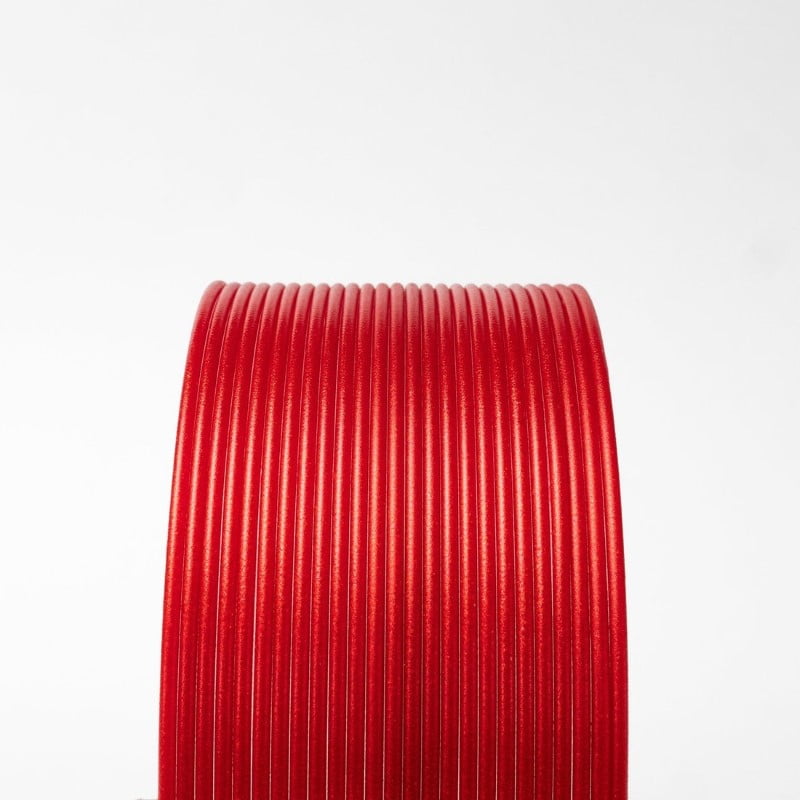
Candy Apple Red Metallic PLA prints with the ease of standard PLA with standard hardware and temperatures, but make fun, mesmerizing prints that stand out. Celebrate good times by 3d printing metallic red PLA ornaments, toys, and treasures. If you want to make a print more fun, just add glitter. Glitter Flake Red PLA has little risk of clogging or wearing your nozzle, and it won't make a glittery mess, but beware, printing with metallic glitter PLA is sure to be addictive! Glitter particles are relatively small but have some orientation effects, giving top/bottom surfaces more shine than sidewall, so have some fun playing with orientation to see how the result changes!
Like our other HTPLAs, Glitter Flake Metallic Red PLA filament can be "Heat Treated" to increase crystallinity for "Higher Temperature" resistance compared to amorphous PLA, ABS, and co-polyesters like PETG! Glitter Flake HTPLA prints translucent, but turns opaque when heat treated (or crystallized). With a more crystalline structure, heat treated HTPLA parts can hold form to near melting, though temperatures where the material is practically useful vary greatly depending on geometry and load conditions!
For this improved performance, your prints should be baked in an oven until you see a change from translucent pink to opaque pink with reduced gloss. This visual change indicates the improved performance! We've seen the change take place in 5-10 minutes on thin walled parts but can take an hour or more. We've had good luck in a quality, at home convection oven at 110C (225F). Parts will get very "floppy" before becoming more firm, so please leave supports on your parts or support them and bake them on a flat, non-radiating surface (like glass, ceramic, or composite).
In our experience, good results were achieved using standard PLA parameters ranging from 195-225C nozzle with standard build surface preparation (blue tape, glue stick, or BuildTak). No heated bed required but up to 60C is okay. Beware, if the bed temperature is too high, your part base could actually heat treat while printing, increasing warping and decreasing adhesion. Some shrinkage will occur in the heat treating process, so dimension critical parts may need to be scaled appropriately (as much as 2.5% in our experience).
Looking for increased heat resistance without the need to switch to ABS? Protopasta High Temperature PLA offers heat deflection of up to 88° C (190.4° F) compared to standard PLA of 45-54° C (113-135° F). This makes it a great choice for moving parts (gears, RepRap pieces, etc) or prints that would face moderately high temperatures. Our High Temperature PLA is white, but can be painted after annealing.
We've created this page to bring you a premium PLA and HTPLA printing experience that rivals our premium material. Follow below to improve your 3D printing experience. In other words, here's your shortcut to awesomeness with pasta. If at the end of this document you have questions or need assistance, please contact us at [email protected].
Loose coils can be very tricky to manage. Going cowboy on your spool handling can quickly end up in a frustrating, tangled mess. Keep your loose coils wrangled with a spool holder like masterspool for a more trouble-free experience. Find out more about loose coil handling in Keith's blog post.
And for spooled filament, never let go of the loose end. When not in the printer extruder, tuck it away in the cardboard spool's corrugation! Also, avoid sharp bends and excessive force when loading filament into your printer.
At Proto-pasta, we make high quality filament. We aspire to make exceptional results easy, but a positive result is very much dependent on your hardware, set-up, adjustments, and process parameters. Matching hardware with process and material for a positive experience is not always straight-forward, but you can start by pairing the following settings with your printer for a good starting point, then tune or troubleshoot as required.
Volume flow rate together with temperature dictates how melted the material is. This is hardware & condition dependent based on hot end, nozzle & extruder type, material & manufacturer as well as layer fan type, position & settings. Extrusion width, layer thickness & speed changes affect volume flow which may change required/desired temperature.
Post your prints & tag us @Proto_pasta on Twitter and Instagram. Need more help? Consider typical pitfalls and fixes below.
We visited Joel and ended up with a helpful video on the subject:
Para uma correcta manutenção da sua impressora 3D, recomendamos sempre que trocar de material de filamento 3D, a efectuar uma purga com filamento especial de limpeza.
Desta forma garante que não ficam vestígios de material nas paredes do nozzle, evitando o acumular de crosta que é criado sempre que efectua trocas de material.
Com este produto evita problema como "clogs" e "jams" e fará com que o seu nozzle mantenha-se sempre limpo, durando muito mais tempo.
Poderá encontrar a partir de 1.49€ no seguinte LINK
Para obter maior aderência à superfície da sua impressora 3D recomendamos a aplicar 3DLAC na base da plataforma.
Poderá encontrar no seguinte LINK
Este material é altamente higroscópico, absorvendo rapidamente a humidade do ar passados poucos minutos após aberto, impossibilitando desta forma a correcta impressão 3D do mesmo. O resultado das impressões 3D de materiais com humidade tendem a ser frágeis e de acabamento irregular ou em certos casos, torna-se simplesmente impossíveis de imprimir.
Deverá de usar soluções de caixas fechadas com dessecante como sílica ou caixas próprias secadoras de filamento.
Poderá encontrar no seguinte LINK
Download:
Technical and Safety Data Sheet
50g- Rolo
HTPLA Candy Apple Metallic Red HTPLA ( Community Inspired )- Cor
1.75mm (+-0.05mm) - Espessura / Tolerância de diâmetro
Muito Fácil - Facilidade de Impressão