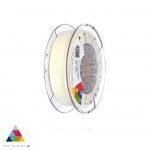
ProtoPasta é uma empresa situada nos Estados Unidos da América, de produção de filamentos para impressão 3D de alta qualidade.
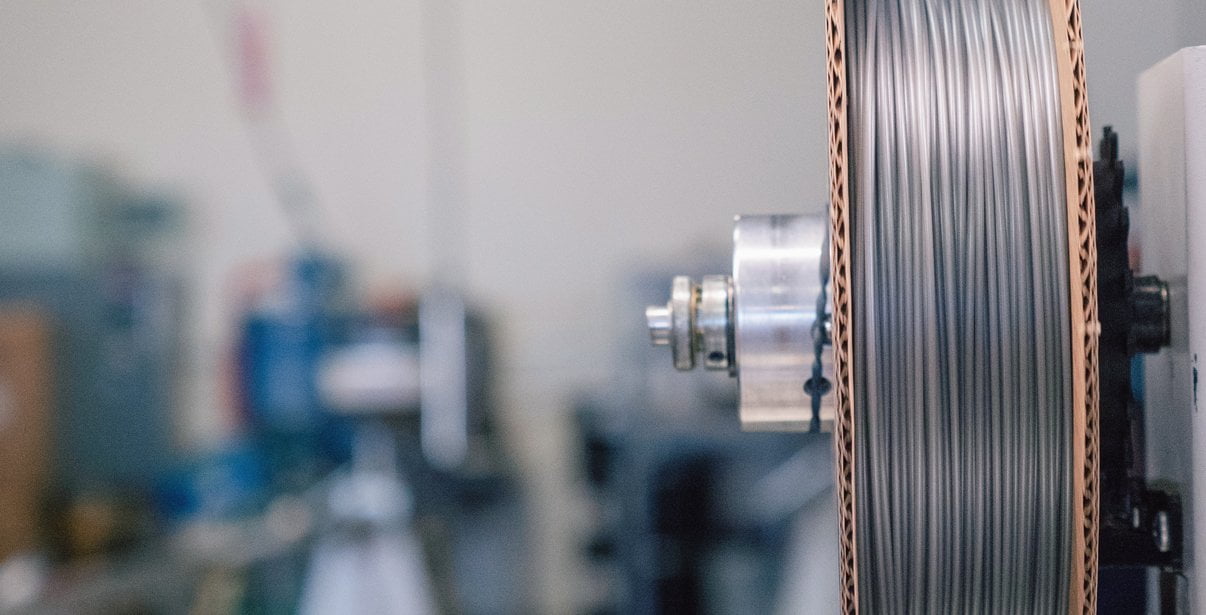
Caracterizada pelos rolos feitos em cartão, esta marca é mundialmente famosa por ser especializada em materiais como PLA e ABS modificados com outros materiais, como o PLA Magnético; o PLA Condutivo; PLA de fibra de carbono; HTPLA de cobre, latão ou bronze; ou o ABS-PC.
Proto-pasta Carbon Fiber Composite HTPLA is a combination of milled carbon fibers and high-performance PLA.
Resulting 3D printed prototypes and end-use parts are characterized by exceptionally stability of form and potential use up to 155 deg C (310 deg F) when heat treated.
Adaptable to most PLA-compatible printers. Heated bed recommended for process ease, quality, and reliability, but not required.
Printer should allow 3rd party filament, parameter adjustment, and nozzle replacement.
Specialized machine adaptation and maintenance may be required for Proto-pasta materials particularly in continued use of abrasive materials.
Please consider all product details before purchase and use.
More about our release of Carbon Fiber HTPLA
Prop 65 Warning! May cause cancer or reproductive harm.
However, in an effort put this statement in perspective, consider our blog on this subject to better-understand actual risks.
RoHS compliant - does not contain Cadmium (Cd), Lead (Pb), Mercury (Hg), Hexavalent Chromium: (Cr VI), Polybrominated Biphenyls (PBB), Polybrominated Diphenyl Ethers (PBDE), Bis(2-Ethylhexyl) phthalate (DEHP), Benzyl butyl phthalate (BBP), Dibutyl phthalate (DBP), or Diisobutyl phthalate (DIBP)
Regarding food contact - though base resin may be safe for food contact, our process & additional ingredients may not be. Thus our materials are not certified for food contact even if the risk is low. Please consider additional coatings, treatments & testing before pursuing extended food contact or certification.
Regarding skin contact - Not a known skin irritant, however, avoid recommending prolonged skin exposure without further testing.
Some machines may require specific considerations for filament placement, path, adjustments, settings, or other preparation & maintenance.
Abrasive materials like Carbon Fiber and Metal Composites may cause premature wear of in line components such as bowden tubes, drive gears, nozzles, and other items in the filament travel path. Serviceable hardware including replaceable nozzles suggested. Wear resistant nozzles are recommended for extended use. Nozzles wear most quickly with flattening of the tip which affects nozzle diameter & distance to build plate. Inconsistent extrusion, inaccuracy & process instability. Extrusion width & first layer distance adjustments and/or replacement of nozzle. For more on nozzle replacement consider this blog demonstrating nozzle replacement & adjustments on a Prusa MK3. Reduce nozzle wear by minimizing over-extrusion & infill.
Product label suggest temperatures as a guideline based on typical nozzle set points. Appropriate settings can vary widely & in given good conditions, a wide range of temperatures can yield positive results. With relatively low print rates on hardware without hangups, HTPLA prints well at the low side of the recommended range. With high print rates on machines with hardware hangups, higher than labeled temperatures may be required for consistent extrusion. In some cases, oiling filament makes the difference between success & failure.
One specific problematic example is the Prusa MK3 which, by design, has a Prusa-specific heat break with an internal ledge that material can get caught on. To reduce need for nuance & risk of jamming, users should either replace the Prusa-specific heat break with a standard e3d v6 one, oil filament to help it slip past the Prusa-specific ledge, or print at an unusually high temperature. The trade off with high temperature as a solution is you should also match that with a high volume flow rate. Sounds great, right? It's okay except for the loss of detail when having to slow down for small part, fine feature, or high resolution printing.
Prusa MK3-specific, Carbon Fiber HTPLA process recommendations:
Volume flow = extrusion width x layer height x speed in mm.
For example, 0.5 mm extrusion width & 0.2 mm layer height for speed 20-90 mm/s.
Poorly cooled cold sides of all metal hotends can yield a similar result & benefit from similar fixes to the Prusa MK3. Aggressive layer fans not isolated from heat blocks and/or nozzles can make for a jammy combination as well. Finding the balance between enough cooling fan when printing fast & a high enough nozzle set-point can be challenging. More isolated hotends with PTFE liners can allow slower printing with lower set points for more detail with less aggressive layer fan settings. Also, insulating your heater block and/or nozzle with a sock can help avoid unwanted layer fan cooling. Rapid changes in speed or print rate should also be avoided whenever possible.
For more on the subject of printing, consider our getting started guide.
HTPLA is a semi-crystalline grade of PLA optimized for heat treating (also known as annealing or crystallizing) for higher temperature use. Without heat treating, "as printed" amorphous PLA loses significant stiffness (and the thus the ability to retain form) as the material approaches it's relatively low glass transition temperature. Heat treating creates a more crystalline molecular structure for maintaining stiffness to near melting, thus extending the useful range of HTPLA, but crystallization also creates shrinkage. HTPLA parts should be scaled in slicer to compensate for shrinkage when heat treating.
A large range of temperatures & times can yield acceptable results. With translucent grades and thin wall parts like a single wall vase, you can see a visual change from transparent to opaque begin in as little as 3 minutes with a full transition to opaque in 7 minutes. Parts with more mass will take more time. What's important is the core temp and time to ensure a comprehensive change in material structure to crystalline throughout the part.
Here's a demonstration of measuring shrinkage, determining change, and applying compensation in printing. Here's additional demonstration of application of scale, heat treating, and validation of form.
Additional post processes might include sanding or painting. The addition of Carbon Fiber can lend well to ease of sanding and adhesion of coatings like paint, however, there are also additional safety considerations when generating dust through sanding and fumes through coating. Please seek safe practices with appropriate personal protective equipment (PPE) and ventilation.

We've created this page to bring you a premium PLA and HTPLA printing experience that rivals our premium material. Follow below to improve your 3D printing experience. In other words, here's your shortcut to awesomeness with pasta. If at the end of this document you have questions or need assistance, please contact us at [email protected].
Loose coils can be very tricky to manage. Going cowboy on your spool handling can quickly end up in a frustrating, tangled mess. Keep your loose coils wrangled with a spool holder like masterspool for a more trouble-free experience. Find out more about loose coil handling in Keith's blog post.
And for spooled filament, never let go of the loose end. When not in the printer extruder, tuck it away in the cardboard spool's corrugation! Also, avoid sharp bends and excessive force when loading filament into your printer.
At Proto-pasta, we make high quality filament. We aspire to make exceptional results easy, but a positive result is very much dependent on your hardware, set-up, adjustments, and process parameters. Matching hardware with process and material for a positive experience is not always straight-forward, but you can start by pairing the following settings with your printer for a good starting point, then tune or troubleshoot as required.
Volume flow rate together with temperature dictates how melted the material is. This is hardware & condition dependent based on hot end, nozzle & extruder type, material & manufacturer as well as layer fan type, position & settings. Extrusion width, layer thickness & speed changes affect volume flow which may change required/desired temperature.
Post your prints & tag us @Proto_pasta on Twitter and Instagram. Need more help? Consider typical pitfalls and fixes below.
We visited Joel and ended up with a helpful video on the subject:
Our most popular exotic material, prints made with our Carbon Fiber PLA are demonstrably more rigid, providing excellent structural strength and layer adhesion with very low warpage. It has a beautiful matte black finish with a slight sheen due to the embedded carbon.
What is it made out of?
Because of the chopped carbon, Protopasta Carbon Fiber PLA may have trouble getting through smaller nozzles. We have had good success using a .5mm nozzle and direct-drive spring loaded pinch-roll style extrusion head.Generally, our customers find it prints just like standard PLA on their machines (at around 195-210° F), though others find success running it a bit hotter (around 220° F). Experiment with your printer and see what works best for you.
Carbon fiber and your printer nozzle
The carbon fibers in our filament are processed for an optimum size: short enough to print in PLA without clogging nozzles, but long enough to provide the added rigidity carbon fiber is famous for. At this length, the chopped carbon fiber makes this filament more abrasive than standard PLA. Prolonged use may result in more wear on your 3D printer, particularly lower-end nozzles.
Para uma correcta manutenção da sua impressora 3D, recomendamos sempre que trocar de material de filamento 3D, a efectuar uma purga com filamento especial de limpeza.
Desta forma garante que não ficam vestígios de material nas paredes do nozzle, evitando o acumular de crosta que é criado sempre que efectua trocas de material.
Com este produto evita problema como "clogs" e "jams" e fará com que o seu nozzle mantenha-se sempre limpo, durando muito mais tempo.
Poderá encontrar a partir de 1.49€ no seguinte LINK
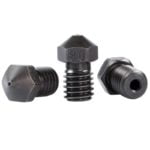
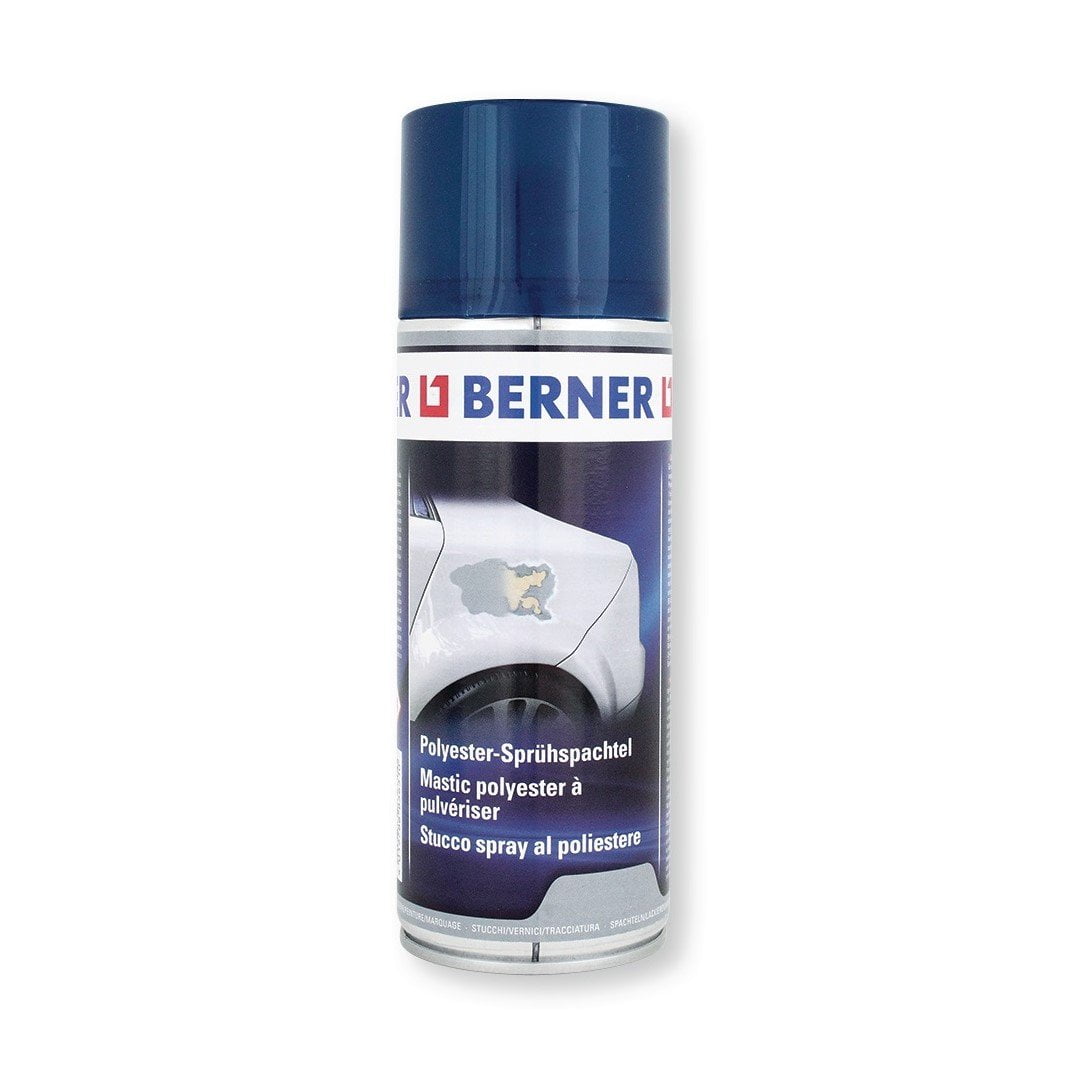
Este material é altamente abrasivo. Recomendamos a utilização de Nozzles de aço endurecido.
Poderá encontrar no seguinte LINK

Para obter maior aderência à superfície da sua impressora 3D recomendamos a aplicar 3DLAC na base da plataforma.
Poderá encontrar no seguinte LINK
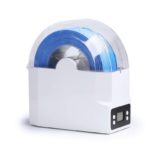
Este material é altamente higroscópico, absorvendo rapidamente a humidade do ar passados poucos minutos após aberto, impossibilitando desta forma a correcta impressão 3D do mesmo. O resultado das impressões 3D de materiais com humidade tendem a ser frágeis e de acabamento irregular ou em certos casos, torna-se simplesmente impossíveis de imprimir.
Deverá de usar soluções de caixas fechadas com dessecante como sílica ou caixas próprias secadoras de filamento.
Poderá encontrar no seguinte LINK
Download:
Technical and Safety Data Sheet
500g- Rolo
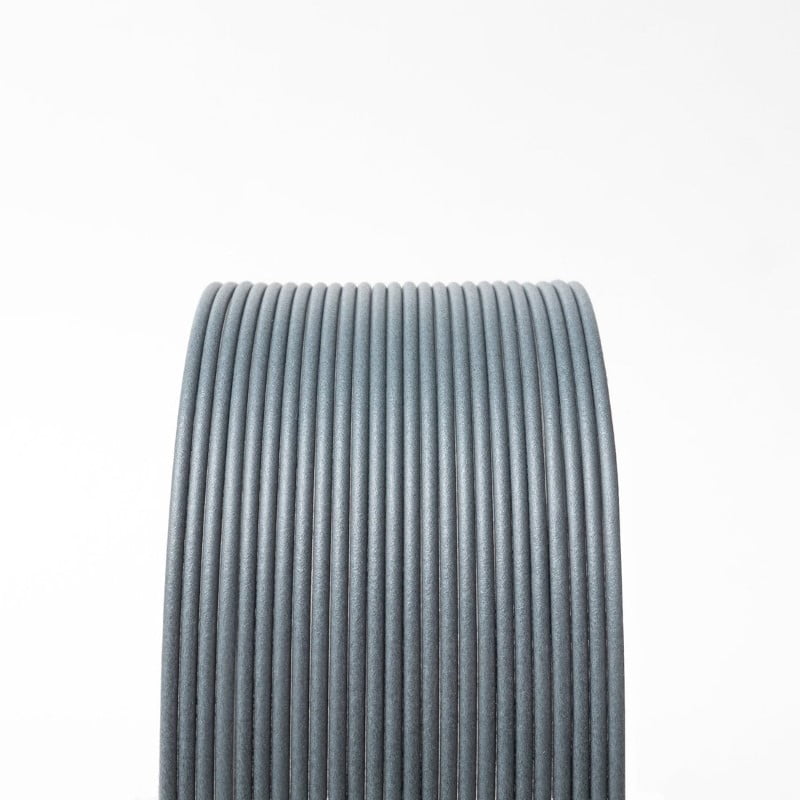
HTPLA Medium Gray ( Carbon Fiber Composite ) - Cor
1.75mm (+-0.05mm) - Espessura / Tolerância de diâmetro
Fácil - Facilidade de Impressão
ProtoPasta é uma empresa situada nos Estados Unidos da América, de produção de filamentos para impressão 3D de alta qualidade.
Caracterizada pelos rolos feitos em cartão, esta marca é mundialmente famosa por ser especializada em materiais como PLA e ABS modificados com outros materiais, como o PLA Magnético; o PLA Condutivo; PLA de fibra de carbono; HTPLA de cobre, latão ou bronze; ou o ABS-PC.
Our most popular exotic material, Proto-pasta Carbon Fiber Composite HTPLA is a combination of milled carbon fibers and high-performance PLA.
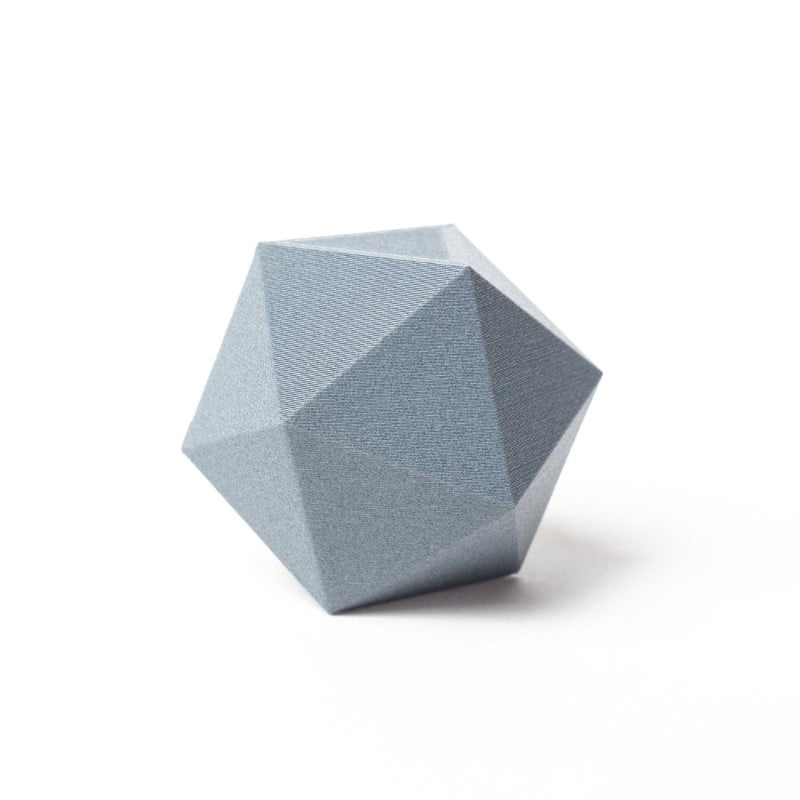
Resulting 3D prints made with our Carbon Fiber HTPLA are demonstrably more rigid, providing excellent structural strength and layer adhesion with very low warpage.
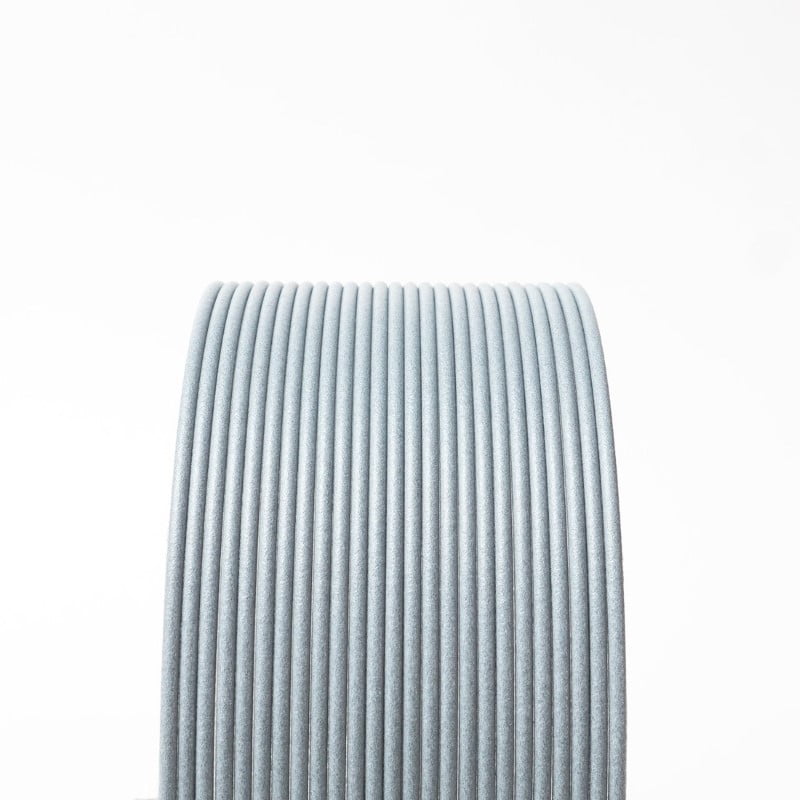
The embedded carbon provides a beautiful light matte gray finish with a slight sheen, resulting in 3D prints with exceptional accuracy, finish, and performance!
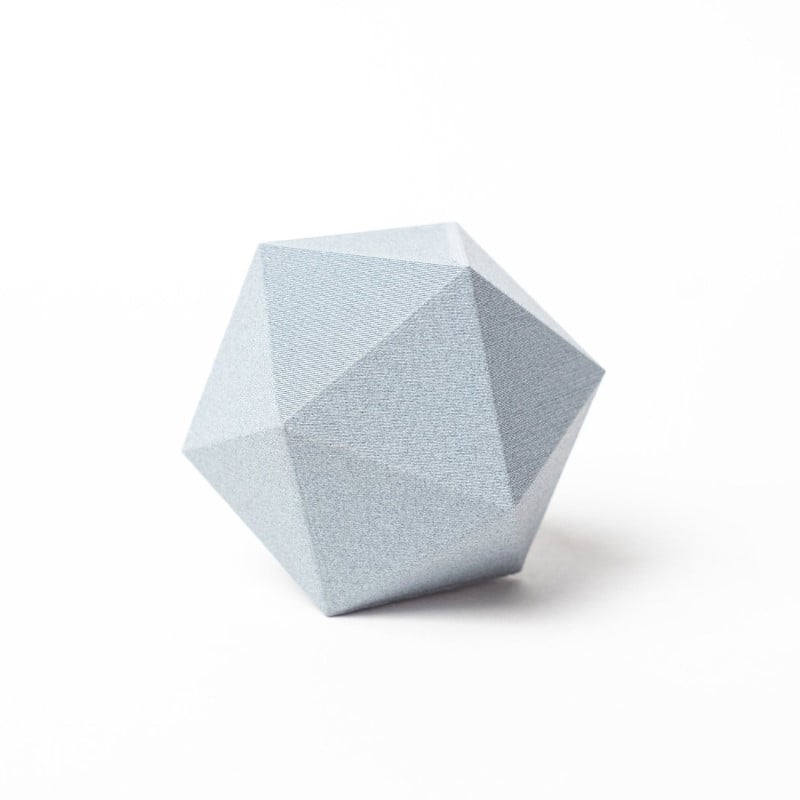
Proto-pasta Carbon Fiber Composite HTPLA is a combination of milled carbon fibers and high-performance PLA. Resulting 3D printed prototypes and end-use parts are characterized by exceptionally stability of form and potential use up to 155 deg C (310 deg F) when heat treated.
Adaptable to most PLA-compatible printers. Heated bed recommended for process ease, quality, and reliability, but not required. Printer should allow 3rd party filament, parameter adjustment, and nozzle replacement. Specialized machine adaptation and maintenance may be required for Proto-pasta materials particularly in continued use of abrasive materials.
Please consider all information below before purchase and use. More on getting started. More about our release of Carbon Fiber HTPLA.
Prop 65 Warning! May cause cancer or reproductive harm.
However, in an effort put this statement in perspective, consider our blog on this subject to better-understand actual risks.
RoHS compliant - does not contain Cadmium (Cd), Lead (Pb), Mercury (Hg), Hexavalent Chromium: (Cr VI), Polybrominated Biphenyls (PBB), Polybrominated Diphenyl Ethers (PBDE), Bis(2-Ethylhexyl) phthalate (DEHP), Benzyl butyl phthalate (BBP), Dibutyl phthalate (DBP), or Diisobutyl phthalate (DIBP)
Regarding food contact - though base resin may be safe for food contact, our process & additional ingredients may not be. Thus our materials are not certified for food contact even if the risk is low. Please consider additional coatings, treatments & testing before pursuing extended food contact or certification.
Regarding skin contact - Not a known skin irritant, however, avoid recommending prolonged skin exposure without further testing.
Some machines may require specific considerations for filament placement, path, adjustments, settings, or other preparation & maintenance.
Abrasive materials like Carbon Fiber and Metal Composites may cause premature wear of in line components such as bowden tubes, drive gears, nozzles, and other items in the filament travel path. Serviceable hardware including replaceable nozzles suggested. Wear resistant nozzles are recommended for extended use. Nozzles wear most quickly with flattening of the tip which affects nozzle diameter & distance to build plate. Inconsistent extrusion, inaccuracy & process instability. Extrusion width & first layer distance adjustments and/or replacement of nozzle. For more on nozzle replacement consider this blog demonstrating nozzle replacement & adjustments on a Prusa MK3. Reduce nozzle wear by minimizing over-extrusion & infill.
Product label suggest temperatures as a guideline based on typical nozzle set points. Appropriate settings can vary widely & in given good conditions, a wide range of temperatures can yield positive results. With relatively low print rates on hardware without hangups, HTPLA prints well at the low side of the recommended range. With high print rates on machines with hardware hangups, higher than labeled temperatures may be required for consistent extrusion. In some cases, oiling filament makes the difference between success & failure.
One specific problematic example is the Prusa MK3 which, by design, has a Prusa-specific heat break with an internal ledge that material can get caught on. To reduce need for nuance & risk of jamming, users should either replace the Prusa-specific heat break with a standard e3d v6 one, oil filament to help it slip past the Prusa-specific ledge, or print at an unusually high temperature. The trade off with high temperature as a solution is you should also match that with a high volume flow rate. Sounds great, right? It's okay except for the loss of detail when having to slow down for small part, fine feature, or high resolution printing.
Prusa MK3-specific, Carbon Fiber HTPLA process recommendations:
Volume flow = extrusion width x layer height x speed in mm.
For example, 0.5 mm extrusion width & 0.2 mm layer height for speed 20-90 mm/s.
Poorly cooled cold sides of all metal hotends can yield a similar result & benefit from similar fixes to the Prusa MK3. Aggressive layer fans not isolated from heat blocks and/or nozzles can make for a jammy combination as well. Finding the balance between enough cooling fan when printing fast & a high enough nozzle set-point can be challenging. More isolated hotends with PTFE liners can allow slower printing with lower set points for more detail with less aggressive layer fan settings. Also, insulating your heater block and/or nozzle with a sock can help avoid unwanted layer fan cooling. Rapid changes in speed or print rate should also be avoided whenever possible.
For more on the subject of printing, consider our getting started guide.
HTPLA is a semi-crystalline grade of PLA optimized for heat treating (also known as annealing or crystallizing) for higher temperature use. Without heat treating, "as printed" amorphous PLA loses significant stiffness (and the thus the ability to retain form) as the material approaches it's relatively low glass transition temperature. Heat treating creates a more crystalline molecular structure for maintaining stiffness to near melting, thus extending the useful range of HTPLA, but crystallization also creates shrinkage. HTPLA parts should be scaled in slicer to compensate for shrinkage when heat treating.
A large range of temperatures & times can yield acceptable results. With translucent grades and thin wall parts like a single wall vase, you can see a visual change from transparent to opaque begin in as little as 3 minutes with a full transition to opaque in 7 minutes. Parts with more mass will take more time. What's important is the core temp and time to ensure a comprehensive change in material structure to crystalline throughout the part.
Here's a demonstration of measuring shrinkage, determining change, and applying compensation in printing. Here's additional demonstration of application of scale, heat treating, and validation of form.
Additional post processes might include sanding or painting. The addition of Carbon Fiber can lend well to ease of sanding and adhesion of coatings like paint, however, there are also additional safety considerations when generating dust through sanding and fumes through coating. Please seek safe practices with appropriate personal protective equipment (PPE) and ventilation.
We've created this page to bring you a premium PLA and HTPLA printing experience that rivals our premium material. Follow below to improve your 3D printing experience. In other words, here's your shortcut to awesomeness with pasta. If at the end of this document you have questions or need assistance, please contact us at [email protected].
Loose coils can be very tricky to manage. Going cowboy on your spool handling can quickly end up in a frustrating, tangled mess. Keep your loose coils wrangled with a spool holder like masterspool for a more trouble-free experience. Find out more about loose coil handling in Keith's blog post.
And for spooled filament, never let go of the loose end. When not in the printer extruder, tuck it away in the cardboard spool's corrugation! Also, avoid sharp bends and excessive force when loading filament into your printer.
At Proto-pasta, we make high quality filament. We aspire to make exceptional results easy, but a positive result is very much dependent on your hardware, set-up, adjustments, and process parameters. Matching hardware with process and material for a positive experience is not always straight-forward, but you can start by pairing the following settings with your printer for a good starting point, then tune or troubleshoot as required.
Volume flow rate together with temperature dictates how melted the material is. This is hardware & condition dependent based on hot end, nozzle & extruder type, material & manufacturer as well as layer fan type, position & settings. Extrusion width, layer thickness & speed changes affect volume flow which may change required/desired temperature.
Post your prints & tag us @Proto_pasta on Twitter and Instagram. Need more help? Consider typical pitfalls and fixes below.
We visited Joel and ended up with a helpful video on the subject:
Our most popular exotic material, prints made with our Carbon Fiber PLA are demonstrably more rigid, providing excellent structural strength and layer adhesion with very low warpage. It has a beautiful matte black finish with a slight sheen due to the embedded carbon.
What is it made out of?
Because of the chopped carbon, Protopasta Carbon Fiber PLA may have trouble getting through smaller nozzles. We have had good success using a .5mm nozzle and direct-drive spring loaded pinch-roll style extrusion head.Generally, our customers find it prints just like standard PLA on their machines (at around 195-210° F), though others find success running it a bit hotter (around 220° F). Experiment with your printer and see what works best for you.
Carbon fiber and your printer nozzle
The carbon fibers in our filament are processed for an optimum size: short enough to print in PLA without clogging nozzles, but long enough to provide the added rigidity carbon fiber is famous for. At this length, the chopped carbon fiber makes this filament more abrasive than standard PLA. Prolonged use may result in more wear on your 3D printer, particularly lower-end nozzles.
Para uma correcta manutenção da sua impressora 3D, recomendamos sempre que trocar de material de filamento 3D, a efectuar uma purga com filamento especial de limpeza.
Desta forma garante que não ficam vestígios de material nas paredes do nozzle, evitando o acumular de crosta que é criado sempre que efectua trocas de material.
Com este produto evita problema como "clogs" e "jams" e fará com que o seu nozzle mantenha-se sempre limpo, durando muito mais tempo.
Poderá encontrar a partir de 1.49€ no seguinte LINK
Este material é altamente abrasivo. Recomendamos a utilização de Nozzles de aço endurecido.
Poderá encontrar no seguinte LINK
Para obter maior aderência à superfície da sua impressora 3D recomendamos a aplicar 3DLAC na base da plataforma.
Poderá encontrar no seguinte LINK
Este material é altamente higroscópico, absorvendo rapidamente a humidade do ar passados poucos minutos após aberto, impossibilitando desta forma a correcta impressão 3D do mesmo. O resultado das impressões 3D de materiais com humidade tendem a ser frágeis e de acabamento irregular ou em certos casos, torna-se simplesmente impossíveis de imprimir.
Deverá de usar soluções de caixas fechadas com dessecante como sílica ou caixas próprias secadoras de filamento.
Poderá encontrar no seguinte LINK
Download:
Technical and Safety Data Sheet
500g- Rolo
HTPLA Light Gray ( Carbon Fiber Composite ) - Cor
1.75mm (+-0.05mm) - Espessura / Tolerância de diâmetro
Fácil - Facilidade de Impressão
ProtoPasta é uma empresa situada nos Estados Unidos da América, de produção de filamentos para impressão 3D de alta qualidade.
Caracterizada pelos rolos feitos em cartão, esta marca é mundialmente famosa por ser especializada em materiais como PLA e ABS modificados com outros materiais, como o PLA Magnético; o PLA Condutivo; PLA de fibra de carbono; HTPLA de cobre, latão ou bronze; ou o ABS-PC.
Our most popular exotic material, Proto-pasta Carbon Fiber Composite HTPLA is a combination of milled carbon fibers and high-performance PLA.
Resulting 3D prints made with our Carbon Fiber HTPLA are demonstrably more rigid, providing excellent structural strength and layer adhesion with very low warpage.
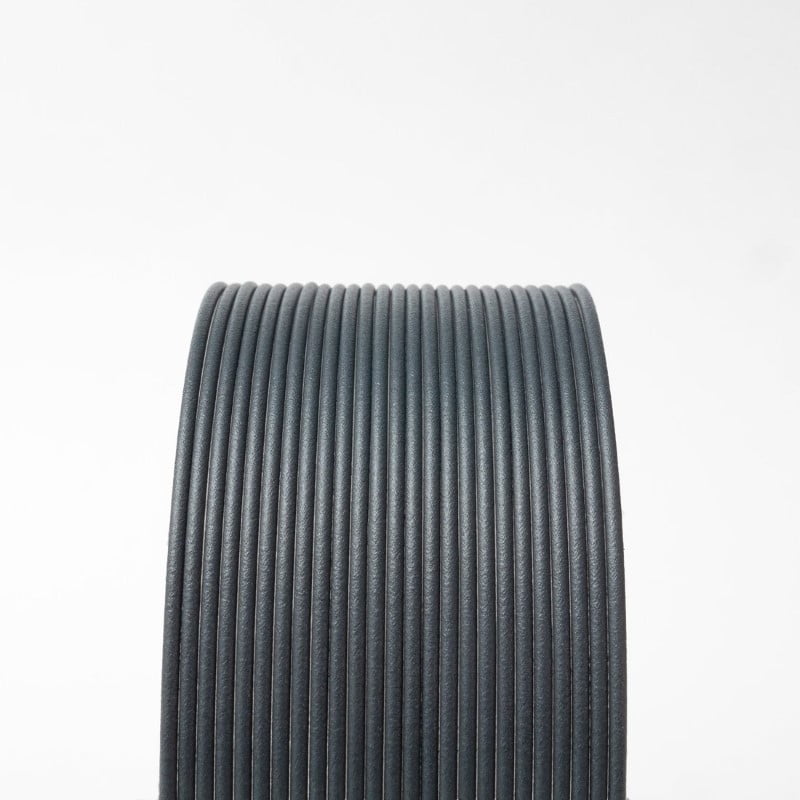
The embedded carbon provides a beautiful dark matte gray finish with a slight sheen, resulting in 3D prints with exceptional accuracy, finish, and performance!

Proto-pasta Carbon Fiber Composite HTPLA is a combination of milled carbon fibers and high-performance PLA. Resulting 3D printed prototypes and end-use parts are characterized by exceptionally stability of form and potential use up to 155 deg C (310 deg F) when heat treated.
Adaptable to most PLA-compatible printers. Heated bed recommended for process ease, quality, and reliability, but not required. Printer should allow 3rd party filament, parameter adjustment, and nozzle replacement. Specialized machine adaptation and maintenance may be required for Proto-pasta materials particularly in continued use of abrasive materials. More on getting started. More about our release of Carbon Fiber HTPLA.
Prop 65 Warning! May cause cancer or reproductive harm.
However, in an effort put this statement in perspective, consider our blog on this subject to better-understand actual risks.
RoHS compliant - does not contain Cadmium (Cd), Lead (Pb), Mercury (Hg), Hexavalent Chromium: (Cr VI), Polybrominated Biphenyls (PBB), Polybrominated Diphenyl Ethers (PBDE), Bis(2-Ethylhexyl) phthalate (DEHP), Benzyl butyl phthalate (BBP), Dibutyl phthalate (DBP), or Diisobutyl phthalate (DIBP)
Regarding food contact - though base resin may be safe for food contact, our process & additional ingredients may not be. Thus our materials are not certified for food contact even if the risk is low. Please consider additional coatings, treatments & testing before pursuing extended food contact or certification.
Regarding skin contact - Not a known skin irritant, however, avoid recommending prolonged skin exposure without further testing.
Some machines may require specific considerations for filament placement, path, adjustments, settings, or other preparation & maintenance.
Abrasive materials like Carbon Fiber and Metal Composites may cause premature wear of in line components such as bowden tubes, drive gears, nozzles, and other items in the filament travel path. Serviceable hardware including replaceable nozzles suggested. Wear resistant nozzles are recommended for extended use. Nozzles wear most quickly with flattening of the tip which affects nozzle diameter & distance to build plate. Inconsistent extrusion, inaccuracy & process instability. Extrusion width & first layer distance adjustments and/or replacement of nozzle. For more on nozzle replacement consider this blog demonstrating nozzle replacement & adjustments on a Prusa MK3. Reduce nozzle wear by minimizing over-extrusion & infill.
Product label suggest temperatures as a guideline based on typical nozzle set points. Appropriate settings can vary widely & in given good conditions, a wide range of temperatures can yield positive results. With relatively low print rates on hardware without hangups, HTPLA prints well at the low side of the recommended range. With high print rates on machines with hardware hangups, higher than labeled temperatures may be required for consistent extrusion. In some cases, oiling filament makes the difference between success & failure.

One specific problematic example is the Prusa MK3 which, by design, has a Prusa-specific heat break with an internal ledge that material can get caught on. To reduce need for nuance & risk of jamming, users should either replace the Prusa-specific heat break with a standard e3d v6 one, oil filament to help it slip past the Prusa-specific ledge, or print at an unusually high temperature. The trade off with high temperature as a solution is you should also match that with a high volume flow rate. Sounds great, right? It's okay except for the loss of detail when having to slow down for small part, fine feature, or high resolution printing.
Prusa MK3-specific, Carbon Fiber HTPLA process recommendations:
Volume flow = extrusion width x layer height x speed in mm.
For example, 0.5 mm extrusion width & 0.2 mm layer height for speed 20-90 mm/s.
Poorly cooled cold sides of all metal hotends can yield a similar result & benefit from similar fixes to the Prusa MK3. Aggressive layer fans not isolated from heat blocks and/or nozzles can make for a jammy combination as well. Finding the balance between enough cooling fan when printing fast & a high enough nozzle set-point can be challenging. More isolated hotends with PTFE liners can allow slower printing with lower set points for more detail with less aggressive layer fan settings. Also, insulating your heater block and/or nozzle with a sock can help avoid unwanted layer fan cooling. Rapid changes in speed or print rate should also be avoided whenever possible.
For more on the subject of printing, consider our getting started guide.
HTPLA is a semi-crystalline grade of PLA optimized for heat treating (also known as annealing or crystallizing) for higher temperature use. Without heat treating, "as printed" amorphous PLA loses significant stiffness (and the thus the ability to retain form) as the material approaches it's relatively low glass transition temperature. Heat treating creates a more crystalline molecular structure for maintaining stiffness to near melting, thus extending the useful range of HTPLA, but crystallization also creates shrinkage. HTPLA parts should be scaled in slicer to compensate for shrinkage when heat treating.
A large range of temperatures & times can yield acceptable results. With translucent grades and thin wall parts like a single wall vase, you can see a visual change from transparent to opaque begin in as little as 3 minutes with a full transition to opaque in 7 minutes. Parts with more mass will take more time. What's important is the core temp and time to ensure a comprehensive change in material structure to crystalline throughout the part.
Here's a demonstration of measuring shrinkage, determining change, and applying compensation in printing. Here's additional demonstration of application of scale, heat treating, and validation of form.
Additional post processes might include sanding or painting. The addition of Carbon Fiber can lend well to ease of sanding and adhesion of coatings like paint, however, there are also additional safety considerations when generating dust through sanding and fumes through coating. Please seek safe practices with appropriate personal protective equipment (PPE) and ventilation.
We've created this page to bring you a premium PLA and HTPLA printing experience that rivals our premium material. Follow below to improve your 3D printing experience. In other words, here's your shortcut to awesomeness with pasta. If at the end of this document you have questions or need assistance, please contact us at [email protected].
Loose coils can be very tricky to manage. Going cowboy on your spool handling can quickly end up in a frustrating, tangled mess. Keep your loose coils wrangled with a spool holder like masterspool for a more trouble-free experience. Find out more about loose coil handling in Keith's blog post.
And for spooled filament, never let go of the loose end. When not in the printer extruder, tuck it away in the cardboard spool's corrugation! Also, avoid sharp bends and excessive force when loading filament into your printer.
At Proto-pasta, we make high quality filament. We aspire to make exceptional results easy, but a positive result is very much dependent on your hardware, set-up, adjustments, and process parameters. Matching hardware with process and material for a positive experience is not always straight-forward, but you can start by pairing the following settings with your printer for a good starting point, then tune or troubleshoot as required.
Volume flow rate together with temperature dictates how melted the material is. This is hardware & condition dependent based on hot end, nozzle & extruder type, material & manufacturer as well as layer fan type, position & settings. Extrusion width, layer thickness & speed changes affect volume flow which may change required/desired temperature.
Post your prints & tag us @Proto_pasta on Twitter and Instagram. Need more help? Consider typical pitfalls and fixes below.
We visited Joel and ended up with a helpful video on the subject:
Our most popular exotic material, prints made with our Carbon Fiber PLA are demonstrably more rigid, providing excellent structural strength and layer adhesion with very low warpage. It has a beautiful matte black finish with a slight sheen due to the embedded carbon.
What is it made out of?
Because of the chopped carbon, Protopasta Carbon Fiber PLA may have trouble getting through smaller nozzles. We have had good success using a .5mm nozzle and direct-drive spring loaded pinch-roll style extrusion head.Generally, our customers find it prints just like standard PLA on their machines (at around 195-210° F), though others find success running it a bit hotter (around 220° F). Experiment with your printer and see what works best for you.
Carbon fiber and your printer nozzle
The carbon fibers in our filament are processed for an optimum size: short enough to print in PLA without clogging nozzles, but long enough to provide the added rigidity carbon fiber is famous for. At this length, the chopped carbon fiber makes this filament more abrasive than standard PLA. Prolonged use may result in more wear on your 3D printer, particularly lower-end nozzles.
Para uma correcta manutenção da sua impressora 3D, recomendamos sempre que trocar de material de filamento 3D, a efectuar uma purga com filamento especial de limpeza.
Desta forma garante que não ficam vestígios de material nas paredes do nozzle, evitando o acumular de crosta que é criado sempre que efectua trocas de material.
Com este produto evita problema como "clogs" e "jams" e fará com que o seu nozzle mantenha-se sempre limpo, durando muito mais tempo.
Poderá encontrar a partir de 1.49€ no seguinte LINK
Este material é altamente abrasivo. Recomendamos a utilização de Nozzles de aço endurecido.
Poderá encontrar no seguinte LINK
Para obter maior aderência à superfície da sua impressora 3D recomendamos a aplicar 3DLAC na base da plataforma.
Poderá encontrar no seguinte LINK
Este material é altamente higroscópico, absorvendo rapidamente a humidade do ar passados poucos minutos após aberto, impossibilitando desta forma a correcta impressão 3D do mesmo. O resultado das impressões 3D de materiais com humidade tendem a ser frágeis e de acabamento irregular ou em certos casos, torna-se simplesmente impossíveis de imprimir.
Deverá de usar soluções de caixas fechadas com dessecante como sílica ou caixas próprias secadoras de filamento.
Poderá encontrar no seguinte LINK
Download:
Technical and Safety Data Sheet
500g- Rolo
HTPLA Dark Gray ( Carbon Fiber Composite ) - Cor
1.75mm (+-0.05mm) - Espessura / Tolerância de diâmetro
Fácil - Facilidade de Impressão
Chave Dinamométrica com 1,5Nm, produzido pela marca Slice Engineering para apertar/desapertar os seus nozzles.
Compatível com todos os nozzles, sendo necessária a aplicação de chaves Hex Socket de 6mm(Vanadium) , 7mm(E3D) ou 8mm conforme o seu nozzle.
1. Especificamente concebido para mudar facilmente todo o tipo de Nozzles
2. Binário de 1,5 Nm fornece a vedação correta para evitar fugas de plástico
3. Ferramenta perfeita para mudar o nozzle com uma mão quando estiver a usar o ™ Mosquito Hotend™
4. È compatível directamente com Vanadium Nozzles™ nativo, com espaço de manobra suficiente caso o nozzle contenha restos de plastico.
5. Encaixa em outros nozzles com adaptadores de chaves Hex Socket
Mudanças de nozzle incómodas que o deixam em baixo? Use a chave de torque do nozzle para afastar os seus males de nozzles com problemas de leaking. O mecanismo de deslizamento rotativo está definido para 1,5 Nm, o torque exacto de que necessita para obter aquela boa vedação ao apertar os seus bicos, e utiliza um mecanismo padrão de 1/4".
Concebido para se adaptar aos nozzle de Vanadium Engineering Slice sem adaptador, uma vez que os nossos nozzles têm um hexágono de 6 mm (que é um pouco inferior a 1/4" para aqueles que não falam Métrico), com um pouco de espaço de manobra para aquele plástico teimoso aderido.
A chave dinamométrica de nozzle encaixa em qualquer outro nozzle quando utilizada em combinação com um adaptador de tracção hexagonal e uma tomada de tamanho apropriado.
Fabricado em Taiwan, embalado nos EUA.
Envio de novas versões agora!
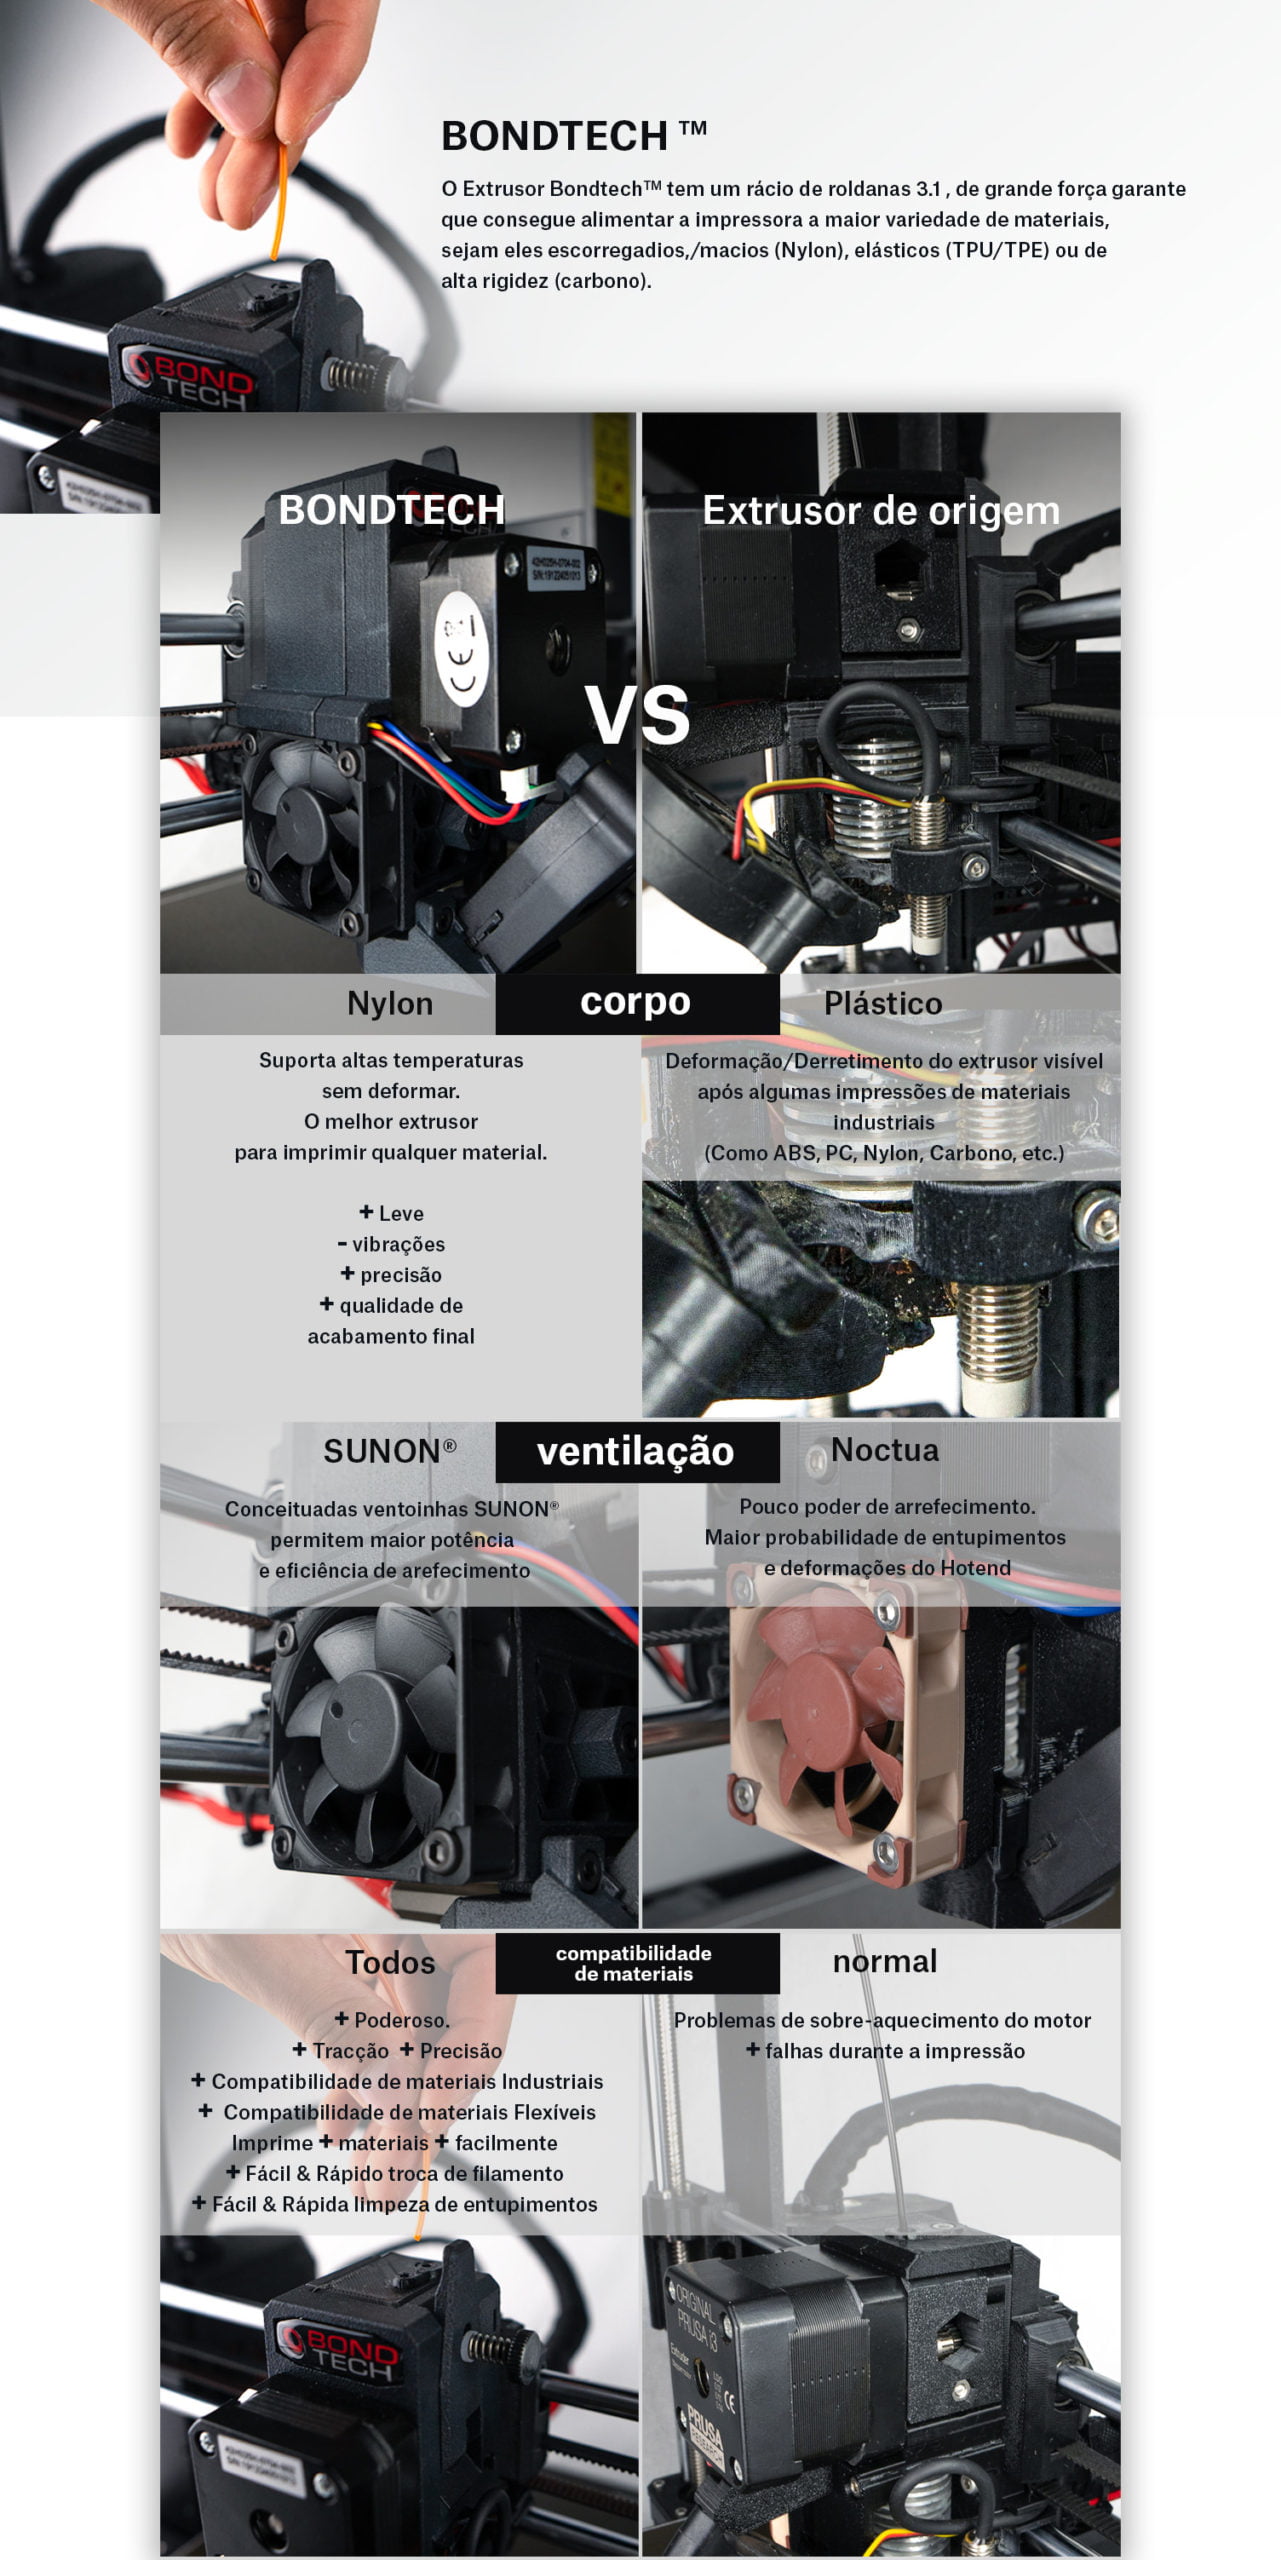
A extrusora Bondtech BMG combina alta performance e resolução com baixo peso. Juntamente com a nossa comprovada e altamente celebrada tecnologia Dual-Drive, você pode esperar uma alimentação de material sem problemas.
A BMG funciona tanto em aplicações bowden como de acionamento direto. Construída para o E3D hotend e cabe em motores passo-a-passo Nema17.
As peças da carcaça são profissionalmente SLS impressas em nylon para máxima resistência e precisão.
Esta extrusora suporta apenas filamentos de tamanho 1,75 mm.
O adaptador bowden não está incluído.
Características do Bondtech Mini Geared
A Bondtech BMG utiliza uma relação de engrenagem interna de 3:1 juntamente com engrenagens de precisão em aço temperado cnc-machined para lhe dar uma potência compacta para todas as suas aplicações. Quer necessite de impressões de alta resolução com bicos pequenos ou impressões de alto fluxo com bicos grandes, a relação de engrenagens optimizada combinada com as nossas engrenagens líderes na indústria fornece uma potência de empuxo sem paralelo e retracções rápidas por relâmpagos num pacote leve e compacto.
Bondtech Dual-Drive
A nossa tecnologia exclusiva Dual-Drive proporciona um fluxo ininterrupto de material sem medo de moer ou escorregar, mesmo nas condições mais exigentes. Os utilizadores da Bondtech em todo o mundo irão atestar que mesmo em impressões com milhares de retracções as nossas extrusoras têm um desempenho impecável, com uma precisão inigualável, e zero danos ou degradação do filamento.
Capacidade multi-material
A nossa extrusora BMG alimenta todo o material com alta fiabilidade, desde os nylons escorregadios e filamentos de TPU/TPE macios até aos materiais de alta resistência altamente rígidos e por vezes frágeis, cheios de carbono. A extrusora foi concebida para filamentos de 1,75 mm, mas foi testada para assegurar o desempenho do filamento de 1,5 mm até 2,0 mm, permitindo uma elevada fiabilidade independentemente da tolerância do filamento utilizado. O caminho do filamento é totalmente guiado através do corpo da extrusora e a carcaça mantém tolerâncias apertadas às engrenagens de acionamento, reduzindo as chances de falha de alimentação do filamento quando o hotend experimenta aumento da contrapressão ou quando são usados filamentos altamente flexíveis.
Tensão ajustável
O tensor do parafuso manual permite que o utilizador afine a pressão exercida pelas engrenagens de accionamento no filamento. Isto dá-lhe o poder de ajustar de acordo com as suas preferências e de optimizar para o tipo de material que está a utilizar.
Libertação rápida
Para poder fazer mudanças materiais num instante, basta activar a alavanca de Soltar Rápido para libertar a tensão e puxar o material a ser mudado para fora da extrusora, mantê-la activada e inserir o novo material.
Desenho multi-aplicação
Esta extrusora pode ser usada num Bowden ou em configurações directas e dá-lhe a flexibilidade para escolher o que funciona melhor para a sua aplicação. Além disso, possui um método de retenção de hotend integrado compatível com os hotends E3D-V6 ou outros usando o padrão GrooveMount. A montagem do seu hotend é simples, segura, e sem oscilações através de apenas dois parafusos.
Opções de montagem flexíveis
Concebemos um suporte de montagem padrão, tanto em CNC como como uma peça para impressão 3D que pode descarregar gratuitamente do nosso stl-archive. A nossa montagem padrão é CNC-machined em alumínio de 3 mm para uma estabilidade máxima. Por favor veja abaixo as montagens disponíveis.
A extrusora cabe em qualquer motor passo Nema17 com um eixo padrão de 5 mm. Para motores passo-a-passo adequados, por favor seleccione um dos motores abaixo ou use o seu próprio motor.
Esta extrusora é vendida sem motor.
Peso sem motor: 75g
E-step valor: 415
Novas Características de Design
O Motor Gear é agora feito de Latão
O material resistente à corrosão irá parar a muito baixa frequência de problemas de oxidação que aconteceram com as engrenagens de aço.
A engrenagem POM ligada ao Eixo Principal é agora preta
Esta é uma actualização estética pura para mascarar a sujidade que se mostra demasiado em branco.
O Push-Fit está agora enfiado
Pode ser removido e/ou substituído para facilitar a resolução de obstruções sem arruinar a habitação da BMG.
Cansado dos sistemas de tubos bowden e suas desvantagens tais como manutenção complicada, troca de filamento demorada, incompatibilidade de impressão com filamentos flexíveis entre outros?
O Bondtech DDX Direct Drive eXtruder para impressoras 3D creality é um kit de upgrade que substitui o sistema bowden original por uma configuração direct drive.
É um extrusor Dual Drive de alto desempenho baseado no Mini Geared BMG Bondtech.
Compatível com os seguintes modelos de impressoras da marca Creality:
Compatibilidade de Múltiplos Hotends
Este modelo foi criado para ser compatível com o hotend original de cada modelo de impressoras 3D da marca Creality.
Os utilizadores também podem actualizar o hotend para Copperhead™ ou Mosquito™.
Este produto inclui:
The DDX was designed to allow space for the bed probe to be attached to the x-carriage.
In models where there is no space to attach a bed probe like the BLtouch, to the X-carriage, a mount can printed and attached to the right hand side of the DDX.
This Direct Drive eXtruder from Bondtech is a high performance, high reliability 1,75mm Dual Drive extruder for Creality 3D printers, based on our very popular BMG.
Bondtech’s unique Dual-Drive technology combined with either the factory hotend or for even better performance the industry leading hotends Copperhead™ or Mosquito™ from SliceEngineering gives you a direct drive extruder with problems free material feeding and enables the use of a wider range of materials.
The housing parts are printed with PA12 (polyamide) for maximum strength and precision using industrial grade SLS technology.
Bondtech DDX Direct Drive eXtruder for Creality is designed to give the user more options – different materials; higher flow and/or wider nozzles; thinner layers – and achieve a higher print quality.
The DDX is based on the BMG Bondtech Mini Geared extruder featuring our unique Dual-Drive technology. The DDX housing design provides an effective Hot-End cooling.
With the 3:1 gearing ratio, high resolution prints with small nozzles or high flow prints with bigger nozzles can be achieved.
Know more about the different ways to upgrade your Creality with DDX here:
The 4 Phases of Bondtech DDX for Creality

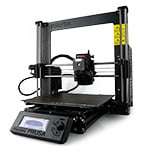
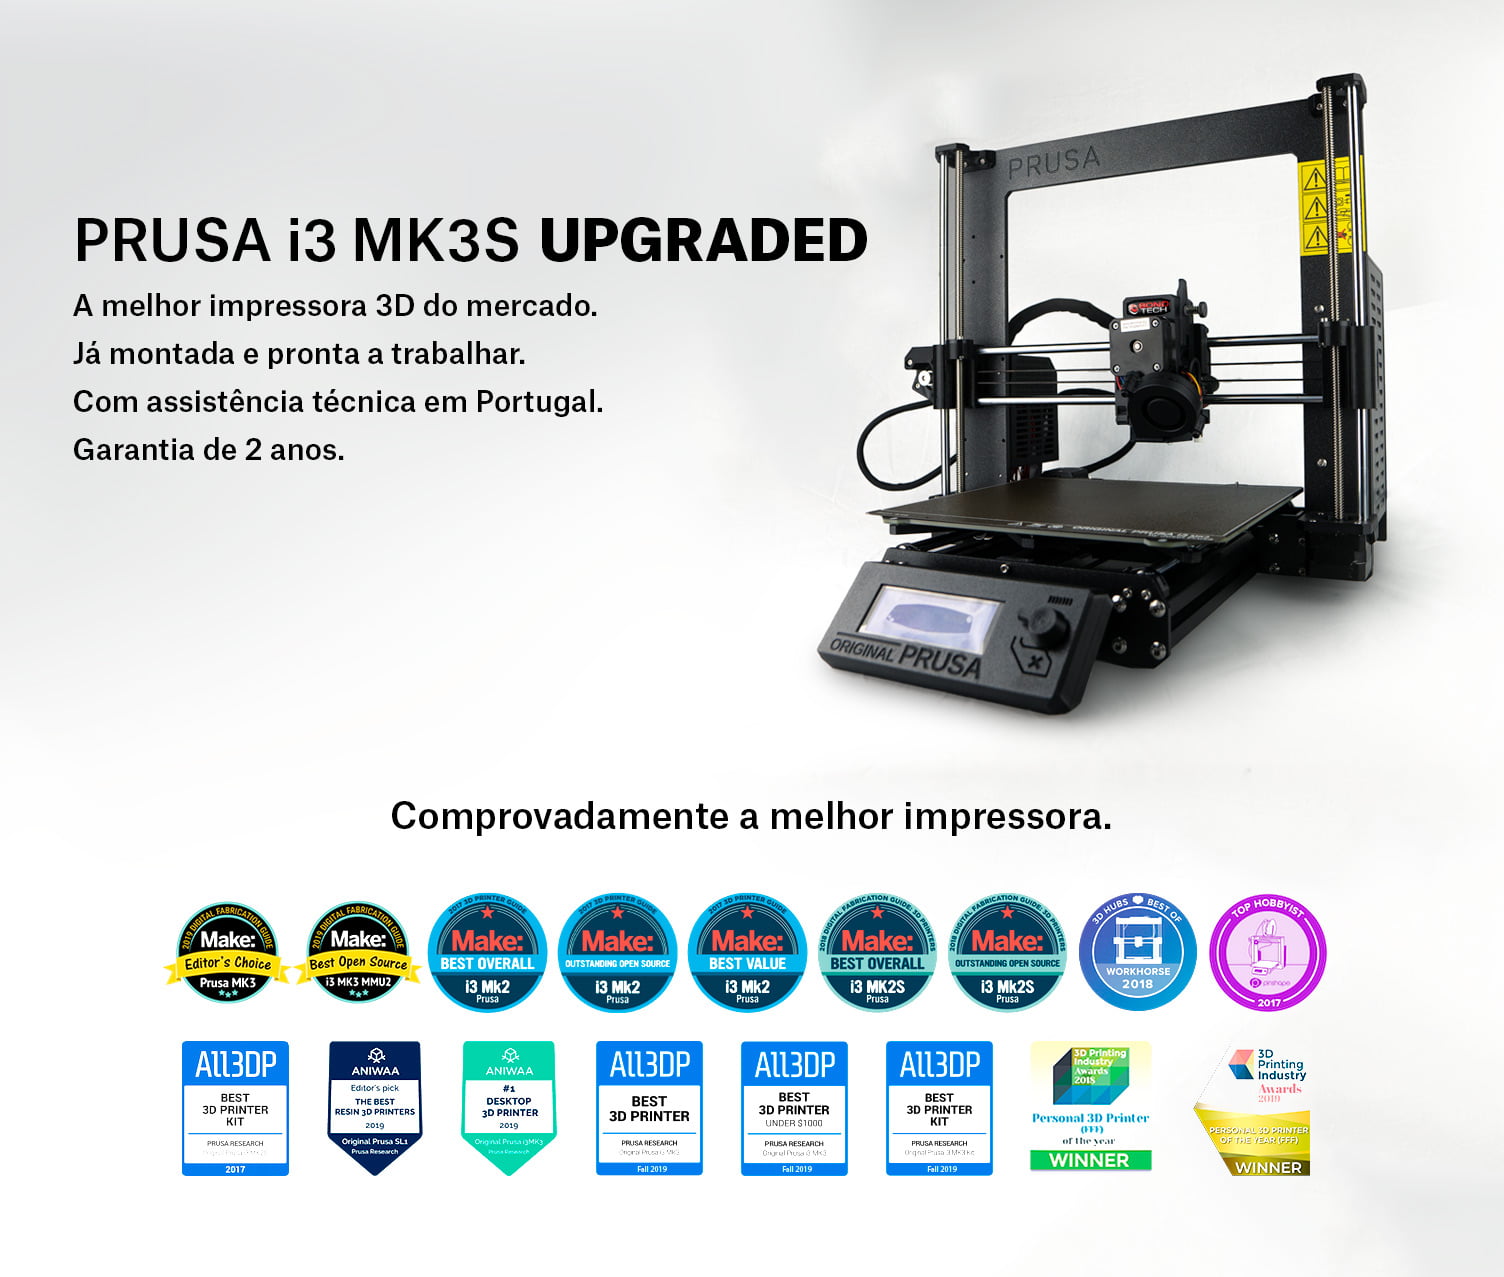
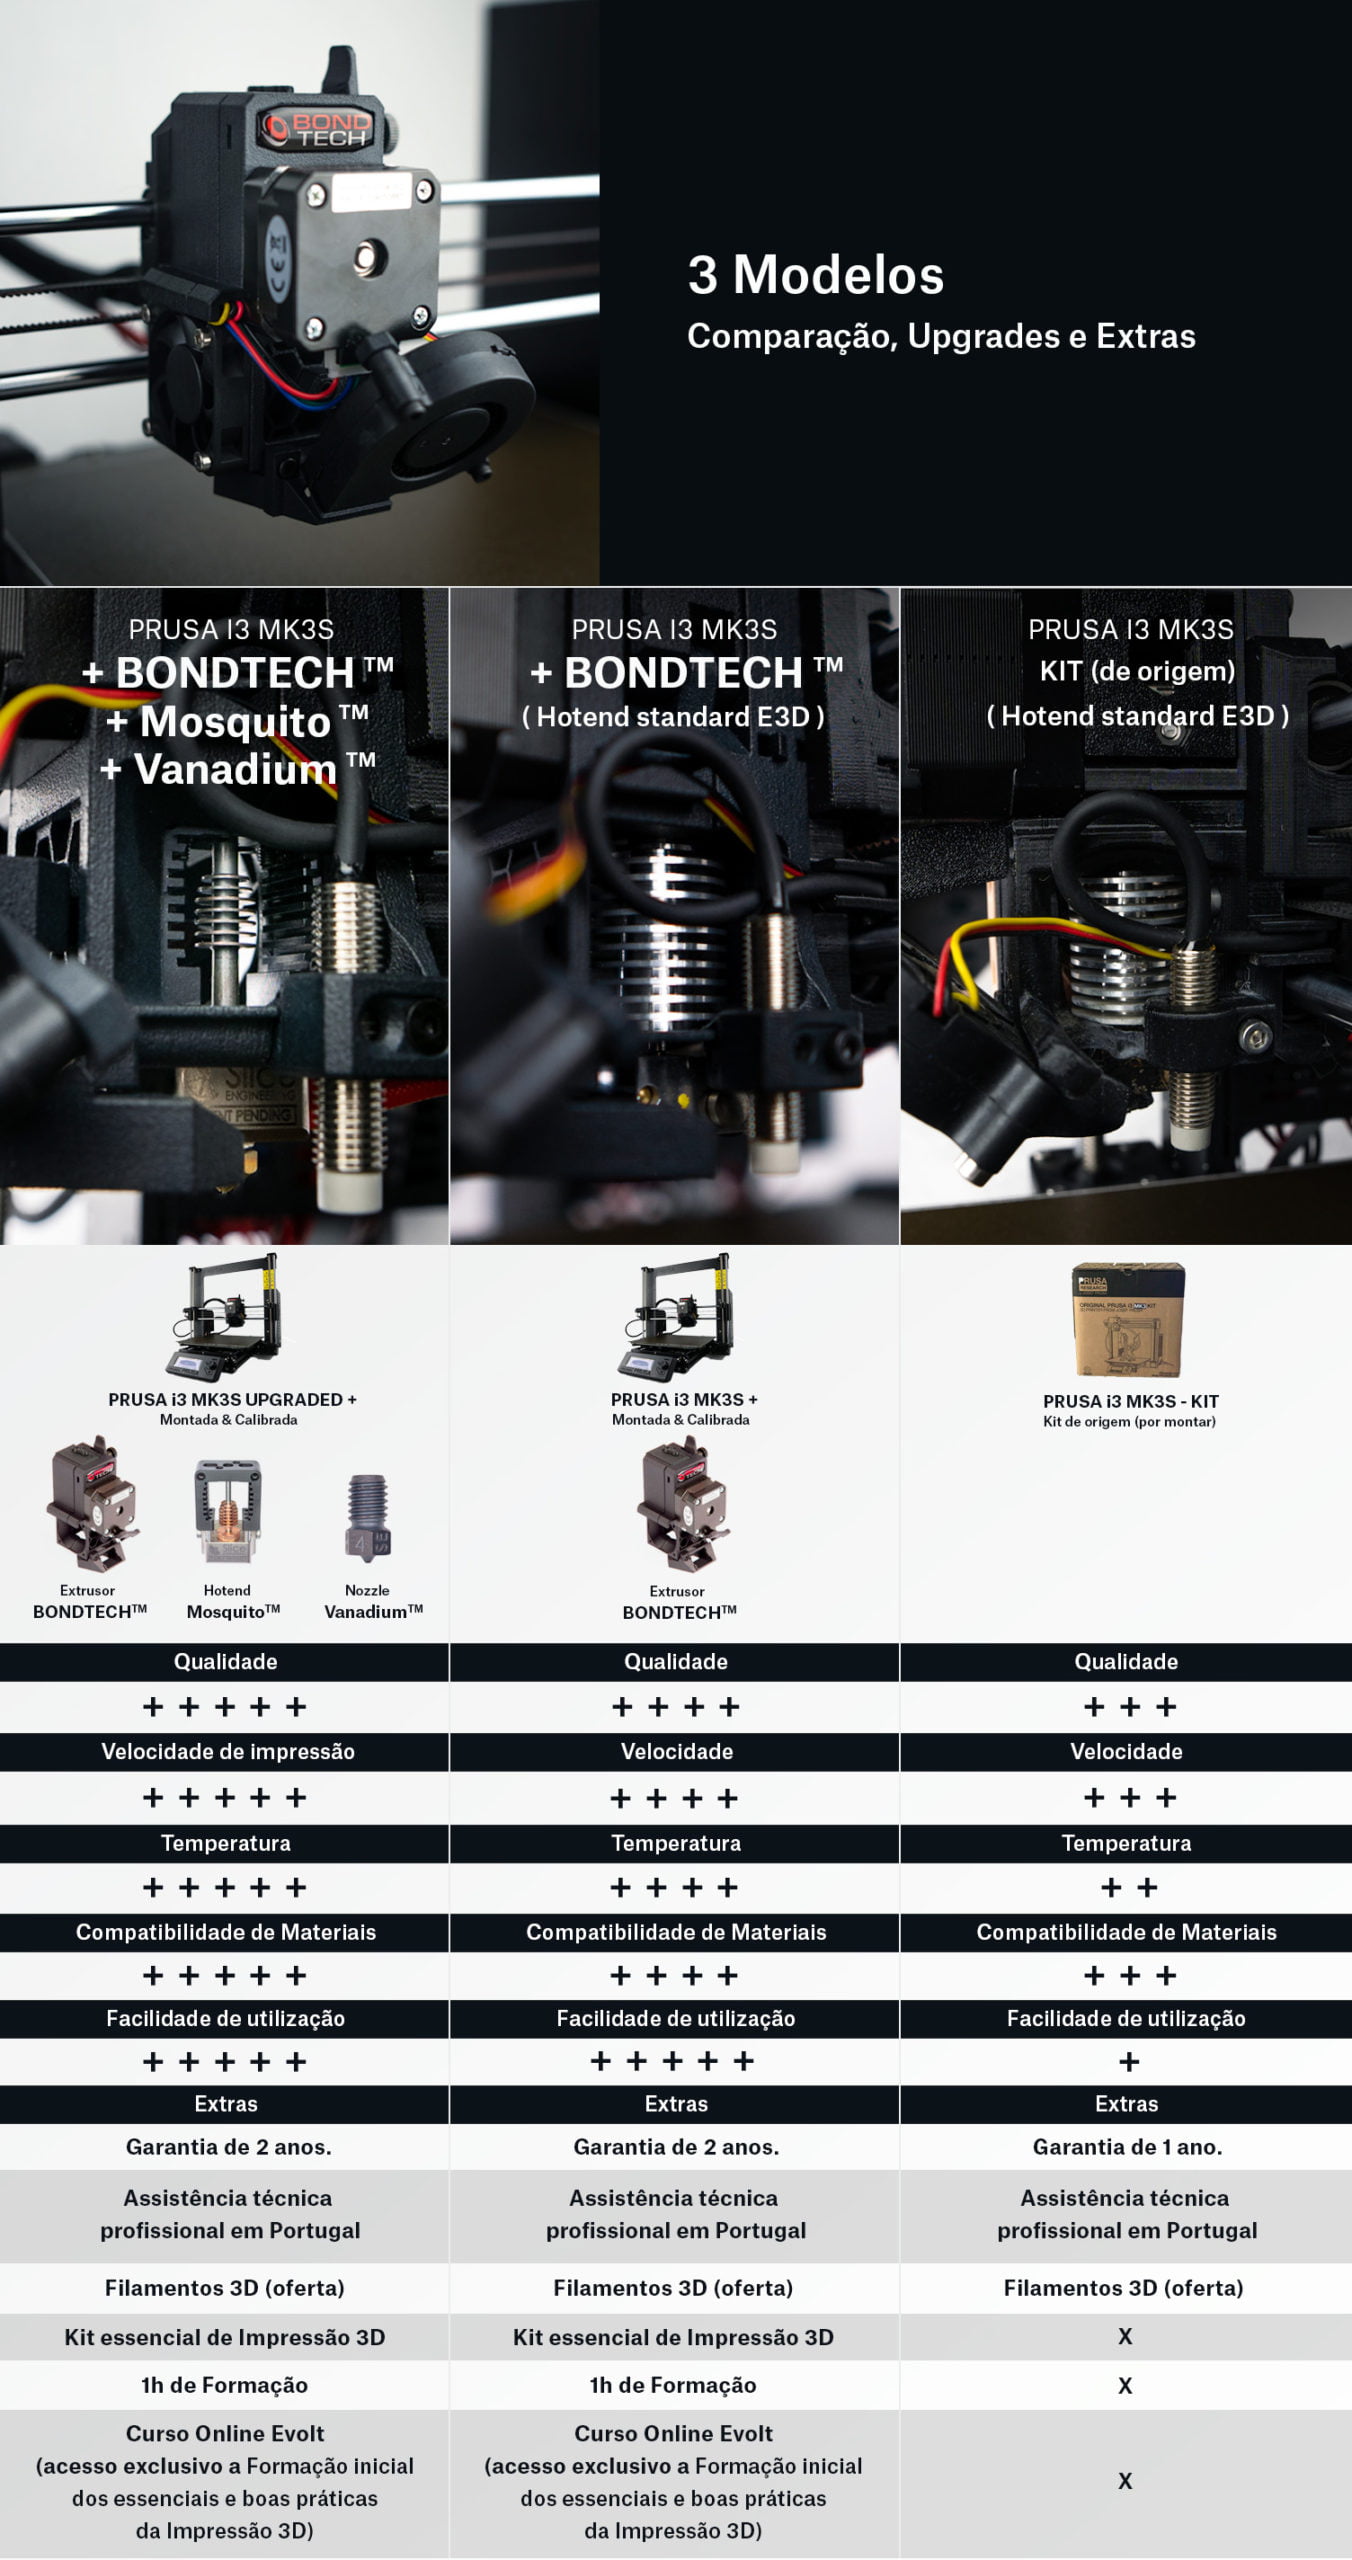
Impressora 3D Original Prusa I3 MK3s+ com Extrusor Bondtech LGX já montada e calibrada, pronta a trabalhar.
Extrusor Bondtech garante uma qualidade de impressão superior.
Original Prusa i3 MK3s+, das impressoras 3D mais famosas do mercado, largamente utilizada em todo o mundo. Impressora repleta de sensores e automatismos.
Recomendamos este modelo de Impressora 3D para uso profissional.
Dispomos de diversas industrias, escolas, escritórios e laboratórios com este modelo sendo a opção numero 1 em termos de fiabilidade e facilidade de uso.
Assistência Técnica em Portugal com serviço de manutenção/reparação em Aveiro e envio de peças em 24h.
3 anos de Garantia para consumidor final e 2 anos de Garantia para Empresas.
Opção da impressora de cor Laranja ou Negra.
Opção de plataforma removível com textura ou sem textura.
🛠️ Assistência Técnica em Portugal com serviço de manutenção/reparação em Aveiro e envio de peças em 24h.
O extrusor da Evolt ULTIMATE foi repensado pela nossa equipa, possuindo um corpo completo desenvolvido em Nylon PA12 MJF, suportando maiores temperaturas sem deformar e sendo estruturalmente mais leve, permitindo maiores velocidades.
O mesmo possui um suporte de sensor de filamento, indicado para ser utilizado em modo standby, quando for necessária a impressão de materiais muito flexíveis (como por exemplo o Recreus 60A), eliminando uma variável de resistência ao fluxo do filamento.
Impressora 3D versão Evolt ULTIMATE Original Prusa I3 MK3s+ com Extrusor Bondtech LGX + Hotend Mosquito V2 + Vanadium Nozzle já Montada e Calibrada segundo os mais elevados critérios de qualidade.
Impressora 3D TOPO DE GAMA repleta dos componentes mais avançados do mercado.
Extrusor Bondtech LGX garante precisão e uma qualidade de impressão superior.
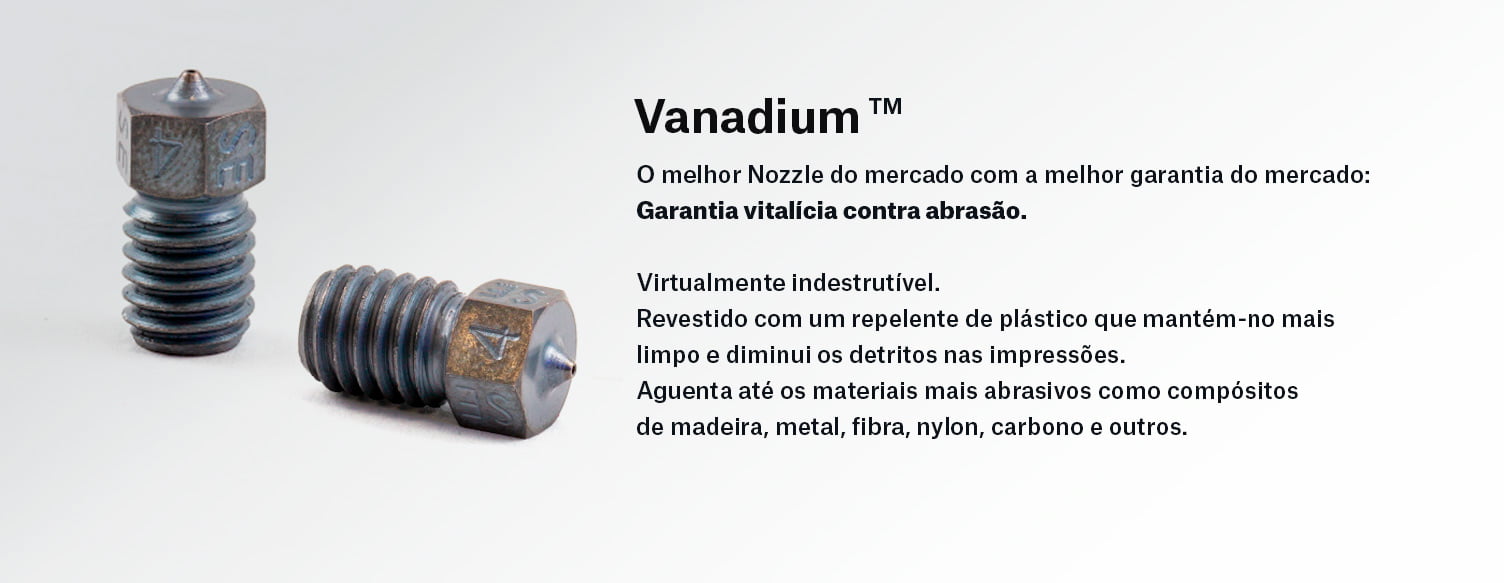
O Nozzle Vanadium é o único bico com garantia vitalícia contra abrasão, com uma classificação mínima de dureza 64 Rockwell C (Vickers HV 910), é praticamente impossível riscar o mesmo com qualquer tipo de filamento 3D existente no mercado.
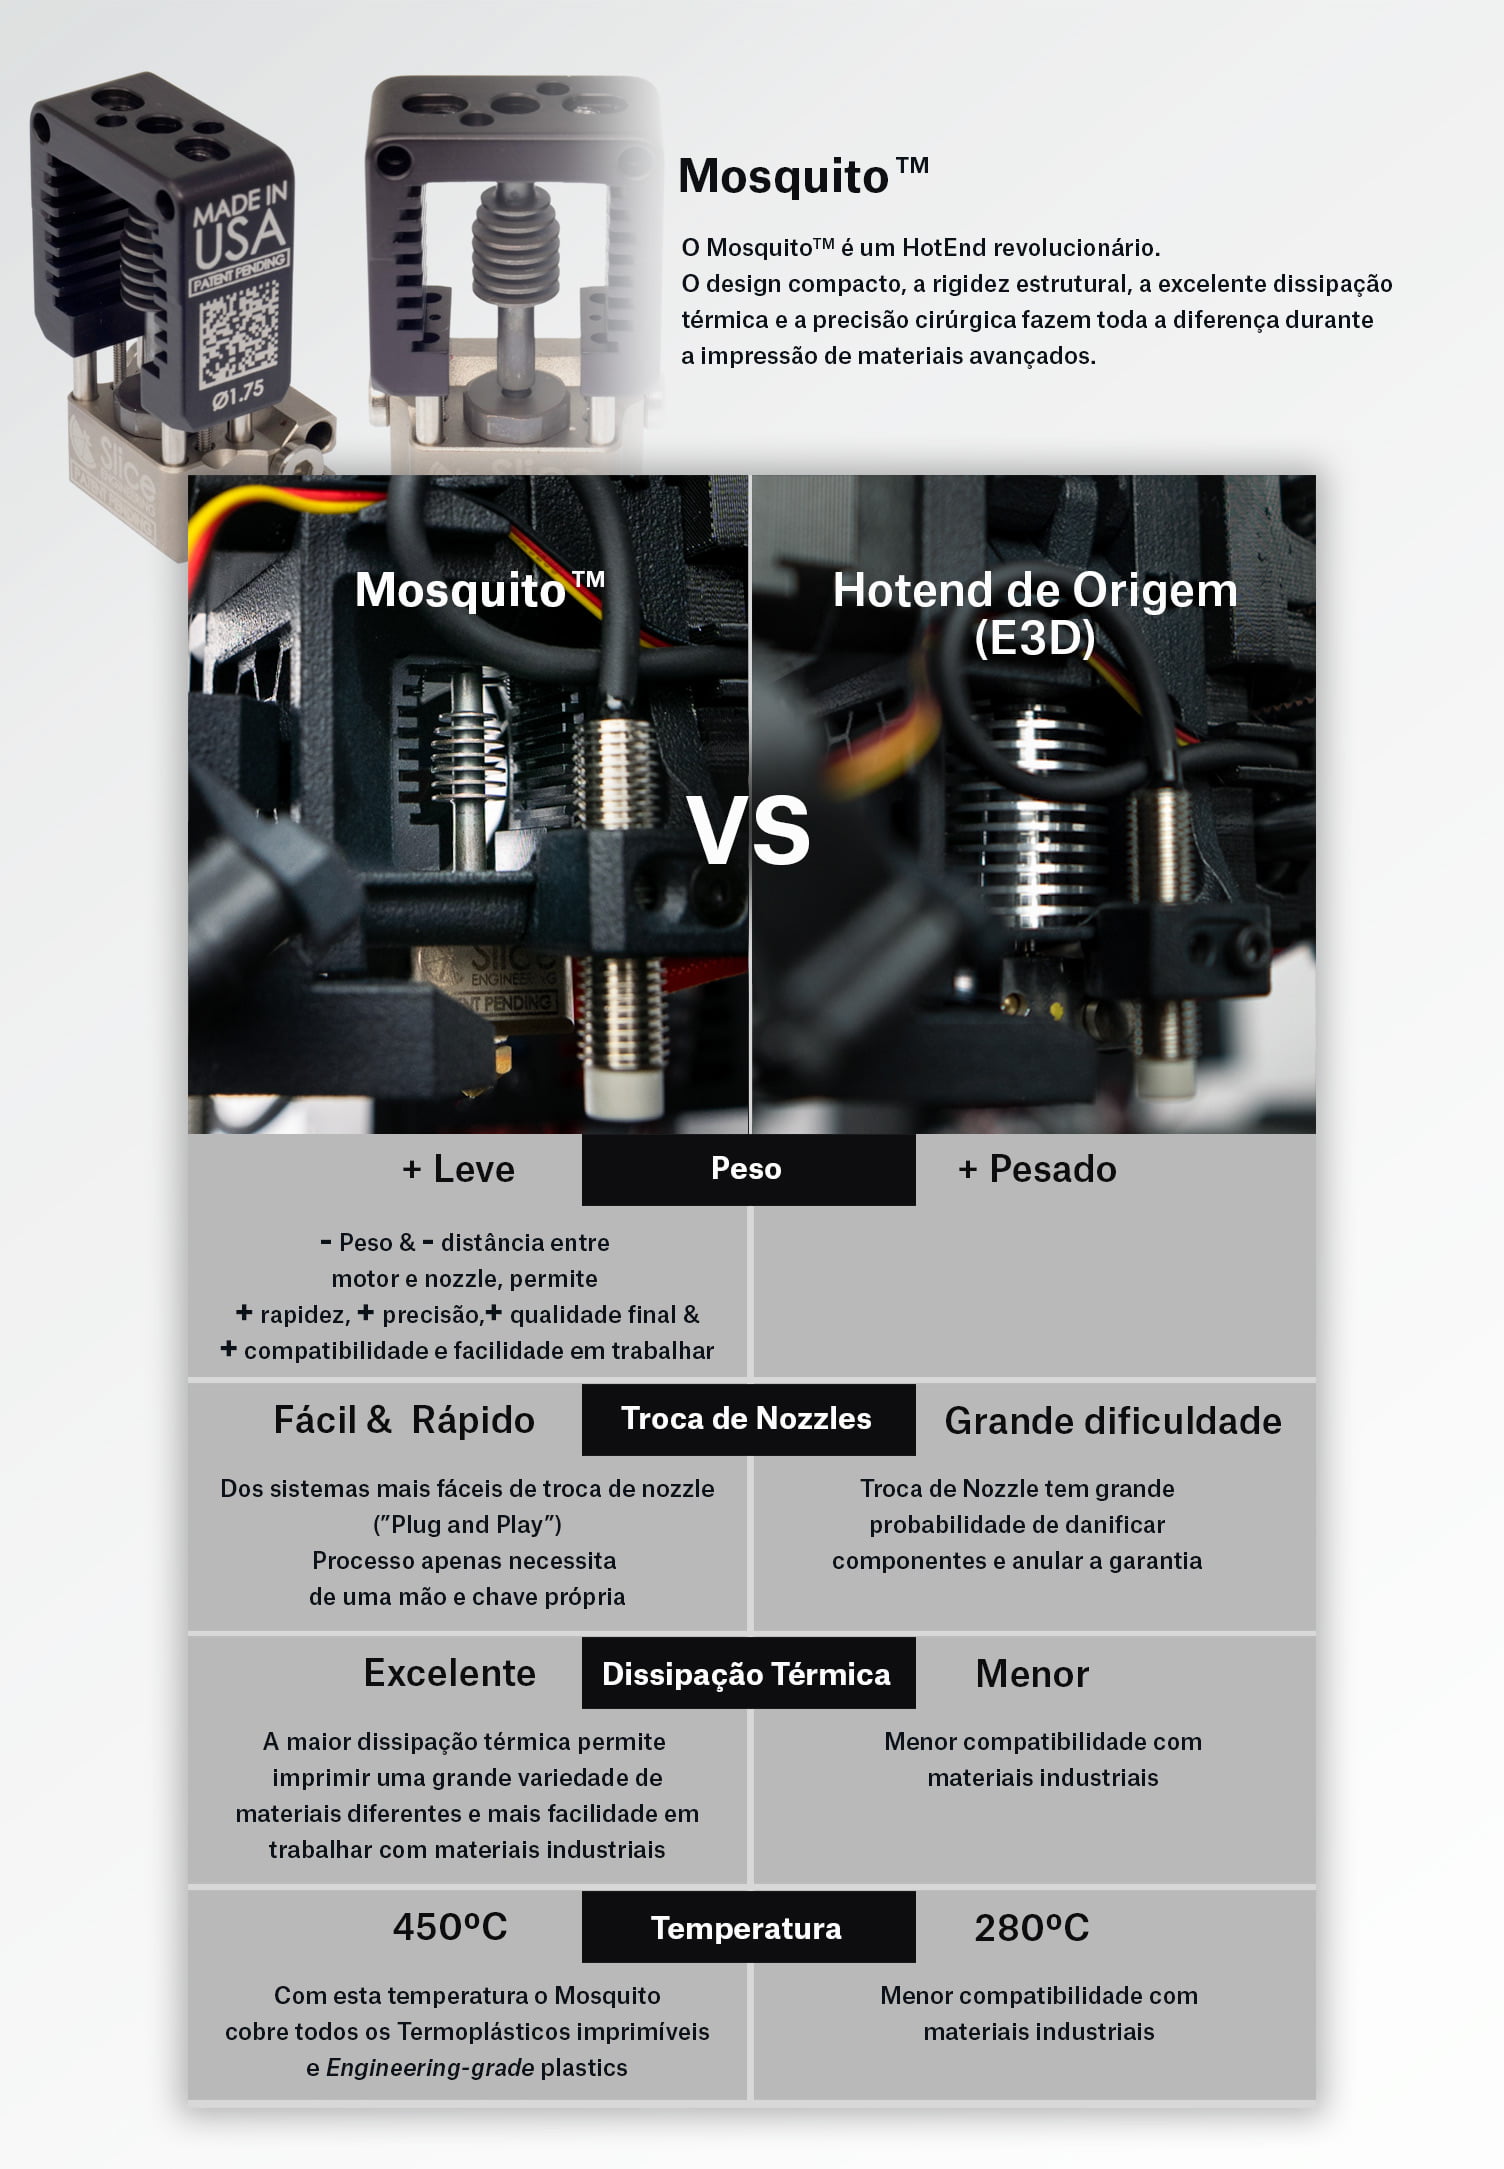
O “Mosquito” da marca Slice Engineering (USA) imprime mais rápido do que qualquer outro hotend do mercado oferecendo o exponente máximo de resolução e total compatibilidade com todos os tipos de plásticos. Em plásticos de engenharia, estamos falando de impressão com temperaturas de até 450 ° c. Isso significa que você pode imprimir peças de automóveis, dispositivos médicos e tudo o que puder imaginar.
Versão V2 de 2020, mais robusta e optimizada.
Recomendamos a leitura do seguinte artigo:
https://evolt.pt/melhor-impressora-3d/
Original Prusa i3 MK3s, das impressoras mais famosas do mercado, largamente utilizada em todo o mundo. Impressora repleta de sensores e automatismos.
Recomendamos este modelo de Impressora 3D para uso profissional.
Dispomos de diversas industrias, escolas, escritórios e laboratórios com este modelo sendo a opção numero 1 em termos de fiabilidade e facilidade de uso.
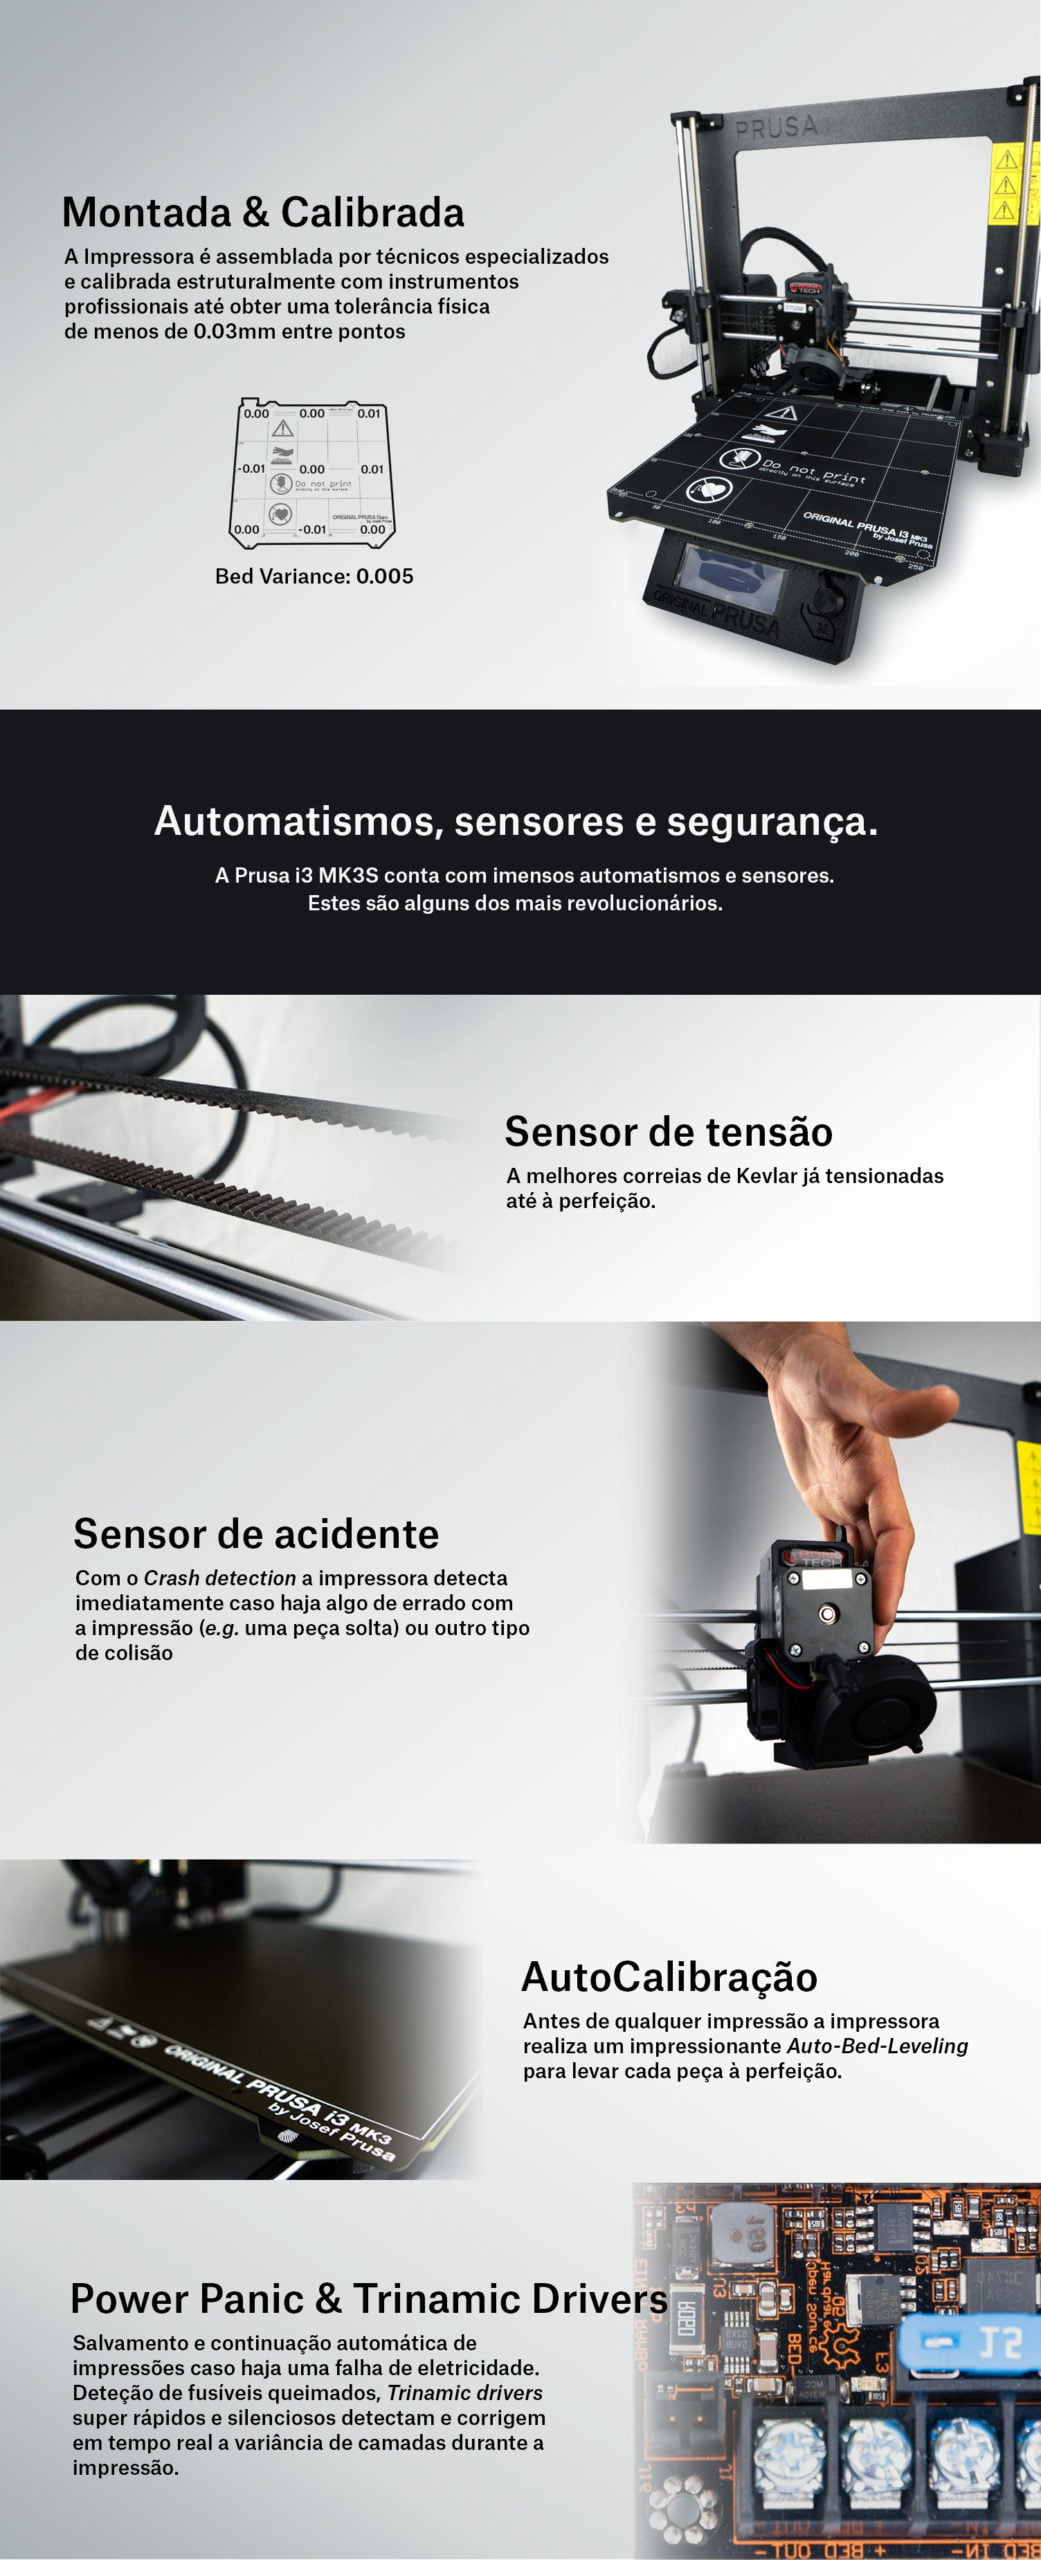
- Auto leveling automático com correcção magnetica e calibração de mesh virtual contra torções e eventuais empenos da plataforma.
- Recuperação de impressão caso falhe a corrente elétrica
- Plataforma magnética flexível para fácil remoção das peças
- Rápido aquecimento
- Trinamic Drivers para impressão silenciosa
- Crash detection. Recupera a impressão no caso de colisão
- Upgrades de Firmware com atualizações trimestrais
- Área de impressão: 210 * 210* 250mm
- Conexão com cartão SD OFFLINE
- Fonte de alimentação comutável 110V / 240V
AVISO: Devido à situação actual, as nossas formações/entregas ao local encontram-se suspensas e não efetuamos envios deste produto por transportadora, no qual todas as encomendas terão que ser levantadas em loja. A formação será realizada remotamente.
Agradecemos a sua compreensão.