Nozzle produzido pela marca Bondtech, de maquinação superior aos modelos de nozzle da marca E3D.
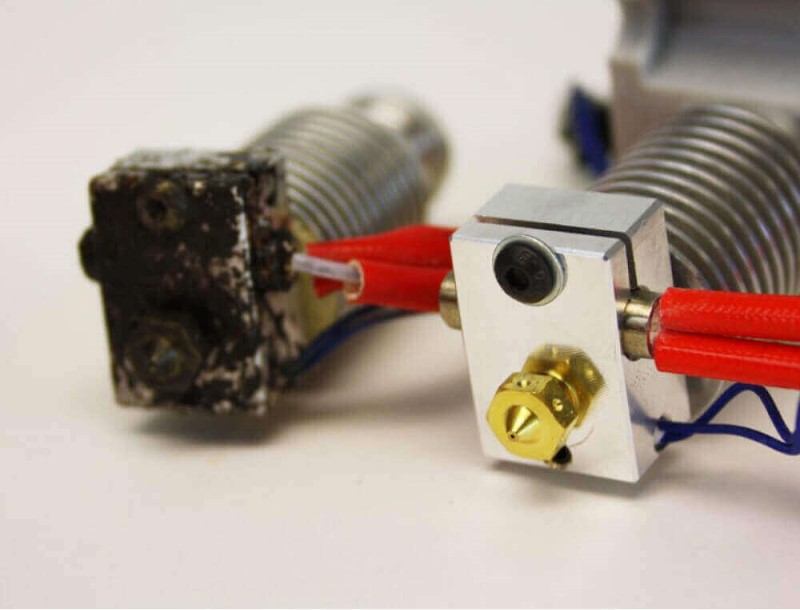
Um revestimento de Níquel é aplicado nos nossos bicos de Latão Revestido para proporcionar protecção contra a corrosão, erosão e abrasão. Com um revestimento de Níquel os bicos são mais resistentes à corrosão e têm um menor coeficiente de atrito, o que permite uma alimentação mais escorregadia do material e impede que o plástico adira à superfície do bico.
Preço acessível
Maquinado com ultra-precisão
Bico de latão com superfície revestida a níquel
Compatível com a maioria das impressoras:
Mosquito and Mosquito Magnum
Copperhead
E3D V4, V5 and V6 blocks
E3D Chimera and Kraken
RepRap M6
e Impressoras 3D:
MK3s
MK2.5/S
MK2/S
MINI

Para apertar correctamente o seu nozzle, recomendamos a utilizar a seguinte chave nanométrica: LINK
Recomendamos a leitura do artigo com informação à cerca do diâmetro dos nozzles
Para trocar este componente, recomendamos a leitura do manual.
0.6mm - Diâmetro

Nozzle produzido pela marca Bondtech, de maquinação superior.
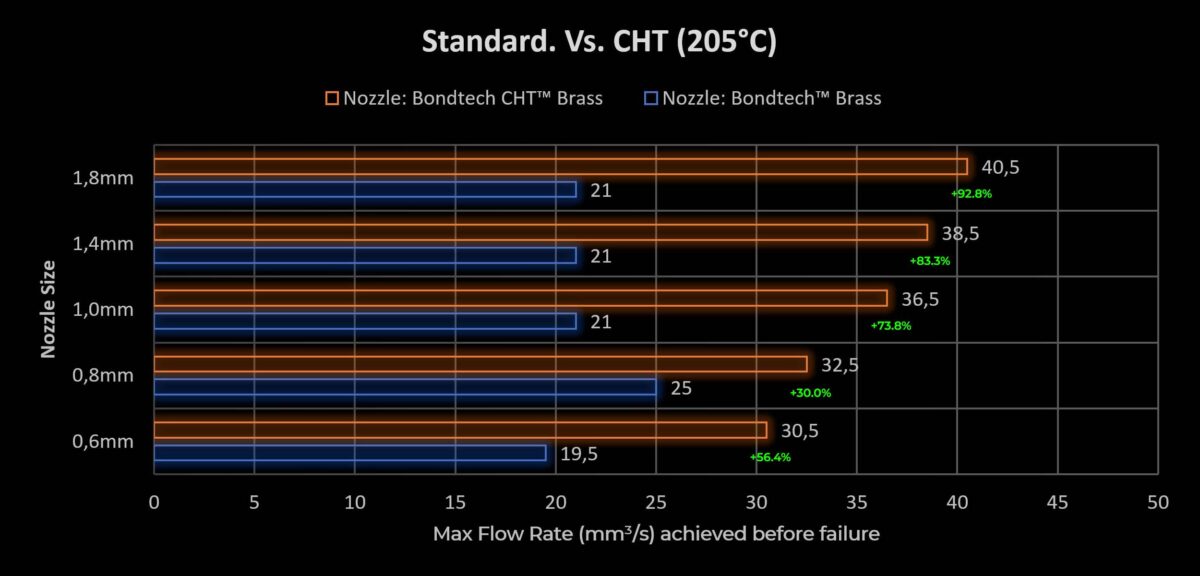
Os nozzles Bondtech CHT® dividem o filamento em 3 filamentos mais finos permitindo derreter o material a partir do interior. Ao fazê-lo, o material derrete mais rapidamente e podem ser utilizadas taxas de fluxo mais elevadas.
OBTENHA 30% A MAIS DE CAPACIDADE DE FUSÃO DO SEU HOTEND
Pode parecer impossível, mas é uma realidade. A Tecnologia de Aquecimento Core Heating é eficaz. Os resultados são ainda melhores do que o que prometemos no nosso Marketing.

Número de registo: EP3445568A1
Nozzles para impressoras 3D feitas de metal com pelo menos um ou vários orifícios para aumentar a área de superfície das paredes de aquecimento.
Um revestimento de Níquel é aplicado nos nossos bicos de Latão Revestido para proporcionar protecção contra a corrosão, erosão e abrasão. Com um revestimento de Níquel os bicos são mais resistentes à corrosão e têm um menor coeficiente de atrito, o que permite uma alimentação mais escorregadia do material e impede que o plástico adira à superfície do bico.
Maior capacidade de fusão através do aumento da área de superfície das paredes de aquecimento
Preço acessível
Maquinado com ultra-precisão
Nozzle de latão com superfície revestida a níquel
Pode ser usado com hotends de 1.75 ou 2.85mm.
Página do produto: LINK
Pagina de Análises: LINK
Compatível com a maioria das impressoras:
Mosquito and Mosquito Magnum
Copperhead
E3D V4, V5 and V6 blocks
E3D Chimera and Kraken
RepRap M6
e Impressoras 3D:
MK3s
MK2.5/S
MK2/S
MINI
Para apertar correctamente o seu nozzle, recomendamos a utilizar a seguinte chave nanométrica: LINK
Recomendamos a leitura do artigo com informação à cerca do diâmetro dos nozzles
Para trocar este componente, recomendamos a leitura do manual.
1 unidade por embalagem;
0.6mm - Diâmetro
Optimizado para filamentos de 1.75mm;
Compatível com filamento de 2.85mm.
Nozzle produzido pela marca Bondtech, de maquinação superior aos modelos de nozzle da marca E3D.
Um revestimento de Níquel é aplicado nos nossos bicos de Latão Revestido para proporcionar protecção contra a corrosão, erosão e abrasão. Com um revestimento de Níquel os bicos são mais resistentes à corrosão e têm um menor coeficiente de atrito, o que permite uma alimentação mais escorregadia do material e impede que o plástico adira à superfície do bico.
Preço acessível
Maquinado com ultra-precisão
Bico de latão com superfície revestida a níquel
Compatível com a maioria das impressoras:
Mosquito and Mosquito Magnum
Copperhead
E3D V4, V5 and V6 blocks
E3D Chimera and Kraken
RepRap M6
e Impressoras 3D:
MK3s
MK2.5/S
MK2/S
MINI
Para apertar correctamente o seu nozzle, recomendamos a utilizar a seguinte chave nanométrica: LINK
Recomendamos a leitura do artigo com informação à cerca do diâmetro dos nozzles
Para trocar este componente, recomendamos a leitura do manual.
0.25mm - Diâmetro
Nozzle produzido pela marca Bondtech, de maquinação superior.
Os nozzles Bondtech CHT® dividem o filamento em 3 filamentos mais finos permitindo derreter o material a partir do interior. Ao fazê-lo, o material derrete mais rapidamente e podem ser utilizadas taxas de fluxo mais elevadas.
OBTENHA 30% A MAIS DE CAPACIDADE DE FUSÃO DO SEU HOTEND
Pode parecer impossível, mas é uma realidade. A Tecnologia de Aquecimento Core Heating é eficaz. Os resultados são ainda melhores do que o que prometemos no nosso Marketing.
Número de registo: EP3445568A1
Nozzles para impressoras 3D feitas de metal com pelo menos um ou vários orifícios para aumentar a área de superfície das paredes de aquecimento.
Um revestimento de Níquel é aplicado nos nossos bicos de Latão Revestido para proporcionar protecção contra a corrosão, erosão e abrasão. Com um revestimento de Níquel os bicos são mais resistentes à corrosão e têm um menor coeficiente de atrito, o que permite uma alimentação mais escorregadia do material e impede que o plástico adira à superfície do bico.
Maior capacidade de fusão através do aumento da área de superfície das paredes de aquecimento
Preço acessível
Maquinado com ultra-precisão
Nozzle de latão com superfície revestida a níquel
Pode ser usado com hotends de 1.75 ou 2.85mm.
Página do produto: LINK
Pagina de Análises: LINK
Compatível com a maioria das impressoras:
Mosquito and Mosquito Magnum
Copperhead
E3D V4, V5 and V6 blocks
E3D Chimera and Kraken
RepRap M6
e Impressoras 3D:
MK3s
MK2.5/S
MK2/S
MINI
Para apertar correctamente o seu nozzle, recomendamos a utilizar a seguinte chave nanométrica: LINK
Recomendamos a leitura do artigo com informação à cerca do diâmetro dos nozzles
Para trocar este componente, recomendamos a leitura do manual.
5 unidade por embalagem;
0.6, 0.8, 1.0, 1.4 e 1.8 mm- Diâmetro
Optimizado para filamentos de 1.75mm;
Compatível com filamento de 2.85mm.
Necessita uma chave de 6mm
Nozzle produzido pela marca Bondtech, de maquinação superior.
Os nozzles Bondtech CHT® dividem o filamento em 3 filamentos mais finos permitindo derreter o material a partir do interior. Ao fazê-lo, o material derrete mais rapidamente e podem ser utilizadas taxas de fluxo mais elevadas.
OBTENHA 30% A MAIS DE CAPACIDADE DE FUSÃO DO SEU HOTEND
Pode parecer impossível, mas é uma realidade. A Tecnologia de Aquecimento Core Heating é eficaz. Os resultados são ainda melhores do que o que prometemos no nosso Marketing.
Número de registo: EP3445568A1
Nozzles para impressoras 3D feitas de metal com pelo menos um ou vários orifícios para aumentar a área de superfície das paredes de aquecimento.
Um revestimento de Níquel é aplicado nos nossos bicos de Latão Revestido para proporcionar protecção contra a corrosão, erosão e abrasão. Com um revestimento de Níquel os bicos são mais resistentes à corrosão e têm um menor coeficiente de atrito, o que permite uma alimentação mais escorregadia do material e impede que o plástico adira à superfície do bico.
Maior capacidade de fusão através do aumento da área de superfície das paredes de aquecimento
Preço acessível
Maquinado com ultra-precisão
Nozzle de latão com superfície revestida a níquel
Pode ser usado com hotends de 1.75 ou 2.85mm.
Página do produto: LINK
Pagina de Análises: LINK
Compatível com a maioria das impressoras:
Mosquito and Mosquito Magnum
Copperhead
E3D V4, V5 and V6 blocks
E3D Chimera and Kraken
RepRap M6
e Impressoras 3D:
MK3s
MK2.5/S
MK2/S
MINI
Para apertar correctamente o seu nozzle, recomendamos a utilizar a seguinte chave nanométrica: LINK
Recomendamos a leitura do artigo com informação à cerca do diâmetro dos nozzles
Para trocar este componente, recomendamos a leitura do manual.
1 unidade por embalagem;
0.4mm - Diâmetro
Optimizado para filamentos de 1.75mm;
Compatível com filamento de 2.85mm.
Nozzle produzido pela marca Bondtech, de maquinação superior aos modelos de nozzle da marca E3D.
Um revestimento de Níquel é aplicado nos nossos bicos de Latão Revestido para proporcionar protecção contra a corrosão, erosão e abrasão. Com um revestimento de Níquel os bicos são mais resistentes à corrosão e têm um menor coeficiente de atrito, o que permite uma alimentação mais escorregadia do material e impede que o plástico adira à superfície do bico.
Preço acessível
Maquinado com ultra-precisão
Bico de latão com superfície revestida a níquel
Compatível com a maioria das impressoras:
Mosquito and Mosquito Magnum
Copperhead
E3D V4, V5 and V6 blocks
E3D Chimera and Kraken
RepRap M6
e Impressoras 3D:
MK3s
MK2.5/S
MK2/S
MINI
Para apertar correctamente o seu nozzle, recomendamos a utilizar a seguinte chave nanométrica: LINK
Recomendamos a leitura do artigo com informação à cerca do diâmetro dos nozzles
Para trocar este componente, recomendamos a leitura do manual.
0.4mm - Diâmetro
Meia de Silicone E3d V6 Sock Pro produzido pela marca E3D.
Compatível com os hotends V6 Originais
Compatível com Impressoras 3D: MK3s
Isolamento de silicone tem a função de isolamento térmico e anti-sugidade.
A manga de silicone tem boas propriedades de isolamento térmico e pode manter eficazmente o calor dentro do heatblock.
A temperatura do heatblock fica mais estável, especialmente quando estiver coma ventoinha de arrefecimento ligada.
Tem ainda a função de evitar que a temperatura do bloco de aquecimento seja afectada pelo vento que sopra ao seu redor, melhorando assim a qualidade de impressão.
As meias de silicone Pro são feitas para isolar o bloco aquecedor e o nozzle para um desempenho térmico mais eficiente e estável. A meia profissional vai um passo além da meia padrão, cobrindo a maior parte do bocal, deixando apenas a ponta exposta. Isto torna-a ideal para pequenos nozzles (0,15 e 0,25mm).
Feita de um silicone inerentemente antiaderente de alta temperatura, a meia profissional ajuda a manter os seus nozzles e o seu bloco livre de resíduos plásticos.
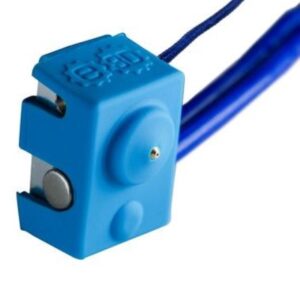
Azul - Cor
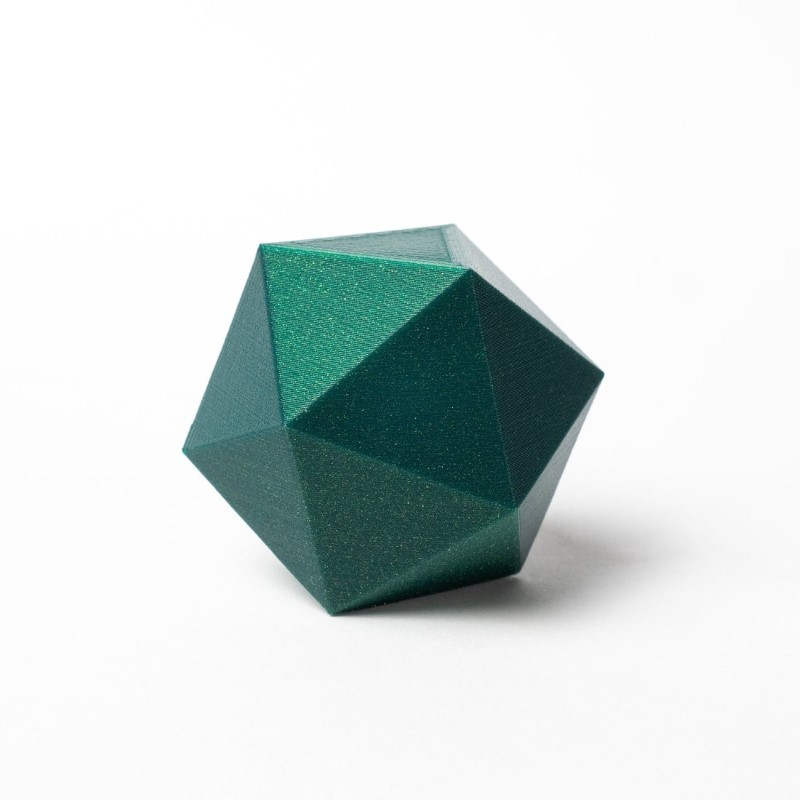
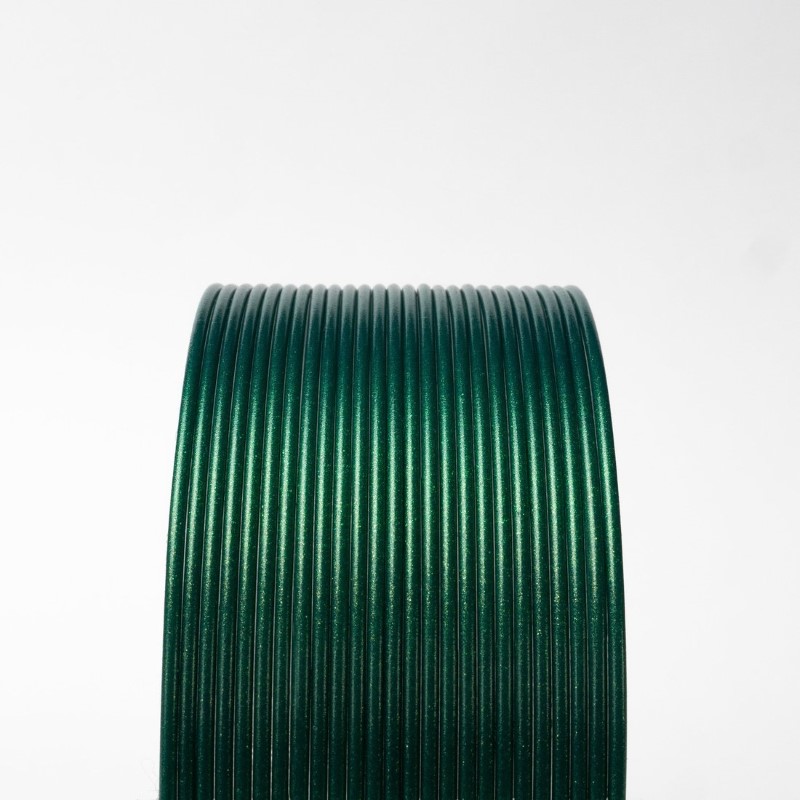
Embora subtil, o HTPLA Cloverleaf Metallic Green é carregado com um "pote o' ouro", mudando a cor para um verde mais quente, mais parecido com a planta. Não que adivinhe a origem natural e biológica do material a partir da sua estética. O Cloverleaf Verde Metálico HTPLA não é curto em brilho e tem um acabamento parecido com uma pintura que lembra um carro desportivo vintage. Em qualquer caso, esteja confiante que não é necessária sorte para um acabamento de alta qualidade em qualquer coisa que imprima usando este material!

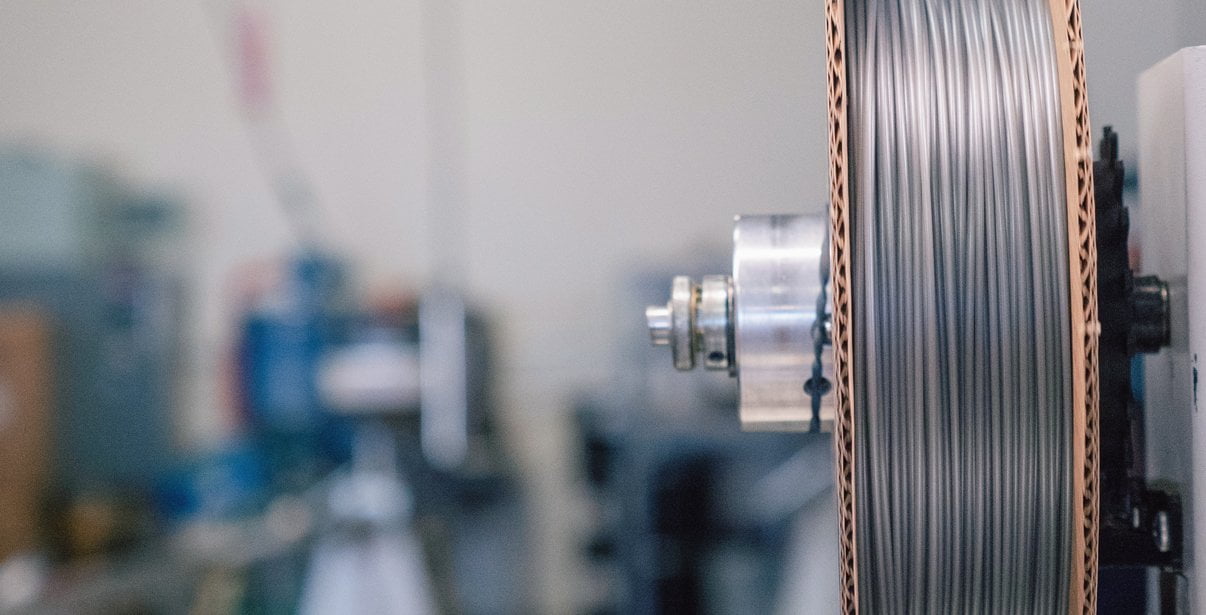
ProtoPasta é uma empresa situada nos Estados Unidos da América, de produção de filamentos para impressão 3D de alta qualidade.
Caracterizada pelos rolos feitos em cartão, esta marca é mundialmente famosa por ser especializada em materiais como PLA e ABS modificados com outros materiais, como o PLA Magnético; o PLA Condutivo; PLA de fibra de carbono; HTPLA de cobre, latão ou bronze; ou o ABS-PC.
Semi crystalline, heat treatable PLA for high temp use
Density: 1.24 g/cc
Length: 346 m/kg (1.75) 130 m/kg (2.85)
Typical Printing Temp: 205-225 C
Glass Transition (Tg)*: 60 C
Peak Crystallization (Tc)**: 95-115 C
Onset to Melt (Tm)***: 155 C
Typical change when heat treated: -2% x/y +1% z
Link to Safety Data Page
*max use with no heat treat & max platform temp
**heat treating @ temp 10+ min depending on size/mass
***max use when heat treated (annealed or crystallized)
HTPLA prints well at 205-225 C, however it's important to match temp to your hardware & volume flow rate. With a typical hotend, you should be able to print at 205 C without jamming at a low flow rate. In machines with hardware that tends towards jamming, consider this video with Joel Telling.
Lower volume flows require lower temps, while higher volume flows require higher temps. In the previously-mentioned video, one way to overcome jamming is to set your temp to a higher-than-typical 240 C. This should then be matched with a high flow rate for a quality printing result.
For direct drives with a short distance between drive gears & nozzle, volume flows can approach 7-8 cubic mm/s or more if printing hot to overcome jamming. For bowden tubes where the distance between drive gear & nozzle are great or less powerful hotends, as little as 2 and as much as 4 cubic mm/s may be the limit. Beware of unintended speed changes from faster infills & slowing down for outlines or short layers. Consider our Ultimaker-specific blog for more on this topic.
A constant speed throughout the part is ideal from an extrusion perspective. Knowing your extrusion width, layer thickness & speed you can calculate your volume flow rate with the calculator like found in the previously-mentioned Ultimaker blog. Alternatively, if you know your volume flow rate limit, extrusion width & layer thickness, you can calculate your speed limit.
PLA & HTPLA are amorphous in structure as printed (no heat treating) & though both are adequate performers in an office environment, they have poor temperature stability, loosing significant stiffness at temps nearing 60 C. Different than standard PLA, HTPLA is designed to survive heat treating for higher temp stability in a no/minimal load condition to near onset of melting (155 C). That's an astonishing improvement in thermal stability compared to standard PLA after a quick bake in the oven after printing.
In as little as 5-10 minutes for small, thin parts, HTPLA quickly crystallizes in an oven at 95-115 C (200-240 F) to become more stiff & hold form above glass transition (60 C). Depending on part geometry, setup & technique, parts can deform and shrink. Best results are with flat and/or supported parts with 100% infill. In this instance we experienced x/y shrinkage of about 2% & growth of about 1% in z.
Be sure to avoid hot spots (non-radiating surfaces & no glowing coils) in the oven used for baking & experiment before baking a prized part. Un-printed filament works great for experimentation & translucent makes the transformation most visible! Heat treating is an art, but the resulting improved thermal performance, if needed, is well-worth exploring. You'll be shocked by the improved thermal stability of your HTPLA parts!!!
Looking for increased heat resistance without the need to switch to ABS? Protopasta High Temperature PLA offers heat deflection of up to 88° C (190.4° F) compared to standard PLA of 45-54° C (113-135° F). This makes it a great choice for moving parts (gears, RepRap pieces, etc) or prints that would face moderately high temperatures. Our High Temperature PLA is white, but can be painted after annealing.
We've created this page to bring you a premium PLA and HTPLA printing experience that rivals our premium material. Follow below to improve your 3D printing experience. In other words, here's your shortcut to awesomeness with pasta. If at the end of this document you have questions or need assistance, please contact us at [email protected].
Loose coils can be very tricky to manage. Going cowboy on your spool handling can quickly end up in a frustrating, tangled mess. Keep your loose coils wrangled with a spool holder like masterspool for a more trouble-free experience. Find out more about loose coil handling in Keith's blog post.
And for spooled filament, never let go of the loose end. When not in the printer extruder, tuck it away in the cardboard spool's corrugation! Also, avoid sharp bends and excessive force when loading filament into your printer.
At Proto-pasta, we make high quality filament. We aspire to make exceptional results easy, but a positive result is very much dependent on your hardware, set-up, adjustments, and process parameters. Matching hardware with process and material for a positive experience is not always straight-forward, but you can start by pairing the following settings with your printer for a good starting point, then tune or troubleshoot as required.
Volume flow rate together with temperature dictates how melted the material is. This is hardware & condition dependent based on hot end, nozzle & extruder type, material & manufacturer as well as layer fan type, position & settings. Extrusion width, layer thickness & speed changes affect volume flow which may change required/desired temperature.
Post your prints & tag us @Proto_pasta on Twitter and Instagram. Need more help? Consider typical pitfalls and fixes below.
We visited Joel and ended up with a helpful video on the subject:
Para uma correcta manutenção da sua impressora 3D, recomendamos sempre que trocar de material de filamento 3D, a efectuar uma purga com filamento especial de limpeza.
Desta forma garante que não ficam vestígios de material nas paredes do nozzle, evitando o acumular de crosta que é criado sempre que efectua trocas de material.
Com este produto evita problema como "clogs" e "jams" e fará com que o seu nozzle mantenha-se sempre limpo, durando muito mais tempo.
Poderá encontrar a partir de 1.49€ no seguinte LINK

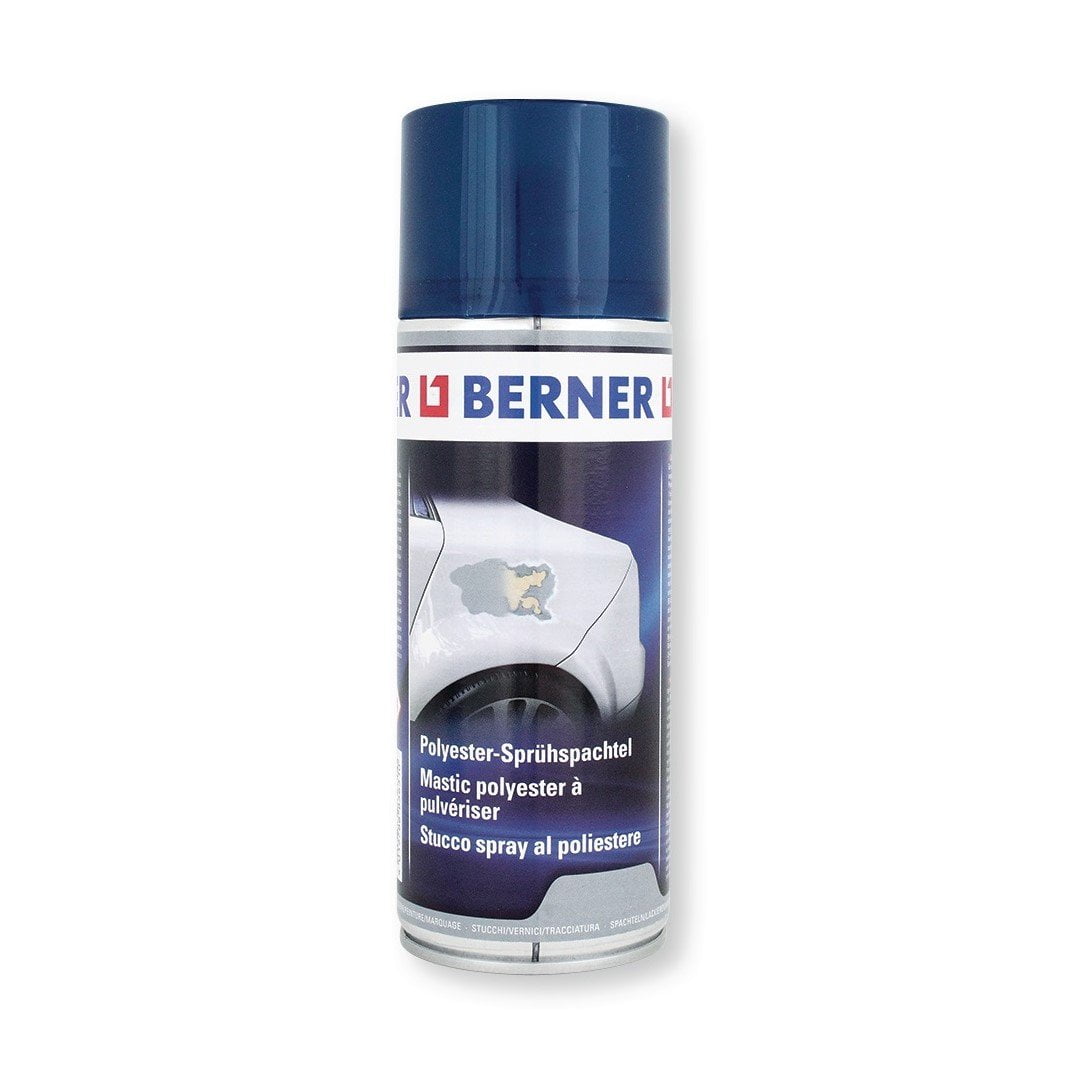
Para obter maior aderência à superfície da sua impressora 3D recomendamos a aplicar 3DLAC na base da plataforma.
Poderá encontrar no seguinte LINK
Este material é altamente higroscópico, absorvendo rapidamente a humidade do ar passados poucos minutos após aberto, impossibilitando desta forma a correcta impressão 3D do mesmo. O resultado das impressões 3D de materiais com humidade tendem a ser frágeis e de acabamento irregular ou em certos casos, torna-se simplesmente impossíveis de imprimir.
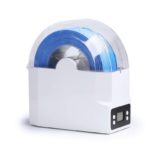
Deverá de usar soluções de caixas fechadas com dessecante como sílica ou caixas próprias secadoras de filamento.
Poderá encontrar no seguinte LINK
Download:
Technical and Safety Data Sheet
50g- Rolo
HTPLA Cloverleaf Metallic Green HTPLA - Cor
1.75mm (+-0.05mm) - Espessura / Tolerância de diâmetro
Muito Fácil - Facilidade de Impressão
Não há 2º lugar para terminar!
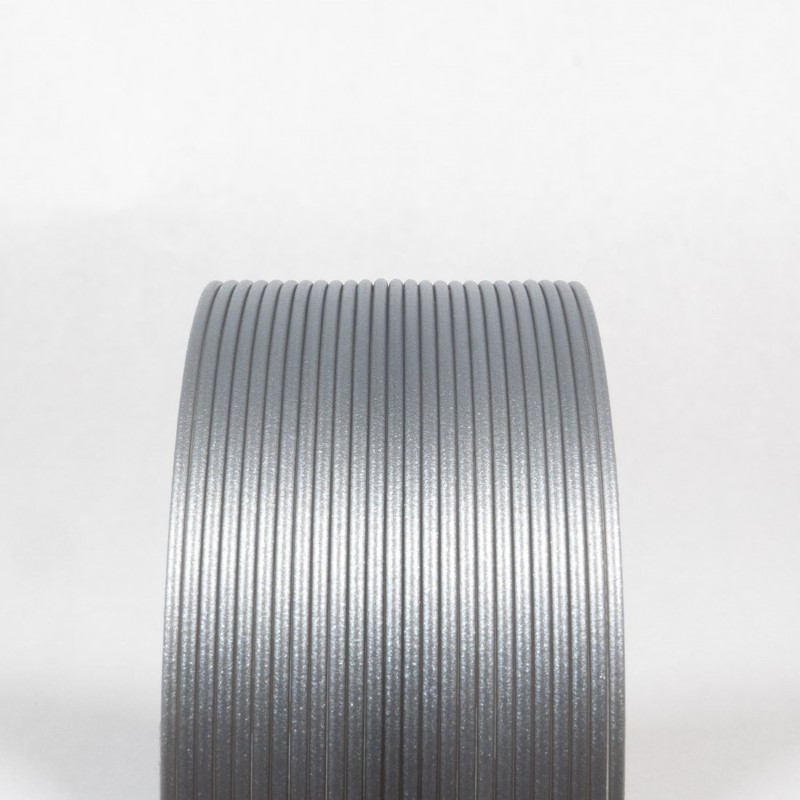
HTPLA Second to None Silver Metallic é uma combinação vencedora de pérolas de prata média e fina com um toque de preto.
Uma alternativa mais opaca e brilhante ao "Spittin' Seeds Gray". Compare com Silver Smoke, que é translúcido sem pérola ou brilho. O Stardust não tem pérola mas muito brilho.
Apresentado em Endless Pastabilities Junho 2021 entrega
Concebido em colaboração com Luke Goodman (Out of Darts) & produzido por Protoplant, fabricantes de Protopasta
ProtoPasta é uma empresa situada nos Estados Unidos da América, de produção de filamentos para impressão 3D de alta qualidade.
Caracterizada pelos rolos feitos em cartão, esta marca é mundialmente famosa por ser especializada em materiais como PLA e ABS modificados com outros materiais, como o PLA Magnético; o PLA Condutivo; PLA de fibra de carbono; HTPLA de cobre, latão ou bronze; ou o ABS-PC.
Semi crystalline, heat treatable PLA for high temp use
Density: 1.24 g/cc
Length: 346 m/kg (1.75) 130 m/kg (2.85)
Typical Printing Temp: 205-225 C
Glass Transition (Tg)*: 60 C
Peak Crystallization (Tc)**: 95-115 C
Onset to Melt (Tm)***: 155 C
Typical change when heat treated: -2% x/y +1% z
Link to Safety Data Page
*max use with no heat treat & max platform temp
**heat treating @ temp 10+ min depending on size/mass
***max use when heat treated (annealed or crystallized)
HTPLA prints well at 205-225 C, however it's important to match temp to your hardware & volume flow rate. With a typical hotend, you should be able to print at 205 C without jamming at a low flow rate. In machines with hardware that tends towards jamming, consider this video with Joel Telling.
Lower volume flows require lower temps, while higher volume flows require higher temps. In the previously-mentioned video, one way to overcome jamming is to set your temp to a higher-than-typical 240 C. This should then be matched with a high flow rate for a quality printing result.
For direct drives with a short distance between drive gears & nozzle, volume flows can approach 7-8 cubic mm/s or more if printing hot to overcome jamming. For bowden tubes where the distance between drive gear & nozzle are great or less powerful hotends, as little as 2 and as much as 4 cubic mm/s may be the limit. Beware of unintended speed changes from faster infills & slowing down for outlines or short layers. Consider our Ultimaker-specific blog for more on this topic.
A constant speed throughout the part is ideal from an extrusion perspective. Knowing your extrusion width, layer thickness & speed you can calculate your volume flow rate with the calculator like found in the previously-mentioned Ultimaker blog. Alternatively, if you know your volume flow rate limit, extrusion width & layer thickness, you can calculate your speed limit.
PLA & HTPLA are amorphous in structure as printed (no heat treating) & though both are adequate performers in an office environment, they have poor temperature stability, loosing significant stiffness at temps nearing 60 C. Different than standard PLA, HTPLA is designed to survive heat treating for higher temp stability in a no/minimal load condition to near onset of melting (155 C). That's an astonishing improvement in thermal stability compared to standard PLA after a quick bake in the oven after printing.
In as little as 5-10 minutes for small, thin parts, HTPLA quickly crystallizes in an oven at 95-115 C (200-240 F) to become more stiff & hold form above glass transition (60 C). Depending on part geometry, setup & technique, parts can deform and shrink. Best results are with flat and/or supported parts with 100% infill. In this instance we experienced x/y shrinkage of about 2% & growth of about 1% in z.
Be sure to avoid hot spots (non-radiating surfaces & no glowing coils) in the oven used for baking & experiment before baking a prized part. Un-printed filament works great for experimentation & translucent makes the transformation most visible! Heat treating is an art, but the resulting improved thermal performance, if needed, is well-worth exploring. You'll be shocked by the improved thermal stability of your HTPLA parts!!!
Looking for increased heat resistance without the need to switch to ABS? Protopasta High Temperature PLA offers heat deflection of up to 88° C (190.4° F) compared to standard PLA of 45-54° C (113-135° F). This makes it a great choice for moving parts (gears, RepRap pieces, etc) or prints that would face moderately high temperatures. Our High Temperature PLA is white, but can be painted after annealing.
We've created this page to bring you a premium PLA and HTPLA printing experience that rivals our premium material. Follow below to improve your 3D printing experience. In other words, here's your shortcut to awesomeness with pasta. If at the end of this document you have questions or need assistance, please contact us at [email protected].
Loose coils can be very tricky to manage. Going cowboy on your spool handling can quickly end up in a frustrating, tangled mess. Keep your loose coils wrangled with a spool holder like masterspool for a more trouble-free experience. Find out more about loose coil handling in Keith's blog post.
And for spooled filament, never let go of the loose end. When not in the printer extruder, tuck it away in the cardboard spool's corrugation! Also, avoid sharp bends and excessive force when loading filament into your printer.
At Proto-pasta, we make high quality filament. We aspire to make exceptional results easy, but a positive result is very much dependent on your hardware, set-up, adjustments, and process parameters. Matching hardware with process and material for a positive experience is not always straight-forward, but you can start by pairing the following settings with your printer for a good starting point, then tune or troubleshoot as required.
Volume flow rate together with temperature dictates how melted the material is. This is hardware & condition dependent based on hot end, nozzle & extruder type, material & manufacturer as well as layer fan type, position & settings. Extrusion width, layer thickness & speed changes affect volume flow which may change required/desired temperature.
Post your prints & tag us @Proto_pasta on Twitter and Instagram. Need more help? Consider typical pitfalls and fixes below.
We visited Joel and ended up with a helpful video on the subject:
Para uma correcta manutenção da sua impressora 3D, recomendamos sempre que trocar de material de filamento 3D, a efectuar uma purga com filamento especial de limpeza.
Desta forma garante que não ficam vestígios de material nas paredes do nozzle, evitando o acumular de crosta que é criado sempre que efectua trocas de material.
Com este produto evita problema como "clogs" e "jams" e fará com que o seu nozzle mantenha-se sempre limpo, durando muito mais tempo.
Poderá encontrar a partir de 1.49€ no seguinte LINK
Para obter maior aderência à superfície da sua impressora 3D recomendamos a aplicar 3DLAC na base da plataforma.
Poderá encontrar no seguinte LINK
Este material é altamente higroscópico, absorvendo rapidamente a humidade do ar passados poucos minutos após aberto, impossibilitando desta forma a correcta impressão 3D do mesmo. O resultado das impressões 3D de materiais com humidade tendem a ser frágeis e de acabamento irregular ou em certos casos, torna-se simplesmente impossíveis de imprimir.
Deverá de usar soluções de caixas fechadas com dessecante como sílica ou caixas próprias secadoras de filamento.
Poderá encontrar no seguinte LINK
Download:
Technical and Safety Data Sheet
50g- Rolo
HTPLA Second to None Silver Metallic HTPLA - Cor
1.75mm (+-0.05mm) - Espessura / Tolerância de diâmetro
Muito Fácil - Facilidade de Impressão
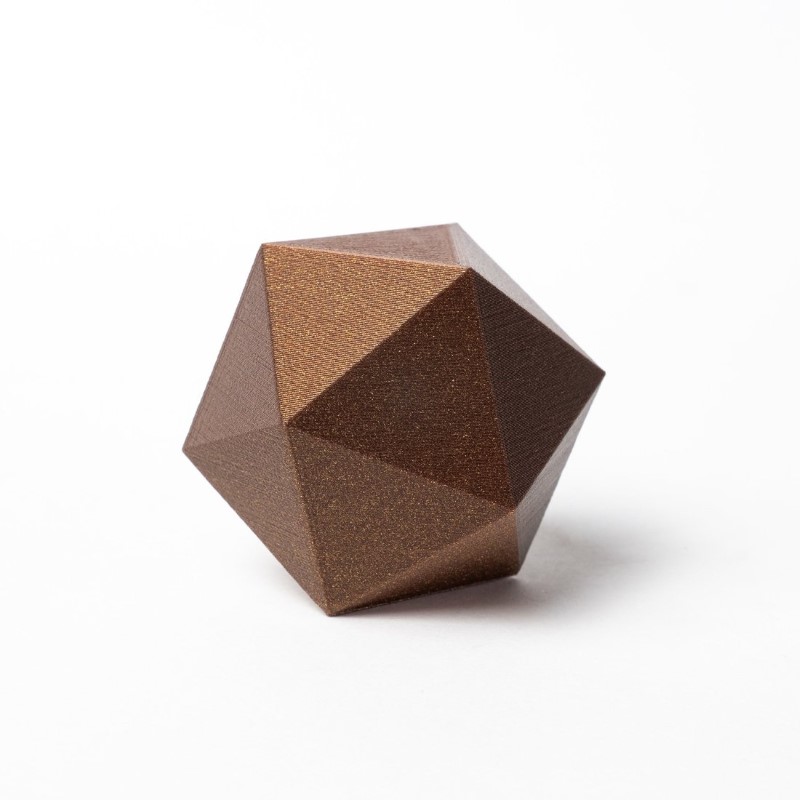
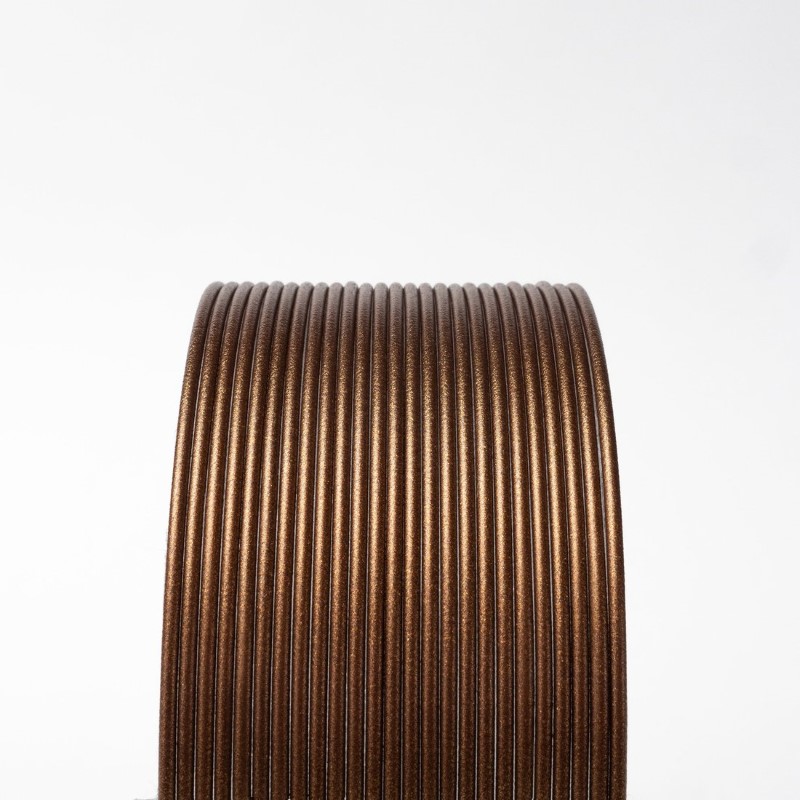
Criado a partir do nosso Premium High Temp PLA (HTPLA ), este é o HTPLA Double Espresso Metallic Brown da Proto-pasta!
Comece o seu dia com este filamento metálico PLA castanho brilhante com uma dose dupla de café expresso.
Este filamento metálico PLA não contém metal real e tem pouco risco de entupir ou usar o seu bocal, e não fará uma bagunça brilhante, mas tenha cuidado para que a impressão seja certamente viciante!
ProtoPasta é uma empresa situada nos Estados Unidos da América, de produção de filamentos para impressão 3D de alta qualidade.
Caracterizada pelos rolos feitos em cartão, esta marca é mundialmente famosa por ser especializada em materiais como PLA e ABS modificados com outros materiais, como o PLA Magnético; o PLA Condutivo; PLA de fibra de carbono; HTPLA de cobre, latão ou bronze; ou o ABS-PC.
Semi crystalline, heat treatable PLA for high temp use
Density: 1.24 g/cc
Length: 346 m/kg (1.75) 130 m/kg (2.85)
Typical Printing Temp: 205-225 C
Glass Transition (Tg)*: 60 C
Peak Crystallization (Tc)**: 95-115 C
Onset to Melt (Tm)***: 155 C
Typical change when heat treated: -2% x/y +1% z
Link to Safety Data Page
*max use with no heat treat & max platform temp
**heat treating @ temp 10+ min depending on size/mass
***max use when heat treated (annealed or crystallized)
HTPLA prints well at 205-225 C, however it's important to match temp to your hardware & volume flow rate. With a typical hotend, you should be able to print at 205 C without jamming at a low flow rate. In machines with hardware that tends towards jamming, consider this video with Joel Telling.
Lower volume flows require lower temps, while higher volume flows require higher temps. In the previously-mentioned video, one way to overcome jamming is to set your temp to a higher-than-typical 240 C. This should then be matched with a high flow rate for a quality printing result.
For direct drives with a short distance between drive gears & nozzle, volume flows can approach 7-8 cubic mm/s or more if printing hot to overcome jamming. For bowden tubes where the distance between drive gear & nozzle are great or less powerful hotends, as little as 2 and as much as 4 cubic mm/s may be the limit. Beware of unintended speed changes from faster infills & slowing down for outlines or short layers. Consider our Ultimaker-specific blog for more on this topic.
A constant speed throughout the part is ideal from an extrusion perspective. Knowing your extrusion width, layer thickness & speed you can calculate your volume flow rate with the calculator like found in the previously-mentioned Ultimaker blog. Alternatively, if you know your volume flow rate limit, extrusion width & layer thickness, you can calculate your speed limit.
PLA & HTPLA are amorphous in structure as printed (no heat treating) & though both are adequate performers in an office environment, they have poor temperature stability, loosing significant stiffness at temps nearing 60 C. Different than standard PLA, HTPLA is designed to survive heat treating for higher temp stability in a no/minimal load condition to near onset of melting (155 C). That's an astonishing improvement in thermal stability compared to standard PLA after a quick bake in the oven after printing.
In as little as 5-10 minutes for small, thin parts, HTPLA quickly crystallizes in an oven at 95-115 C (200-240 F) to become more stiff & hold form above glass transition (60 C). Depending on part geometry, setup & technique, parts can deform and shrink. Best results are with flat and/or supported parts with 100% infill. In this instance we experienced x/y shrinkage of about 2% & growth of about 1% in z.
Be sure to avoid hot spots (non-radiating surfaces & no glowing coils) in the oven used for baking & experiment before baking a prized part. Un-printed filament works great for experimentation & translucent makes the transformation most visible! Heat treating is an art, but the resulting improved thermal performance, if needed, is well-worth exploring. You'll be shocked by the improved thermal stability of your HTPLA parts!!!
Looking for increased heat resistance without the need to switch to ABS? Protopasta High Temperature PLA offers heat deflection of up to 88° C (190.4° F) compared to standard PLA of 45-54° C (113-135° F). This makes it a great choice for moving parts (gears, RepRap pieces, etc) or prints that would face moderately high temperatures. Our High Temperature PLA is white, but can be painted after annealing.
We've created this page to bring you a premium PLA and HTPLA printing experience that rivals our premium material. Follow below to improve your 3D printing experience. In other words, here's your shortcut to awesomeness with pasta. If at the end of this document you have questions or need assistance, please contact us at [email protected].
Loose coils can be very tricky to manage. Going cowboy on your spool handling can quickly end up in a frustrating, tangled mess. Keep your loose coils wrangled with a spool holder like masterspool for a more trouble-free experience. Find out more about loose coil handling in Keith's blog post.
And for spooled filament, never let go of the loose end. When not in the printer extruder, tuck it away in the cardboard spool's corrugation! Also, avoid sharp bends and excessive force when loading filament into your printer.
At Proto-pasta, we make high quality filament. We aspire to make exceptional results easy, but a positive result is very much dependent on your hardware, set-up, adjustments, and process parameters. Matching hardware with process and material for a positive experience is not always straight-forward, but you can start by pairing the following settings with your printer for a good starting point, then tune or troubleshoot as required.
Volume flow rate together with temperature dictates how melted the material is. This is hardware & condition dependent based on hot end, nozzle & extruder type, material & manufacturer as well as layer fan type, position & settings. Extrusion width, layer thickness & speed changes affect volume flow which may change required/desired temperature.
Post your prints & tag us @Proto_pasta on Twitter and Instagram. Need more help? Consider typical pitfalls and fixes below.
We visited Joel and ended up with a helpful video on the subject:
Para uma correcta manutenção da sua impressora 3D, recomendamos sempre que trocar de material de filamento 3D, a efectuar uma purga com filamento especial de limpeza.
Desta forma garante que não ficam vestígios de material nas paredes do nozzle, evitando o acumular de crosta que é criado sempre que efectua trocas de material.
Com este produto evita problema como "clogs" e "jams" e fará com que o seu nozzle mantenha-se sempre limpo, durando muito mais tempo.
Poderá encontrar a partir de 1.49€ no seguinte LINK
Para obter maior aderência à superfície da sua impressora 3D recomendamos a aplicar 3DLAC na base da plataforma.
Poderá encontrar no seguinte LINK
Este material é altamente higroscópico, absorvendo rapidamente a humidade do ar passados poucos minutos após aberto, impossibilitando desta forma a correcta impressão 3D do mesmo. O resultado das impressões 3D de materiais com humidade tendem a ser frágeis e de acabamento irregular ou em certos casos, torna-se simplesmente impossíveis de imprimir.
Deverá de usar soluções de caixas fechadas com dessecante como sílica ou caixas próprias secadoras de filamento.
Poderá encontrar no seguinte LINK
Download:
Technical and Safety Data Sheet
50g- Rolo
HTPLA Double Espresso Metallic Brown HTPLA - Cor
1.75mm (+-0.05mm) - Espessura / Tolerância de diâmetro
Muito Fácil - Facilidade de Impressão